Learn how to create Speks wherever your team works—whether it's in the Spekit Web App, the Chrome Extension, directly within your everyday tools like Salesforce and Slack, or even embedded in the applications your team uses most. We'll guide you through each option so you can easily deliver the right information at the right time, no matter where your team is working.
Where can I create a Spek?
You can create Speks from three different places:
1.) The Web App
3.) Slack
Option 1: The Spekit Web App
You can create Speks in two different ways from the Spekit Web App:
A.) Create a Spek from the Team Hub
B.) Create a Spek from the Topic View
Create a Spek from the Team Hub
1.) Open the Spekit Web App.
2.) Click on the Team Hub drop-down in the top navigation bar.
3.) Select Add New.
4.) A pop-up will appear on the screen, select Spek.
NOTE: When creating Speks in the Web App, there is a 10-minute delay in the Spek showing up. If you click the Spekit logo in the top left of the extension, the page will refresh and the Spek will appear.
Create a Spek from the Topic View
1.) Open the Spekit Web App.
2.) Navigate to the Topic you would like to add content to.
3.) Click the + Add Content button.
4.) A pop-up will appear on the screen, select Spek.
Option 2: The Spekit Chrome Extension
You can create Speks in five different ways from the Chrome Extension:
A.) Create a Spek from the Spekit Chrome Extension
B.) Create a Spek to embed in an application in Chrome
C.) Create a Spek using our Salesforce integration for an existing field, picklist, or Object
D.) Add a Spek to a button on an object page layout
E.) Add a Spek to a Dashboard or custom page in Salesforce
Create a Spek from the Spekit Chrome Extension
Simply open your extension by clicking on the Dock to pop open the sidebar or click on the Spekit icon in your extension toolbar.
1.) Open the Spekit Chrome Extension.
2.) Hover over the Team Hub drop-down in the top navigation bar.
3.) Select Add New.
4.) A pop-up will appear on the screen, select Spek.
Create a Spek to embed in an application in Chrome
You can embed Speks directly in most web applications using Chrome. Here’s how to set it up:
1.) Open the Spekit Chrome Extension.
2.) Hover over the Team Hub drop-down in the top navigation bar.
3.) Select Add New.
4.) A pop-up will appear on the screen, select Spek.
5.) Enter the Label of the Spek which needs to be an EXACT text match to where you’d like the Spek to appear. Capitalization and punctuation need to be exact.
📌 Example: To embed a Spek next to “Lead Source,” enter “Lead Source” as the label.
NOTE: The Spek will appear anywhere that exact text shows up on the page—so if “Lead Source” appears in multiple places on the page or website, the same Spek will show in each spot.
6.) Enter a Definition for the Spek. You can add style to the text using the rich text options. Click here to learn how to use our rich text editor!
7.) Add the Spek being created to one or more Topics. This Topic must have the Domain URL linked to the website you're targeting, otherwise the embedded Speks will not show up. To make sure your custom Speks show up where they should, click here to learn how.
8.) Click the Save button to publish your newly created Spek
NOTE: If you are using our Salesforce Integration, make sure to read more instructions below on how to document your existing fields synced in Spek.
Create a Spek using our Salesforce integration for an existing field, picklist, or Object.
Our unique Salesforce integration allows you to import fields and picklists from any object into Spekit. Ensure you have imported the object and synced it to Salesforce since that field was added to make sure it shows up in Spekit. Learn more about our Salesforce integration here.
To add a Spek next to your existing field:
1.) Open the Spekit Chrome Extension.
2.) Search for that field in the sidebar, use AI Sidekick, or highlight the field label type shift + command + S on your keyboard to find it.
3.) To find your empty field or picklist Speks, search for the name and filter by Speks.
4.) Toggle on Only show empty Speks.
5.) Now, you will see empty Speks that need definitions.
6.) Click Add Content to add content to that Spek.
Add a Spek to a button on an object page layout
You can create a Spek on a button on an object page layout on most applications in Chrome, please follow these instructions:
1.) Open the Spekit Chrome Extension.
2.) Click on the ellipsis [...].
3.) Select Settings, and enable Show Help Text Icons.
4.) Hover over the Team Hub drop-down in the top navigation bar.
5.) Select Add New.
6.) A pop-up will appear on the screen, select Spek.
7.) Enter the Label of the Spek which needs to be an EXACT help text icon of where you’d like the Spek to appear. Capitalization and punctuation need to be exact.
📌 Example: To embed a Spek next to “Lead Source,” enter “Lead Source” as the label.
NOTE: The Spek will appear anywhere that exact text shows up on the page—so if “Lead Source” appears in multiple places (like in Salesforce), the same Spek will show in each spot.
8.) Enter a Definition for the Spek. You can add style to the text using the rich text options. Click here to learn how to use our rich text editor!
9.) Add the Spek being created to the Topic linked to the domain the button is on.
10.) Link to the Salesforce Object.
11.) Click the Publish button, and refresh the page.
Add a Spek to a Dashboard or custom page in Salesforce
You can create a Spek on a Dashboard or Visualforce in Salesforce by following these instructions:
1.) Open the Spekit Chrome Extension.
2.) Click Settings, and enable Show Help Text Icons.

3.) Click on the Create button in the top right corner.
4.) Select Spek.
5.) Enter the Label of the Spek which needs to be an EXACT help text icon of the dashboard text. Capitalization and punctuation need to be exact.
- For example, if we want to embed a Spek on the title of an Events Dashboard, we would create a custom Spek with the label Events Dashboard.
NOTE: The Spek will show up wherever that text is found on the domain. For instance, if Events Dashboard is listed more than once in Salesforce, the same Spek will show in the various locations.
6.) Enter a Definition for the Spek. You can add style to the text using the rich text options. Click here to learn how to use our rich text editor!
7.) Add the Spek being created to the Salesforce Topic linked to the Dashboards page.
8.) Click the blue Create Spek button, and refresh the page.
Option 3: Slack
Prerequisites: Install the Slack Integration. Read more about our Slack Integration here.
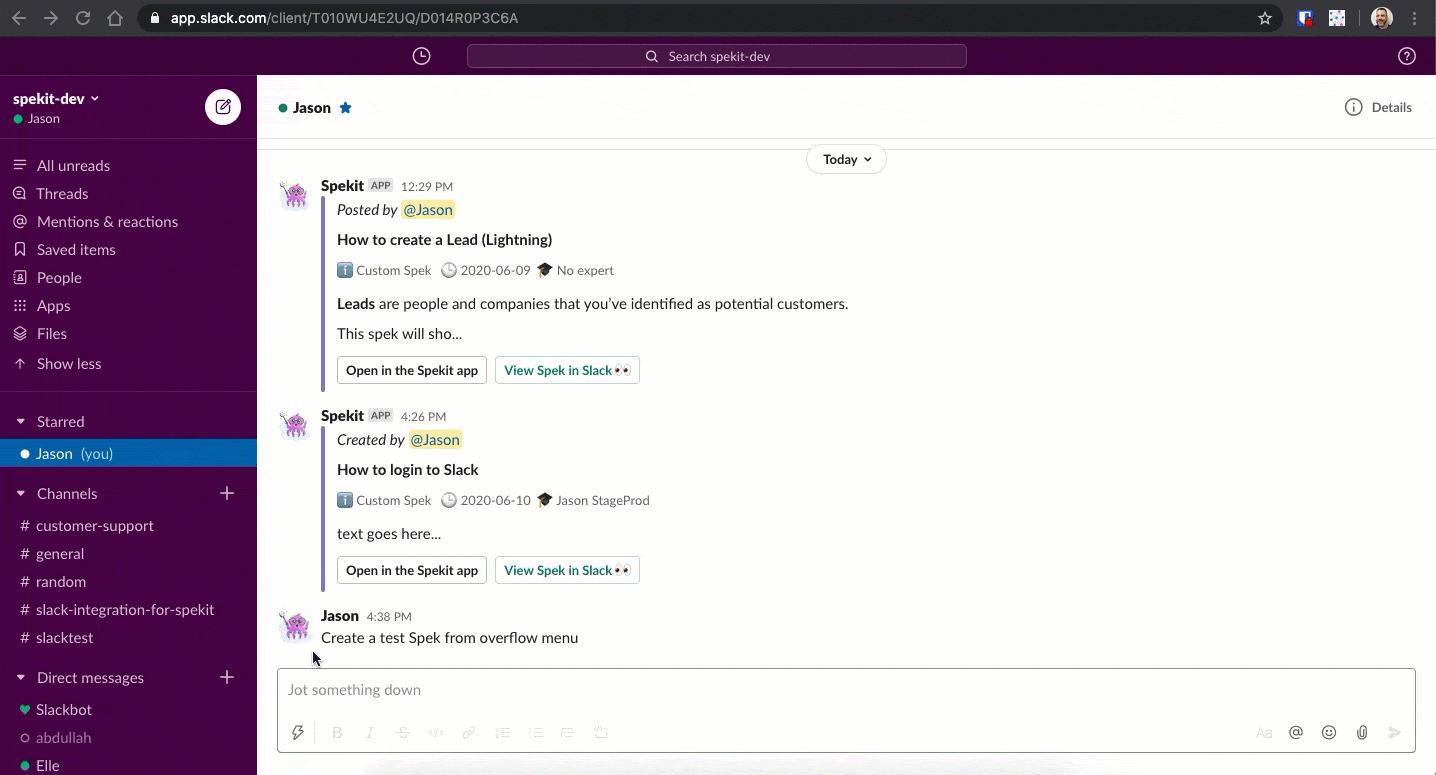
1.) Enter /spekit create to open up a window to create a Spek
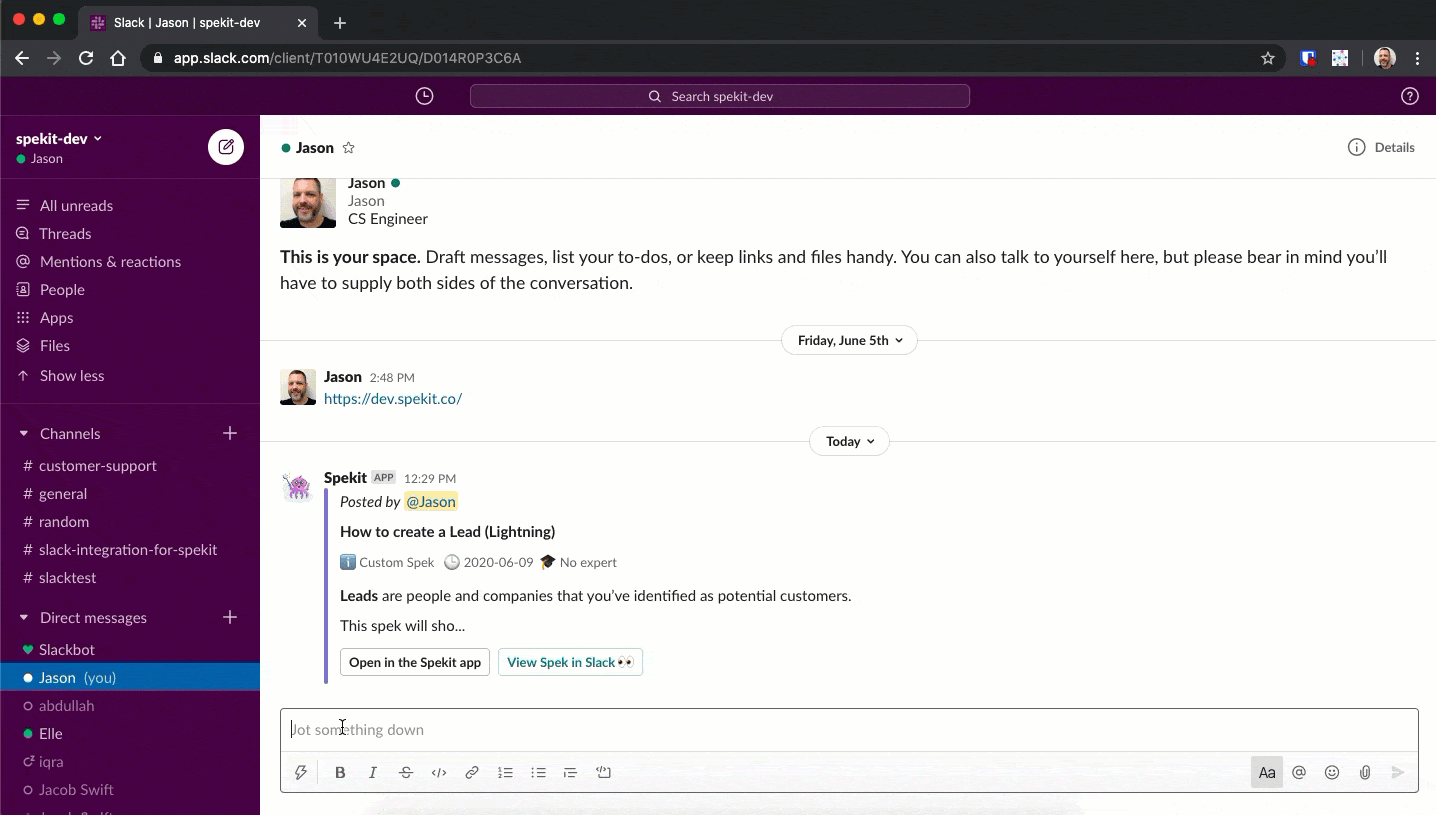
2.) Use the overflow menu to Create a Spek from an existing message.
Use Case: Once you've answered a question - use the overflow menu to Create a Spek from that message. It'll auto-populate the definition for you so you can re-use the answer in the future.
Where can I find Version History, and how do I use it?
Version History in Spekit allows admins and experts to track and review changes made to Speks and files. Follow these steps to access it:
1.) Open the Spekit Web App.
2.) Open up a Spek you would like to view the Version History of.
3.) Click the Version History icon.
4.) A sidebar will appear, displaying all versions of the Spek in reverse chronological order (newest to oldest). What you’ll see in Version History:
- Change Details: The name of the user who made the edits and a timestamp.
- Change Scope: Versions are created for updates to titles, content (description), or uploaded files. Metadata changes (e.g., permissions or custom fields) do not create new versions or impact the last edited date shown to users.
- Highlighting Changes: Additions are highlighted in green, while deletions are highlighted in red.
How to Delete Content
HOW TO DELETE CONTENT
1.) Open the content you would like to delete.
2.) Click the ... ellipses.
3.) Click Delete.
4.) A pop-up will appear to confirm that you would like to delete the content.
HOW TO DELETE CONTENT FROM THE CHROME EXTENSION
1.) Open the Spekit Chrome Extension.
2.) Navigate to the piece of the content you would like to delete.
3.) Click the ... ellipses.
4.) Click Edit.
5.) The content edit modal will open. From there, click on the trash can icon to delete the piece of content.
6.) A pop-up will appear to confirm that you would like to delete the content.
HOW TO BULK DELETE CONTENT
1.) Open the Topic where the content you would like to delete is located.
2.) Select the content you would like to delete by clicking the checkbox in the upper lefthand corner of the Spek.
3.) Click Bulk Actions.
4.) Click Delete Speks.
5.) A pop-up will appear to confirm that you would like to delete the Spek.
How to rearrange Content in a Topic
1.) Open the Spekit Web App.
2.) Open the Topic you would like to reorder content in.
3.) Click Reorder Content button.
4.) From here, you can move content around to the order you would like to appear in the Topic.
5.) Once you are done reordering the content, click Save Changes.
The content will now be rearranged in the Topic.