Setting up OneLogin SCIM provisioning with Spekit? This guide provides a general overview of what the SSO connection process involves.
⚠️ Important: This guide provides a general overview of the SSO connection process and should not be used as a step-by-step configuration guide. To set up SSO with Spekit, go to the Connect page within your Spekit Web App and proceed through the in-app setup walkthrough.
📌 Quick-Jump Topics
- Step 1: Create a OneLogin Application: Setting up the SCIM app in OneLogin
- Step 2: Configure OneLogin SCIM: Connecting SCIM to Spekit and enabling provisioning
- Step 3: Assign Users to Your Spekit SCIM Application: Syncing individual users into Spekit
- Step 4: Assign Groups to Spekit: Syncing roles and groups into Spekit via rules
Step 1: Create a OneLogin Application
How do I create the Spekit SCIM application in OneLogin?
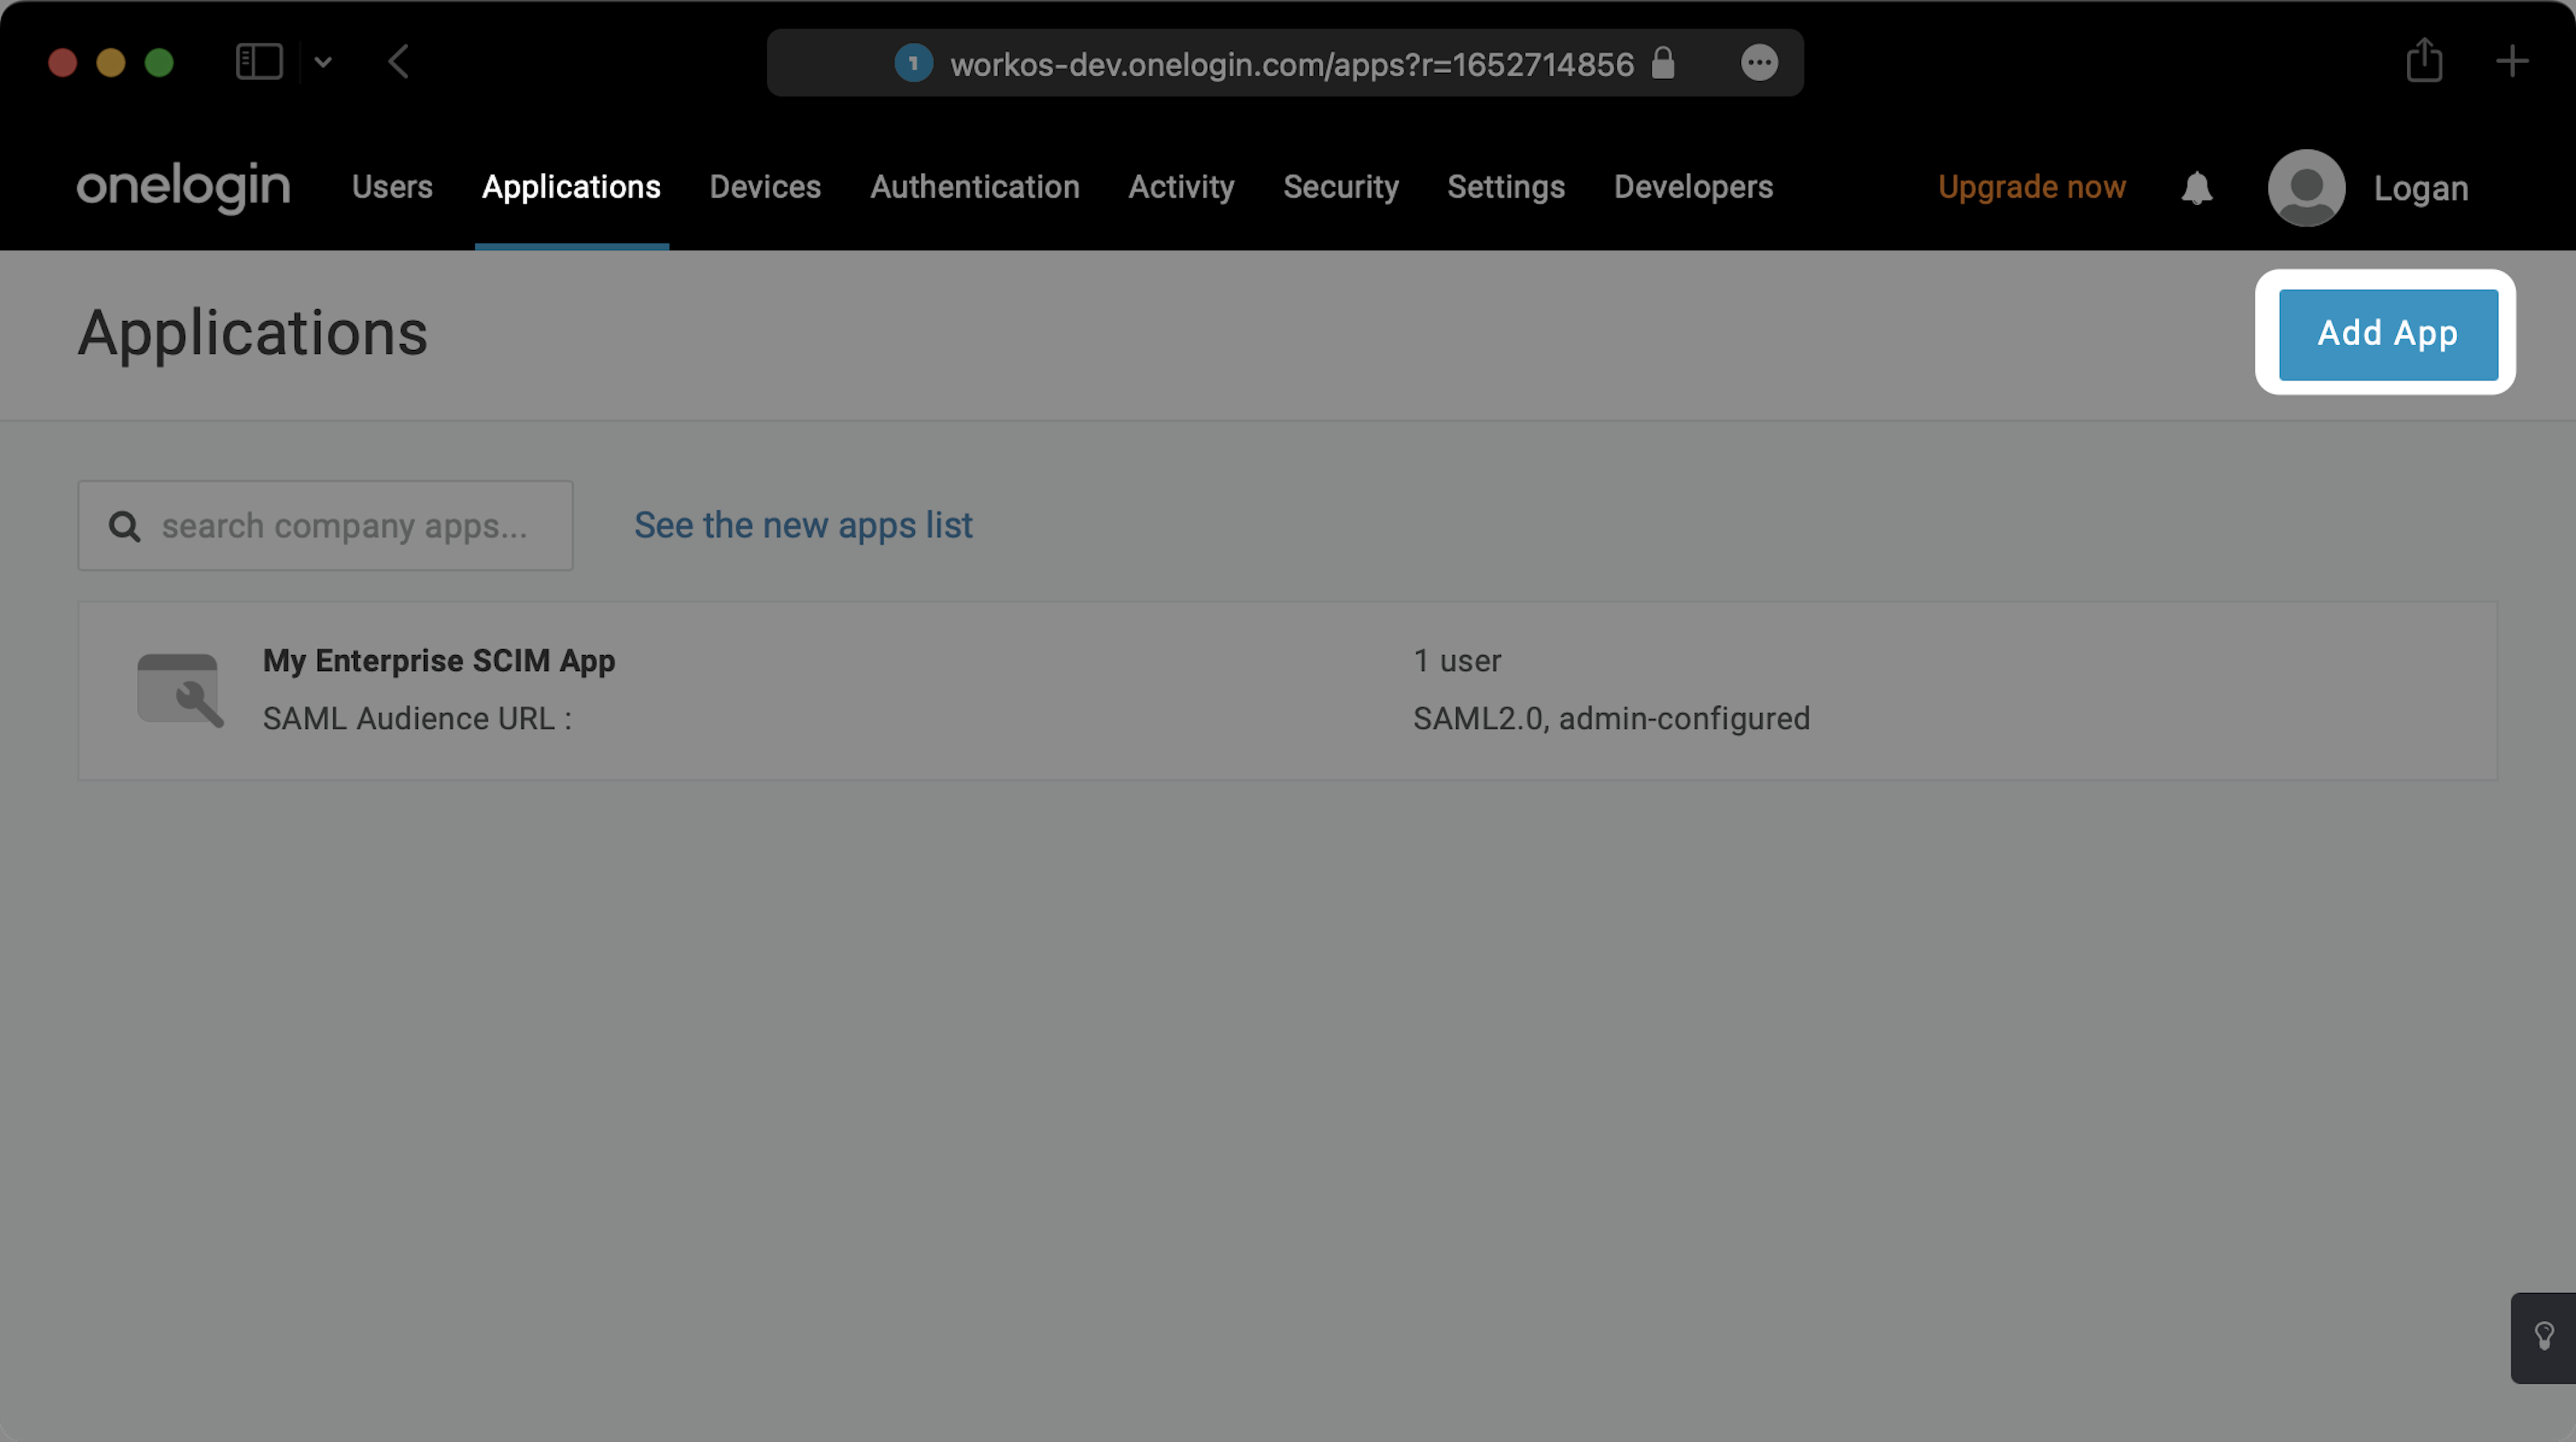
- Log in to the OneLogin admin dashboard.
- Select the Applications tab at the top of the page.
- Click Add App.
- In the search field, type SCIM and select the application named SCIM Provisioner with SAML (SCIM V2 Enterprise).
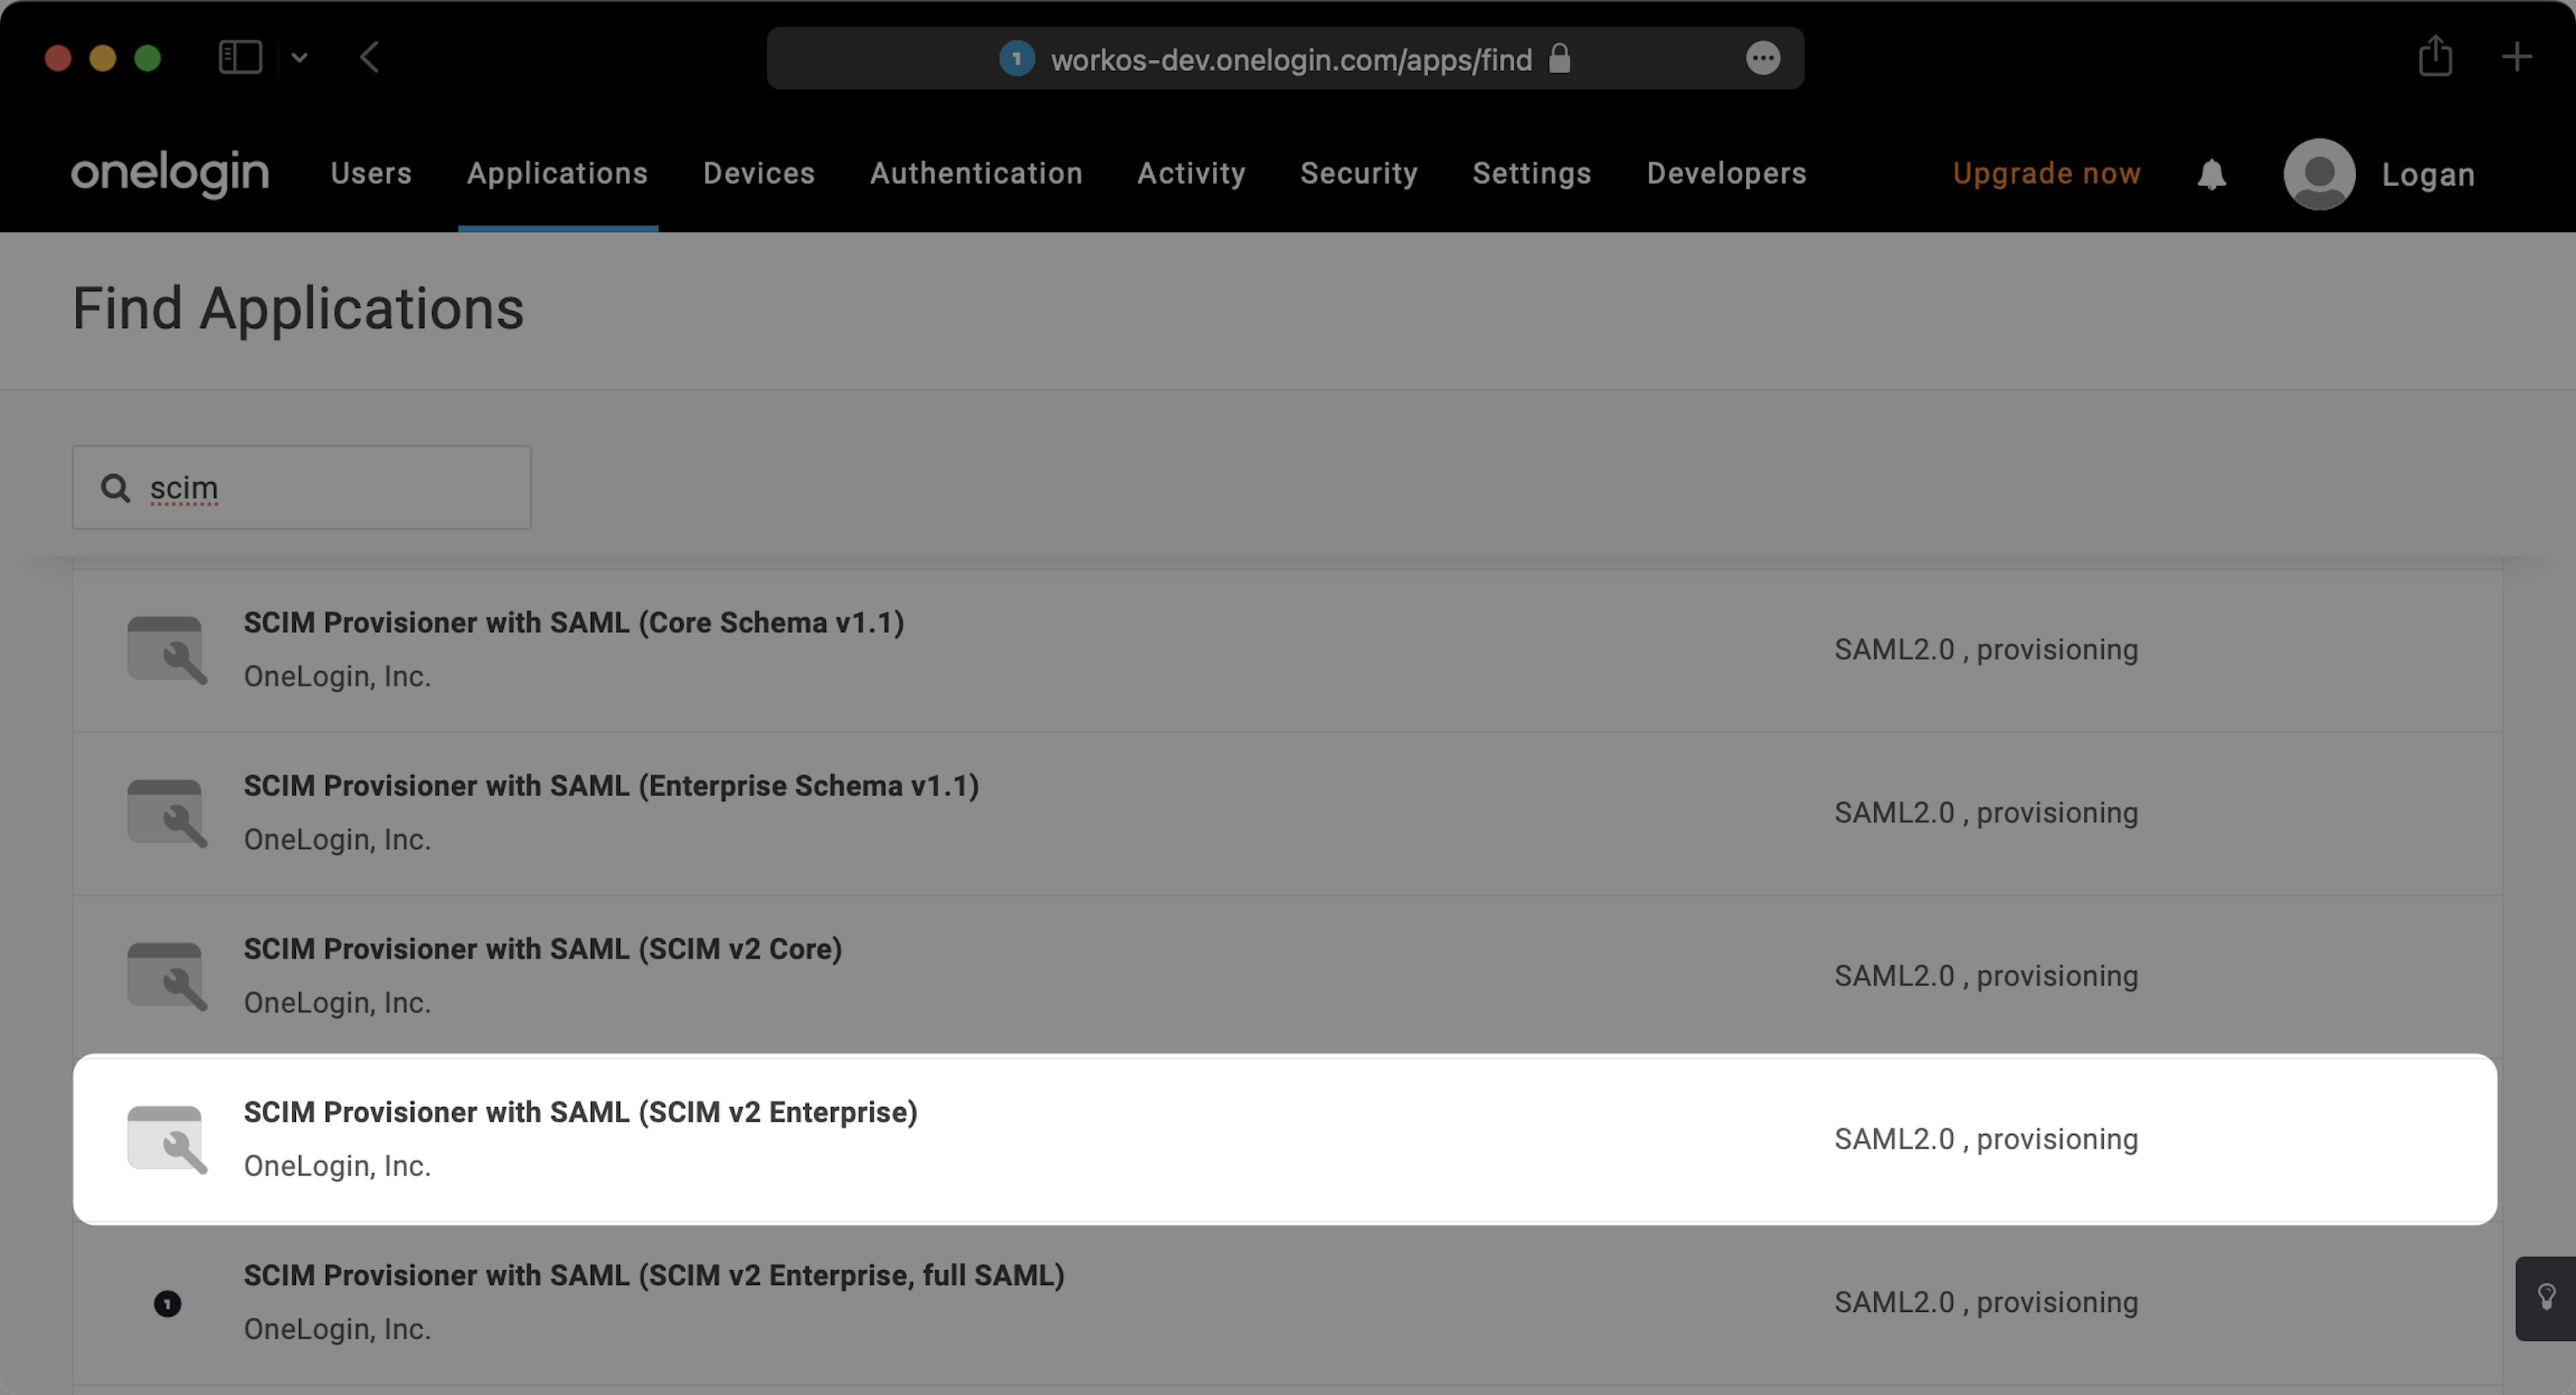
- Give the application a descriptive Display Name such as Spekit SCIM.
- Click Save.

Step 2: Configure OneLogin SCIM
How do I configure the SCIM application to connect with Spekit?
Configure the API credentials:
- Within the SCIM application you just created, click the Configuration tab on the left.
- Copy and paste the API credentials from your Spekit in-app walkthrough into the corresponding fields.

Enable provisioning:
- Click the Provisioning tab on the left.
- Ensure both dropdowns are set to Suspend.
- Check the Enable provisioning box.
- Click Save.

Configure group parameters:
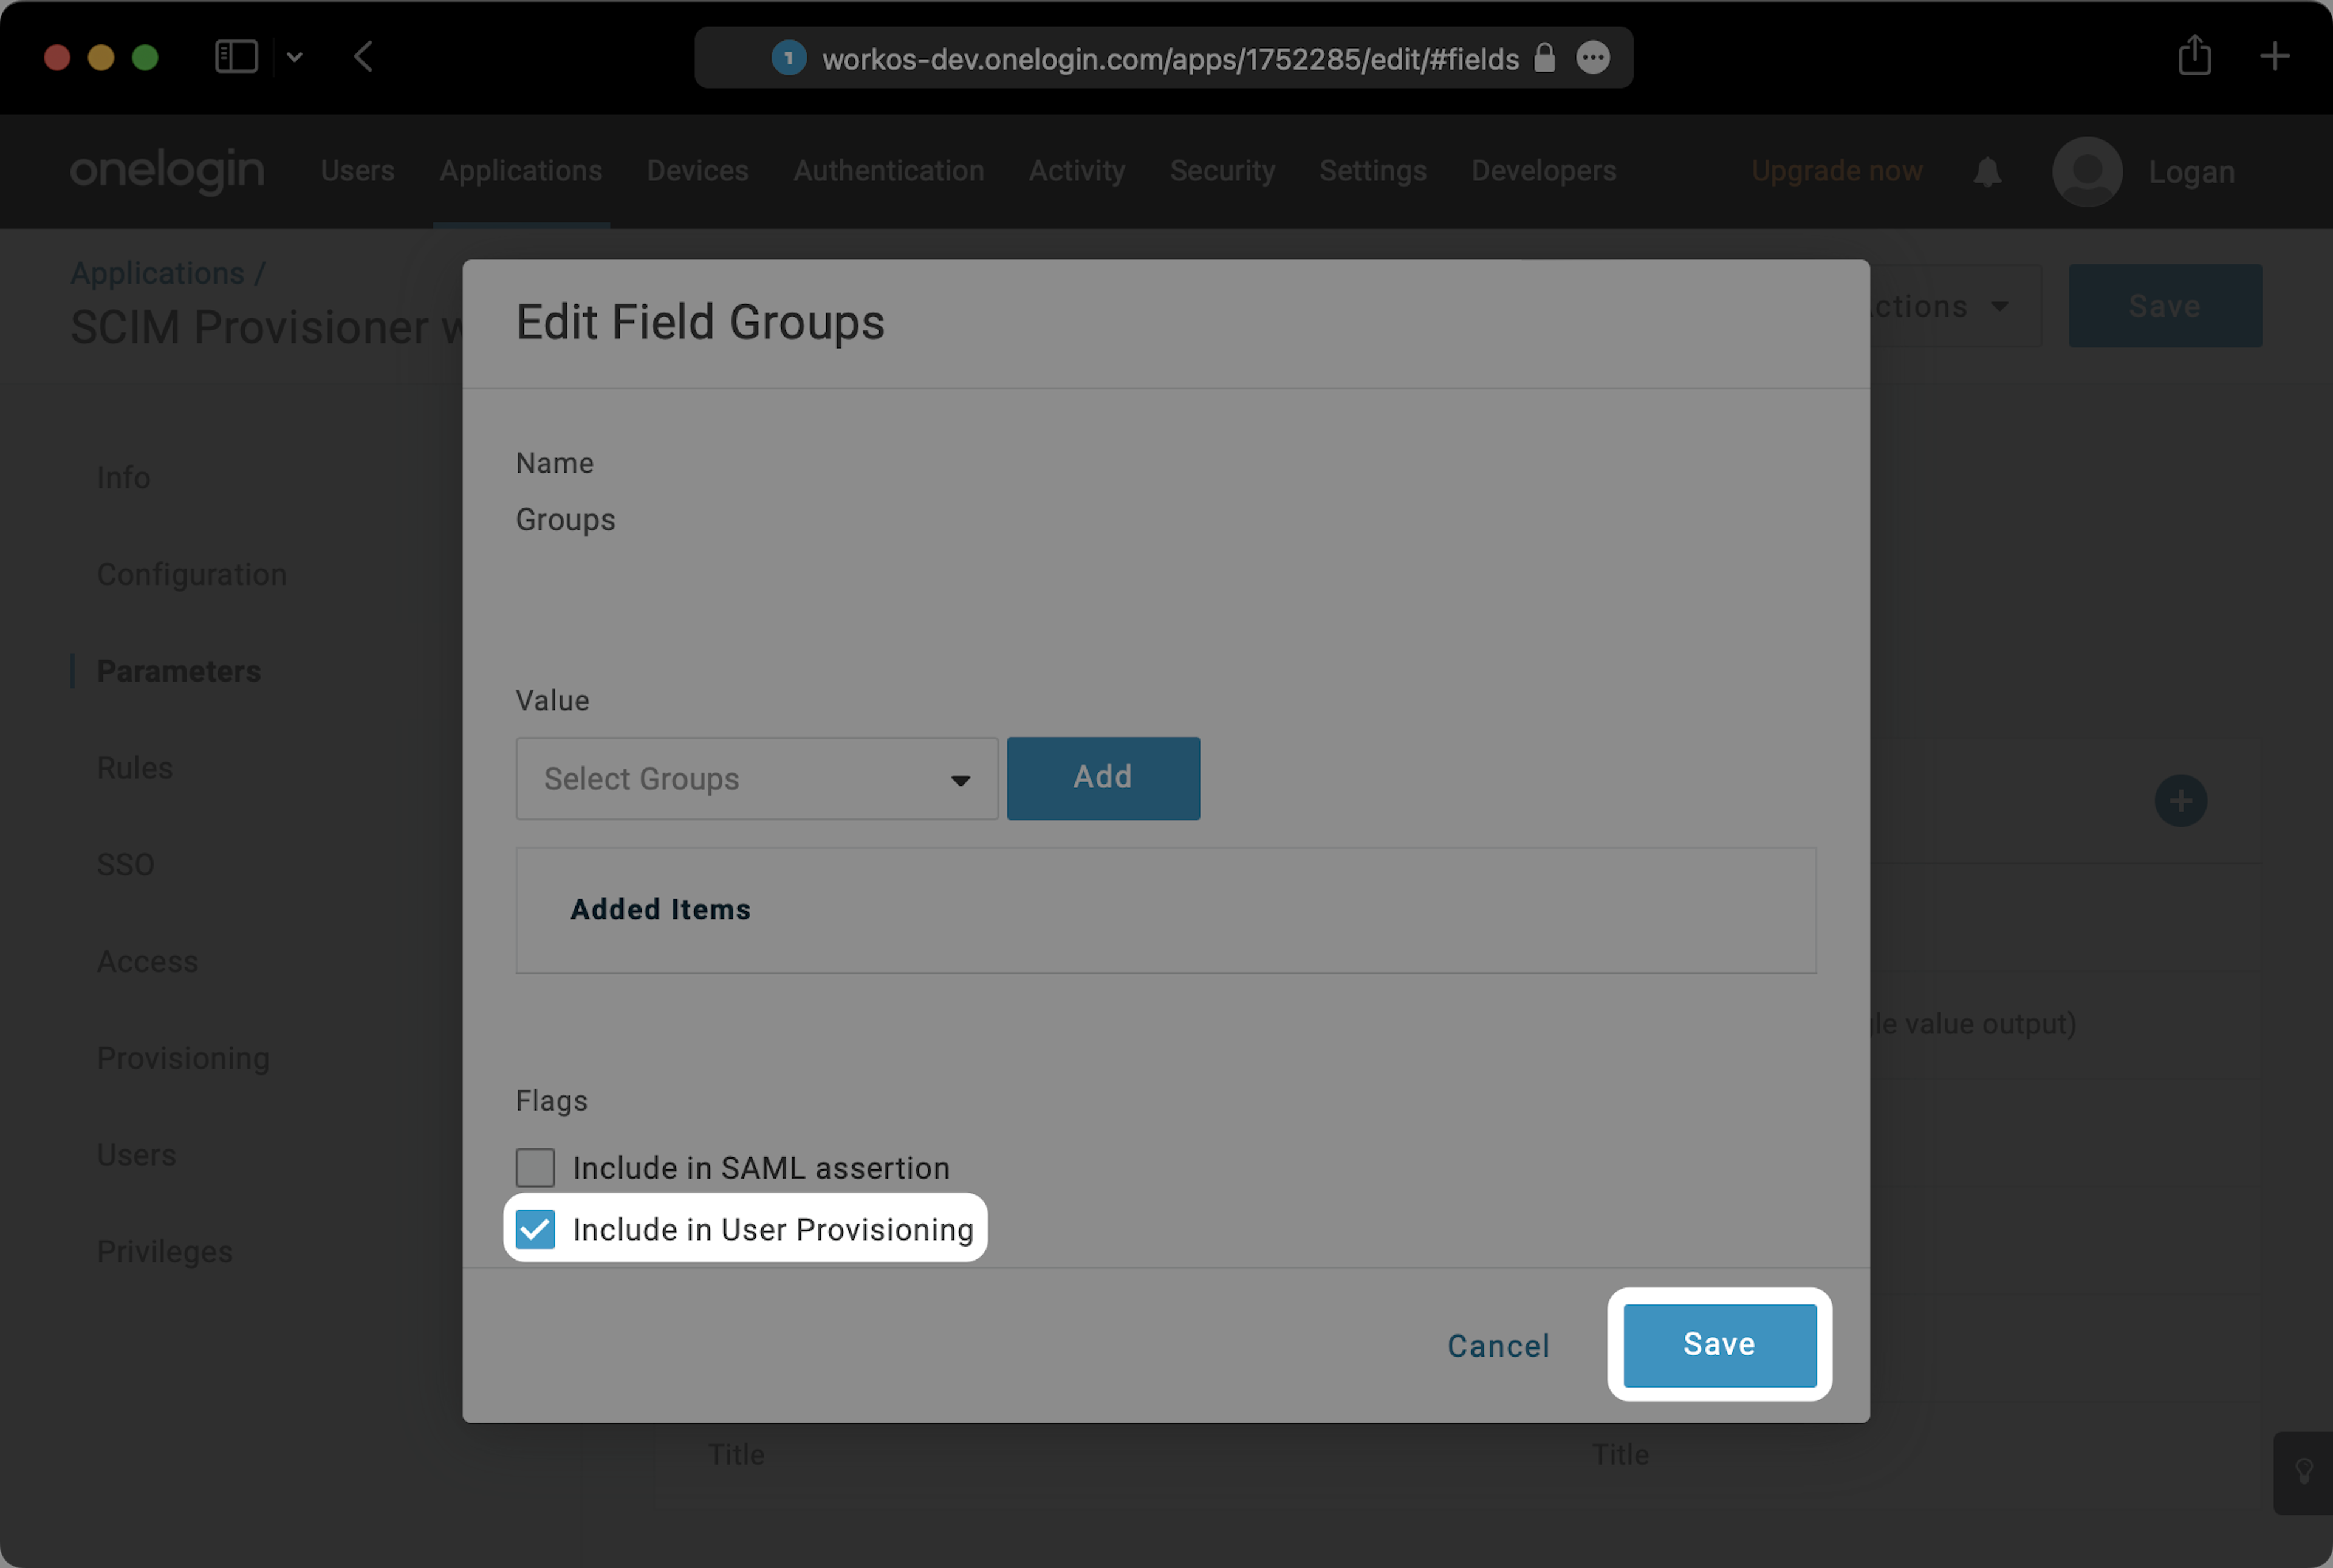
- Click the Parameters tab on the left.
- Click Groups.

- In the modal that appears, check the box next to Include in User Provisioning.
- Click Save.
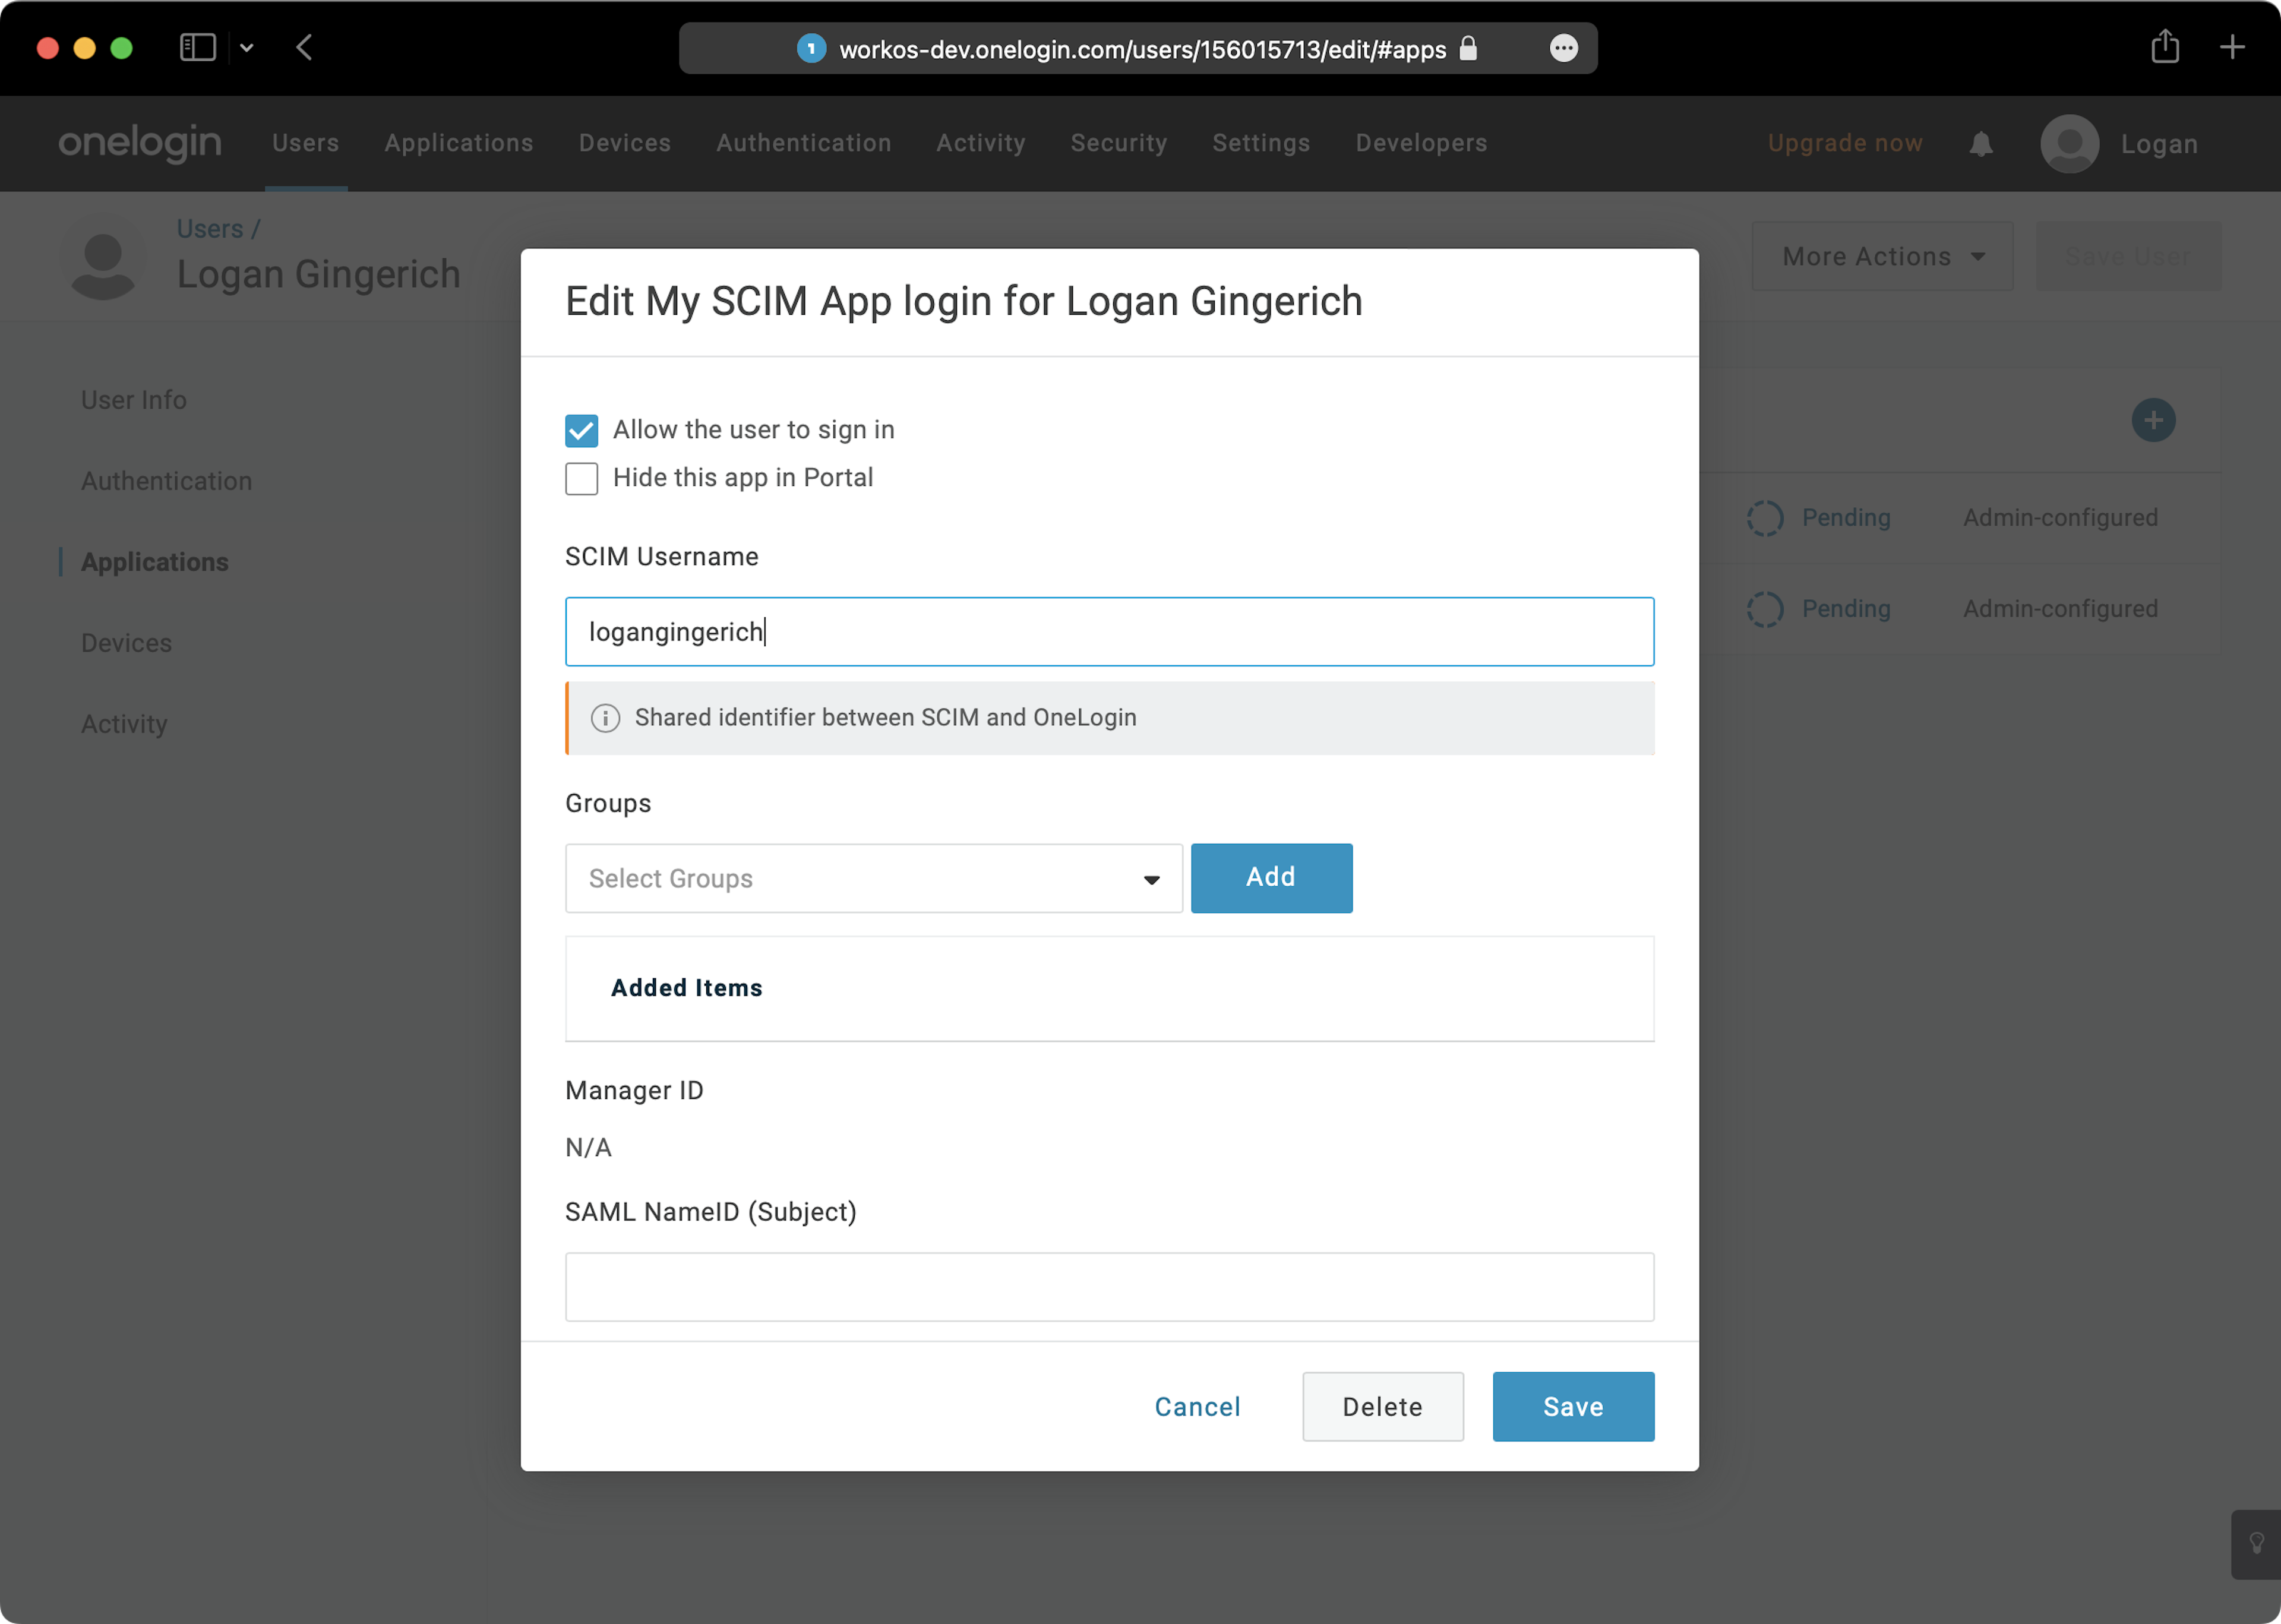
Step 3: Assign Users to Your Spekit SCIM Application
How do I assign individual users to the Spekit SCIM application?
Users and groups must be assigned to the Spekit SCIM application in OneLogin before they can be synced into Spekit.
- Select Users from the top navigation menu.
- Find the user you want to provision to the SCIM app and open their profile.
- Click the Applications tab on the left within the user profile.
- Click the + (plus) symbol to add an application.

- Select the Spekit SCIM application from the list and click Continue.

- Click Save in the confirmation modal to apply the change.
Step 4: Assign Groups to Spekit
How do I sync groups into Spekit via OneLogin roles?
ℹ️ Note: There are multiple ways to provision groups in OneLogin. The method below is one approach that Spekit recommends, but other methods can also be used.
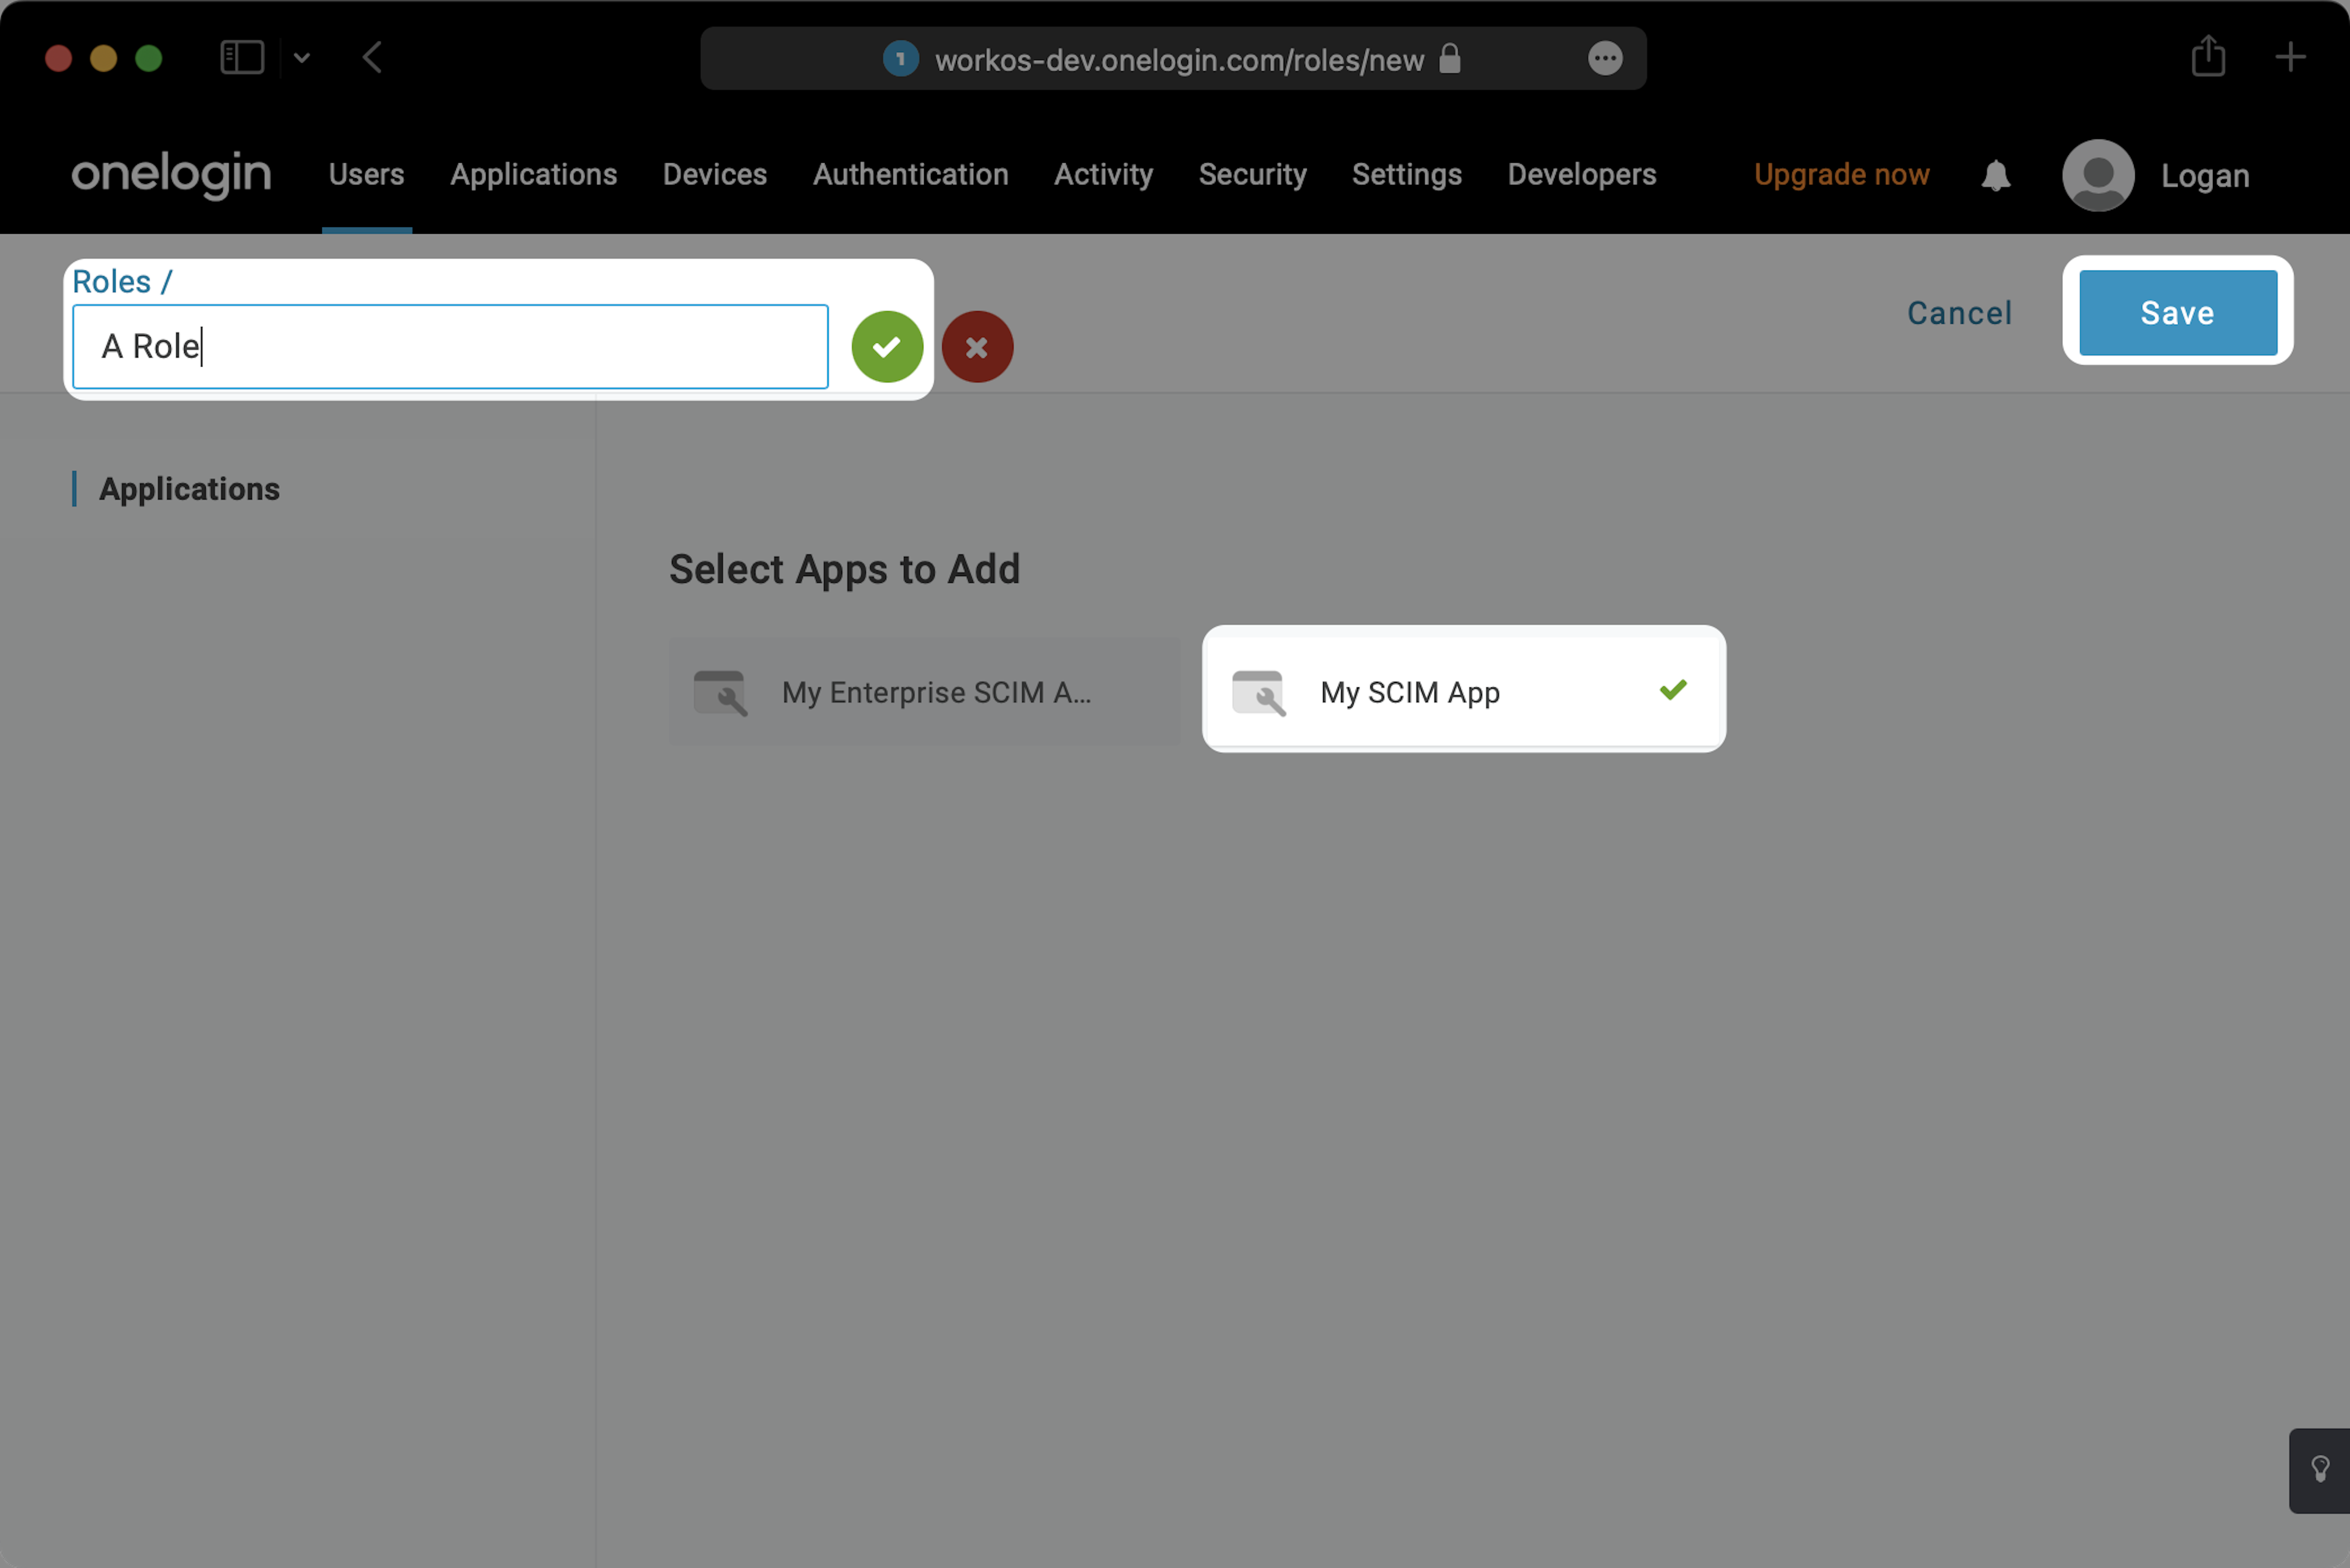
Create a new Role:
- In the top navigation, select Users and then click Roles from the dropdown.
- Click New Role.
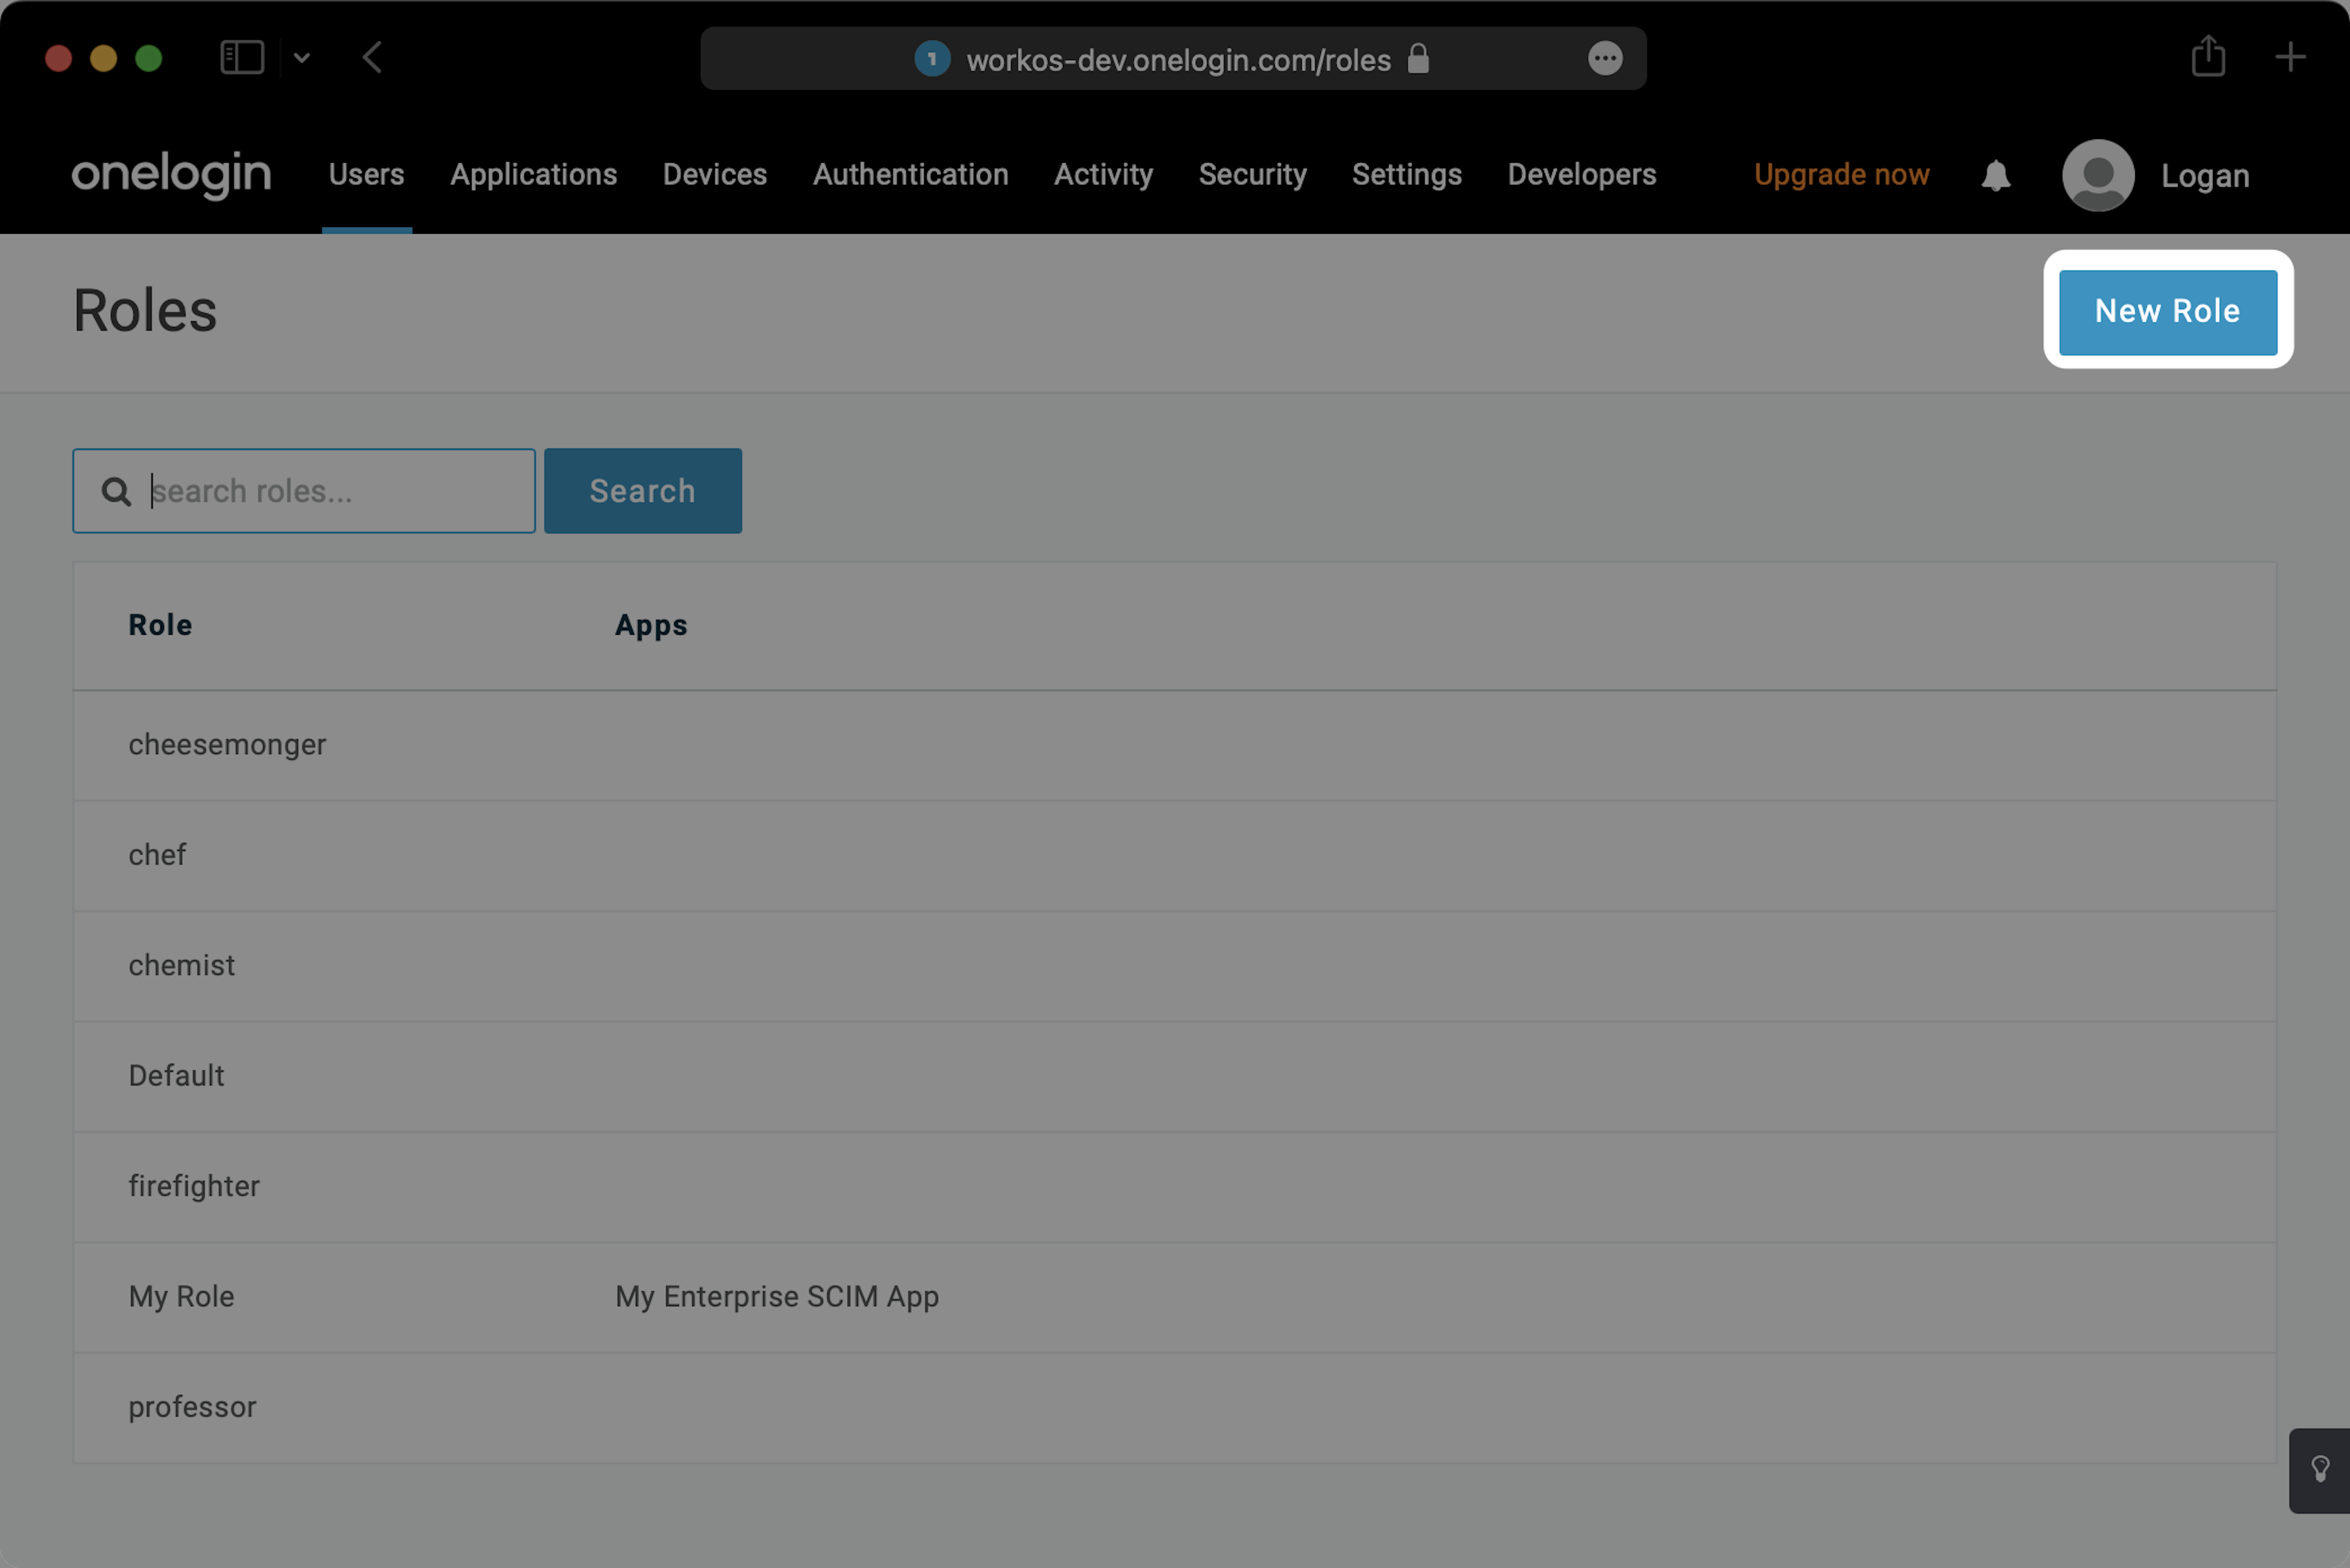
- Give the Role a name — this will become the name of the group in Spekit.
- Select the appropriate SCIM application.
- Click Save.
Add users to the Role:
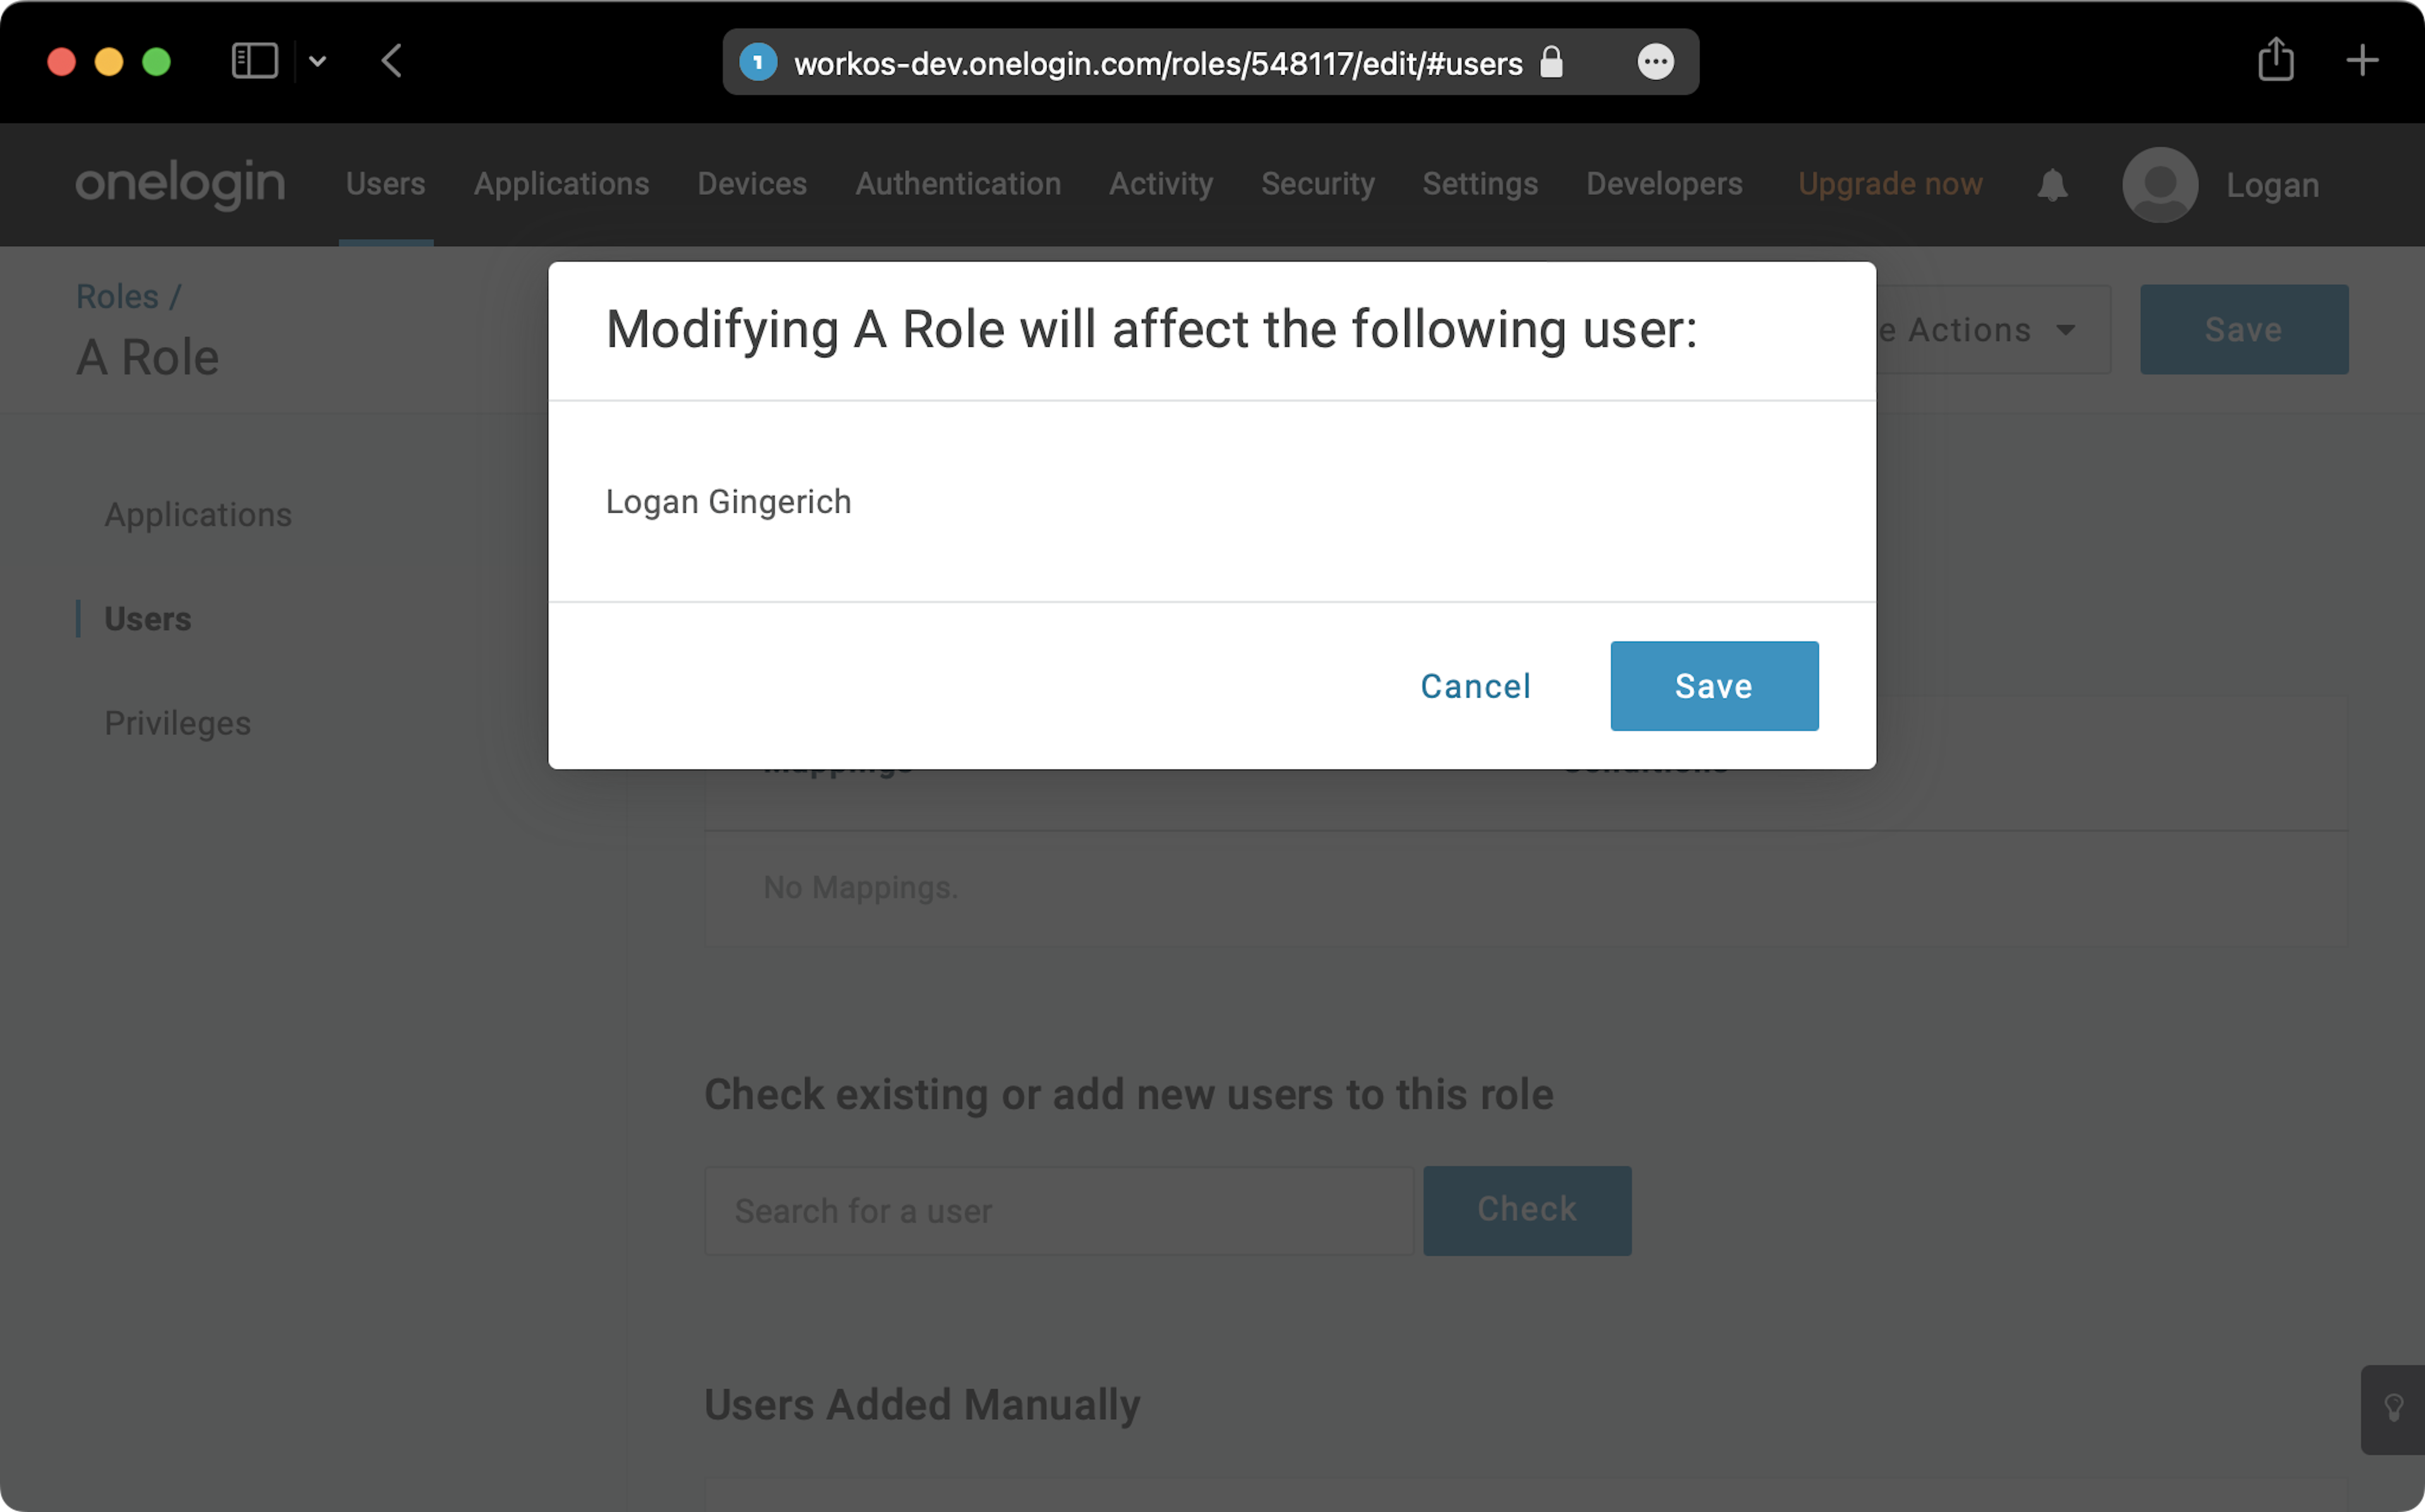
- Click the Users tab within the Role.
- Search for the users you want to assign to this role and click Add To Role.
- Click Save.
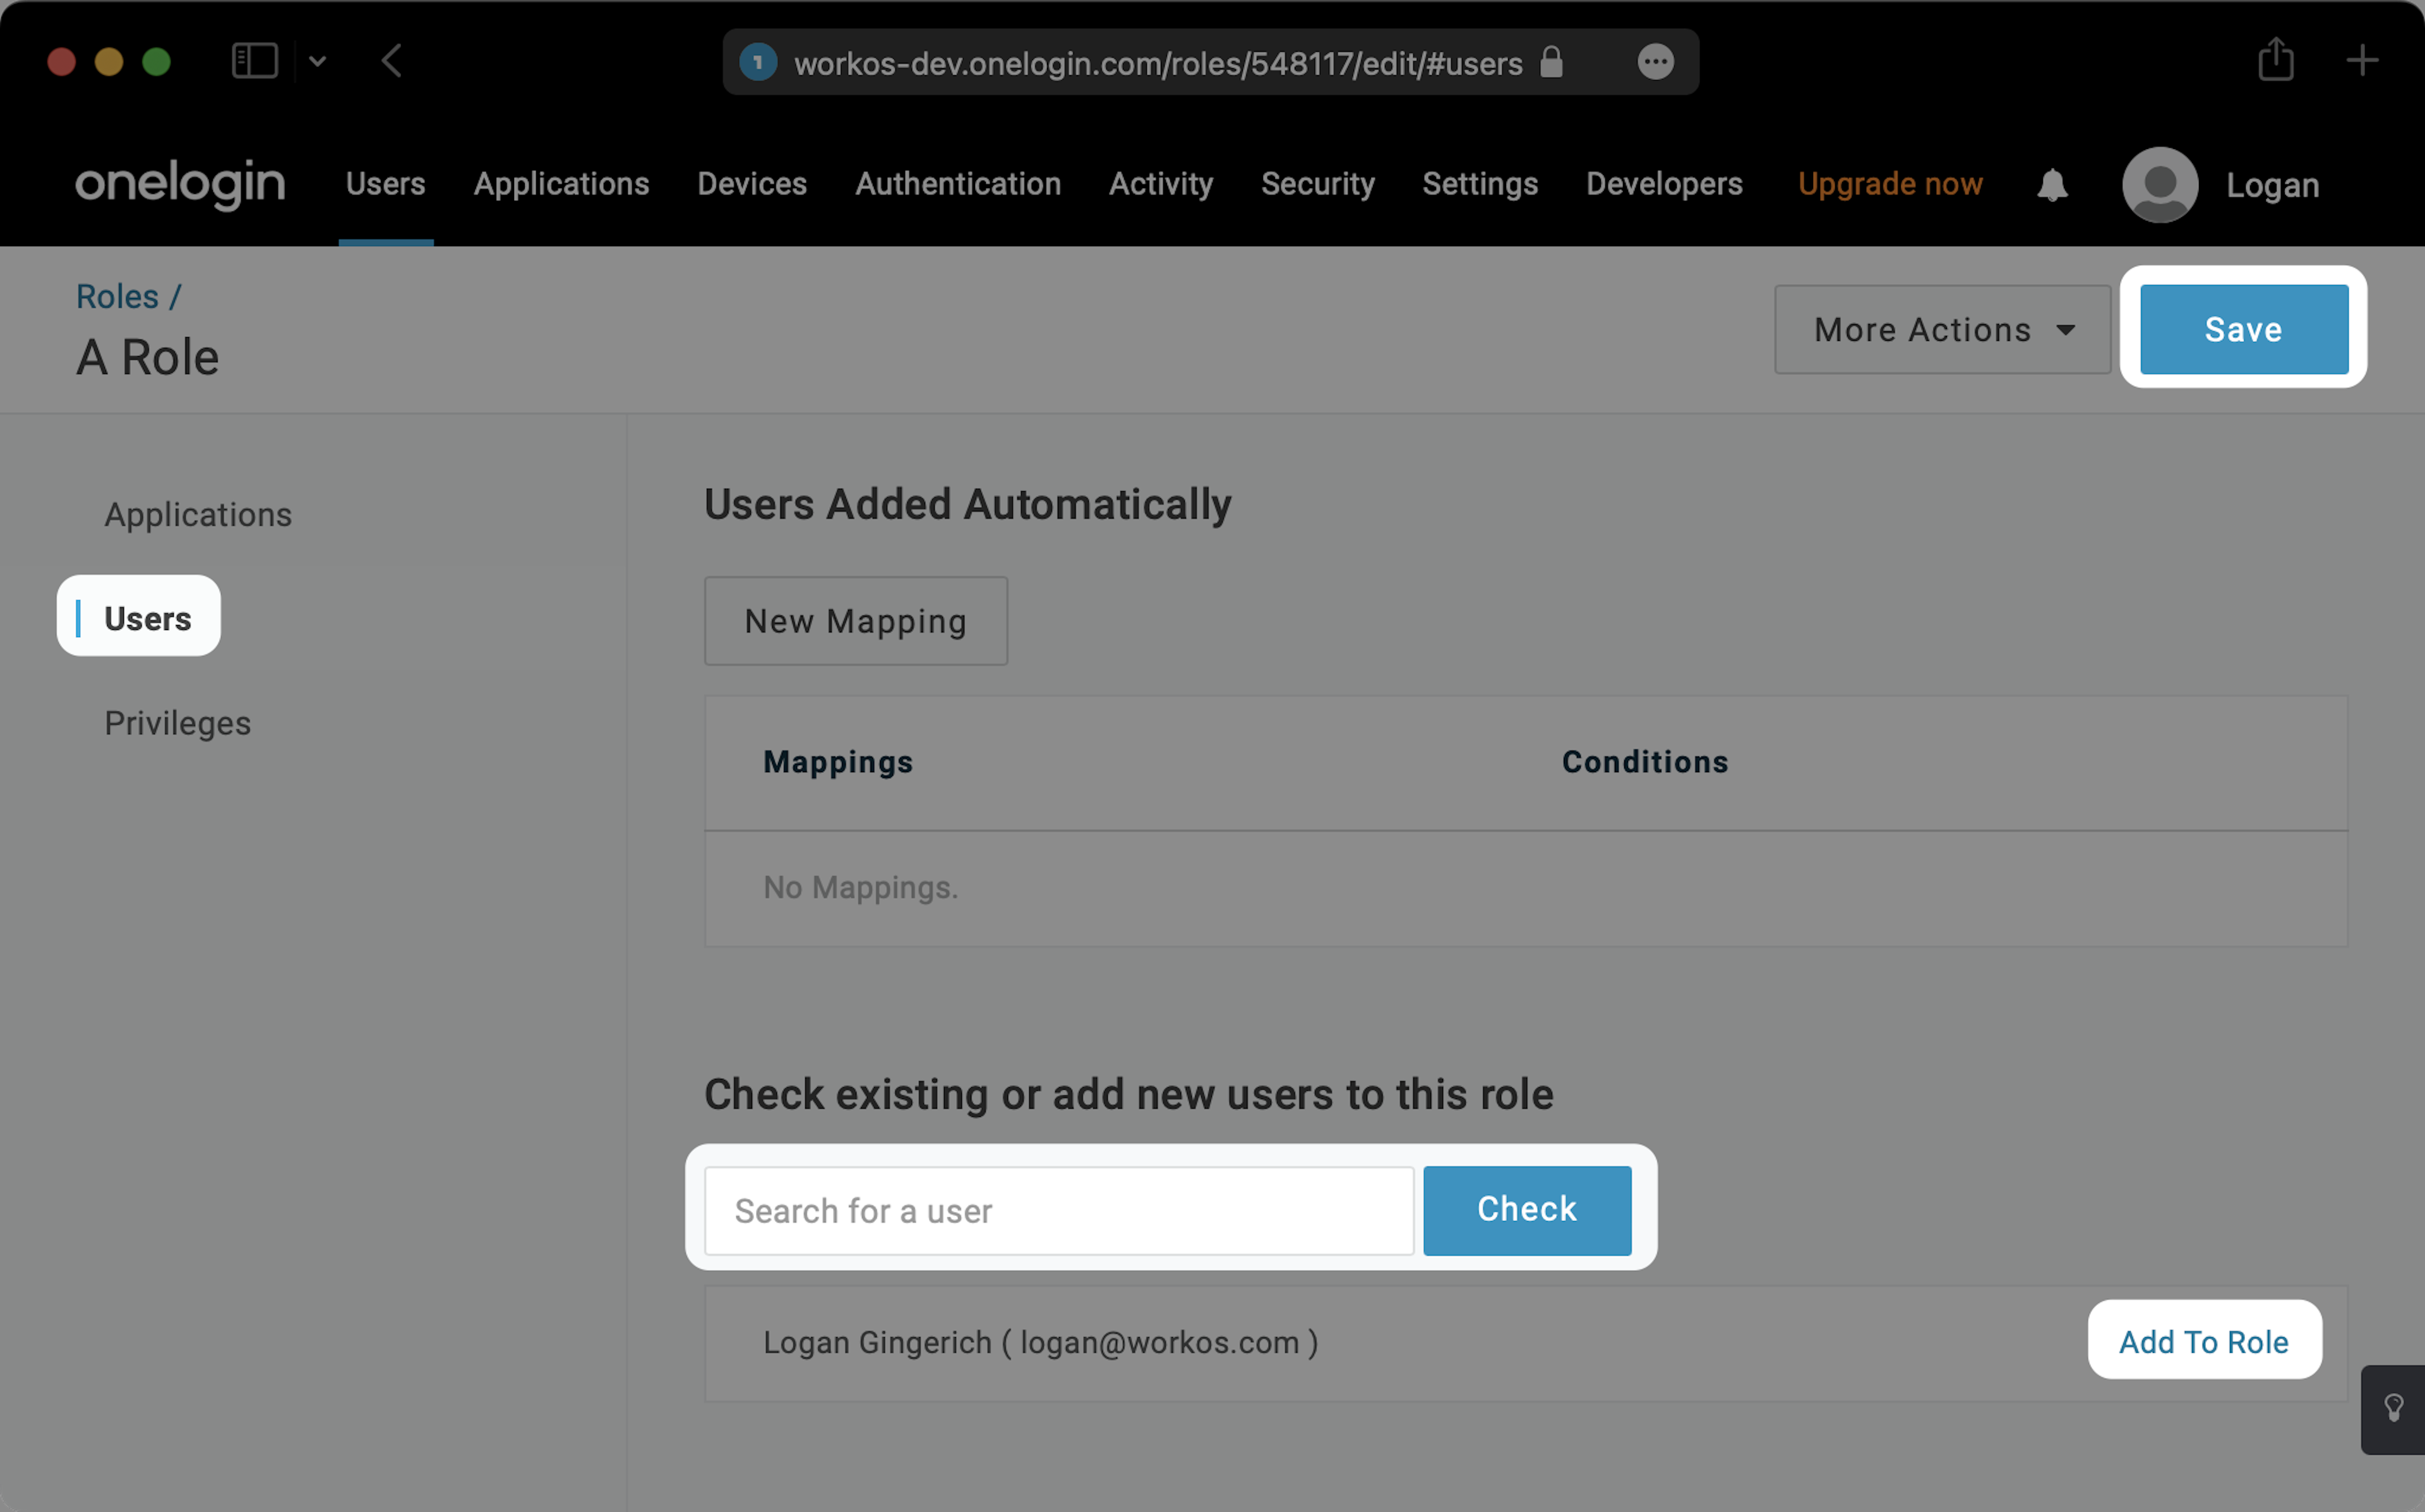
- Click Save in the confirmation modal.
Create a Rule to map the Role to a Spekit group:
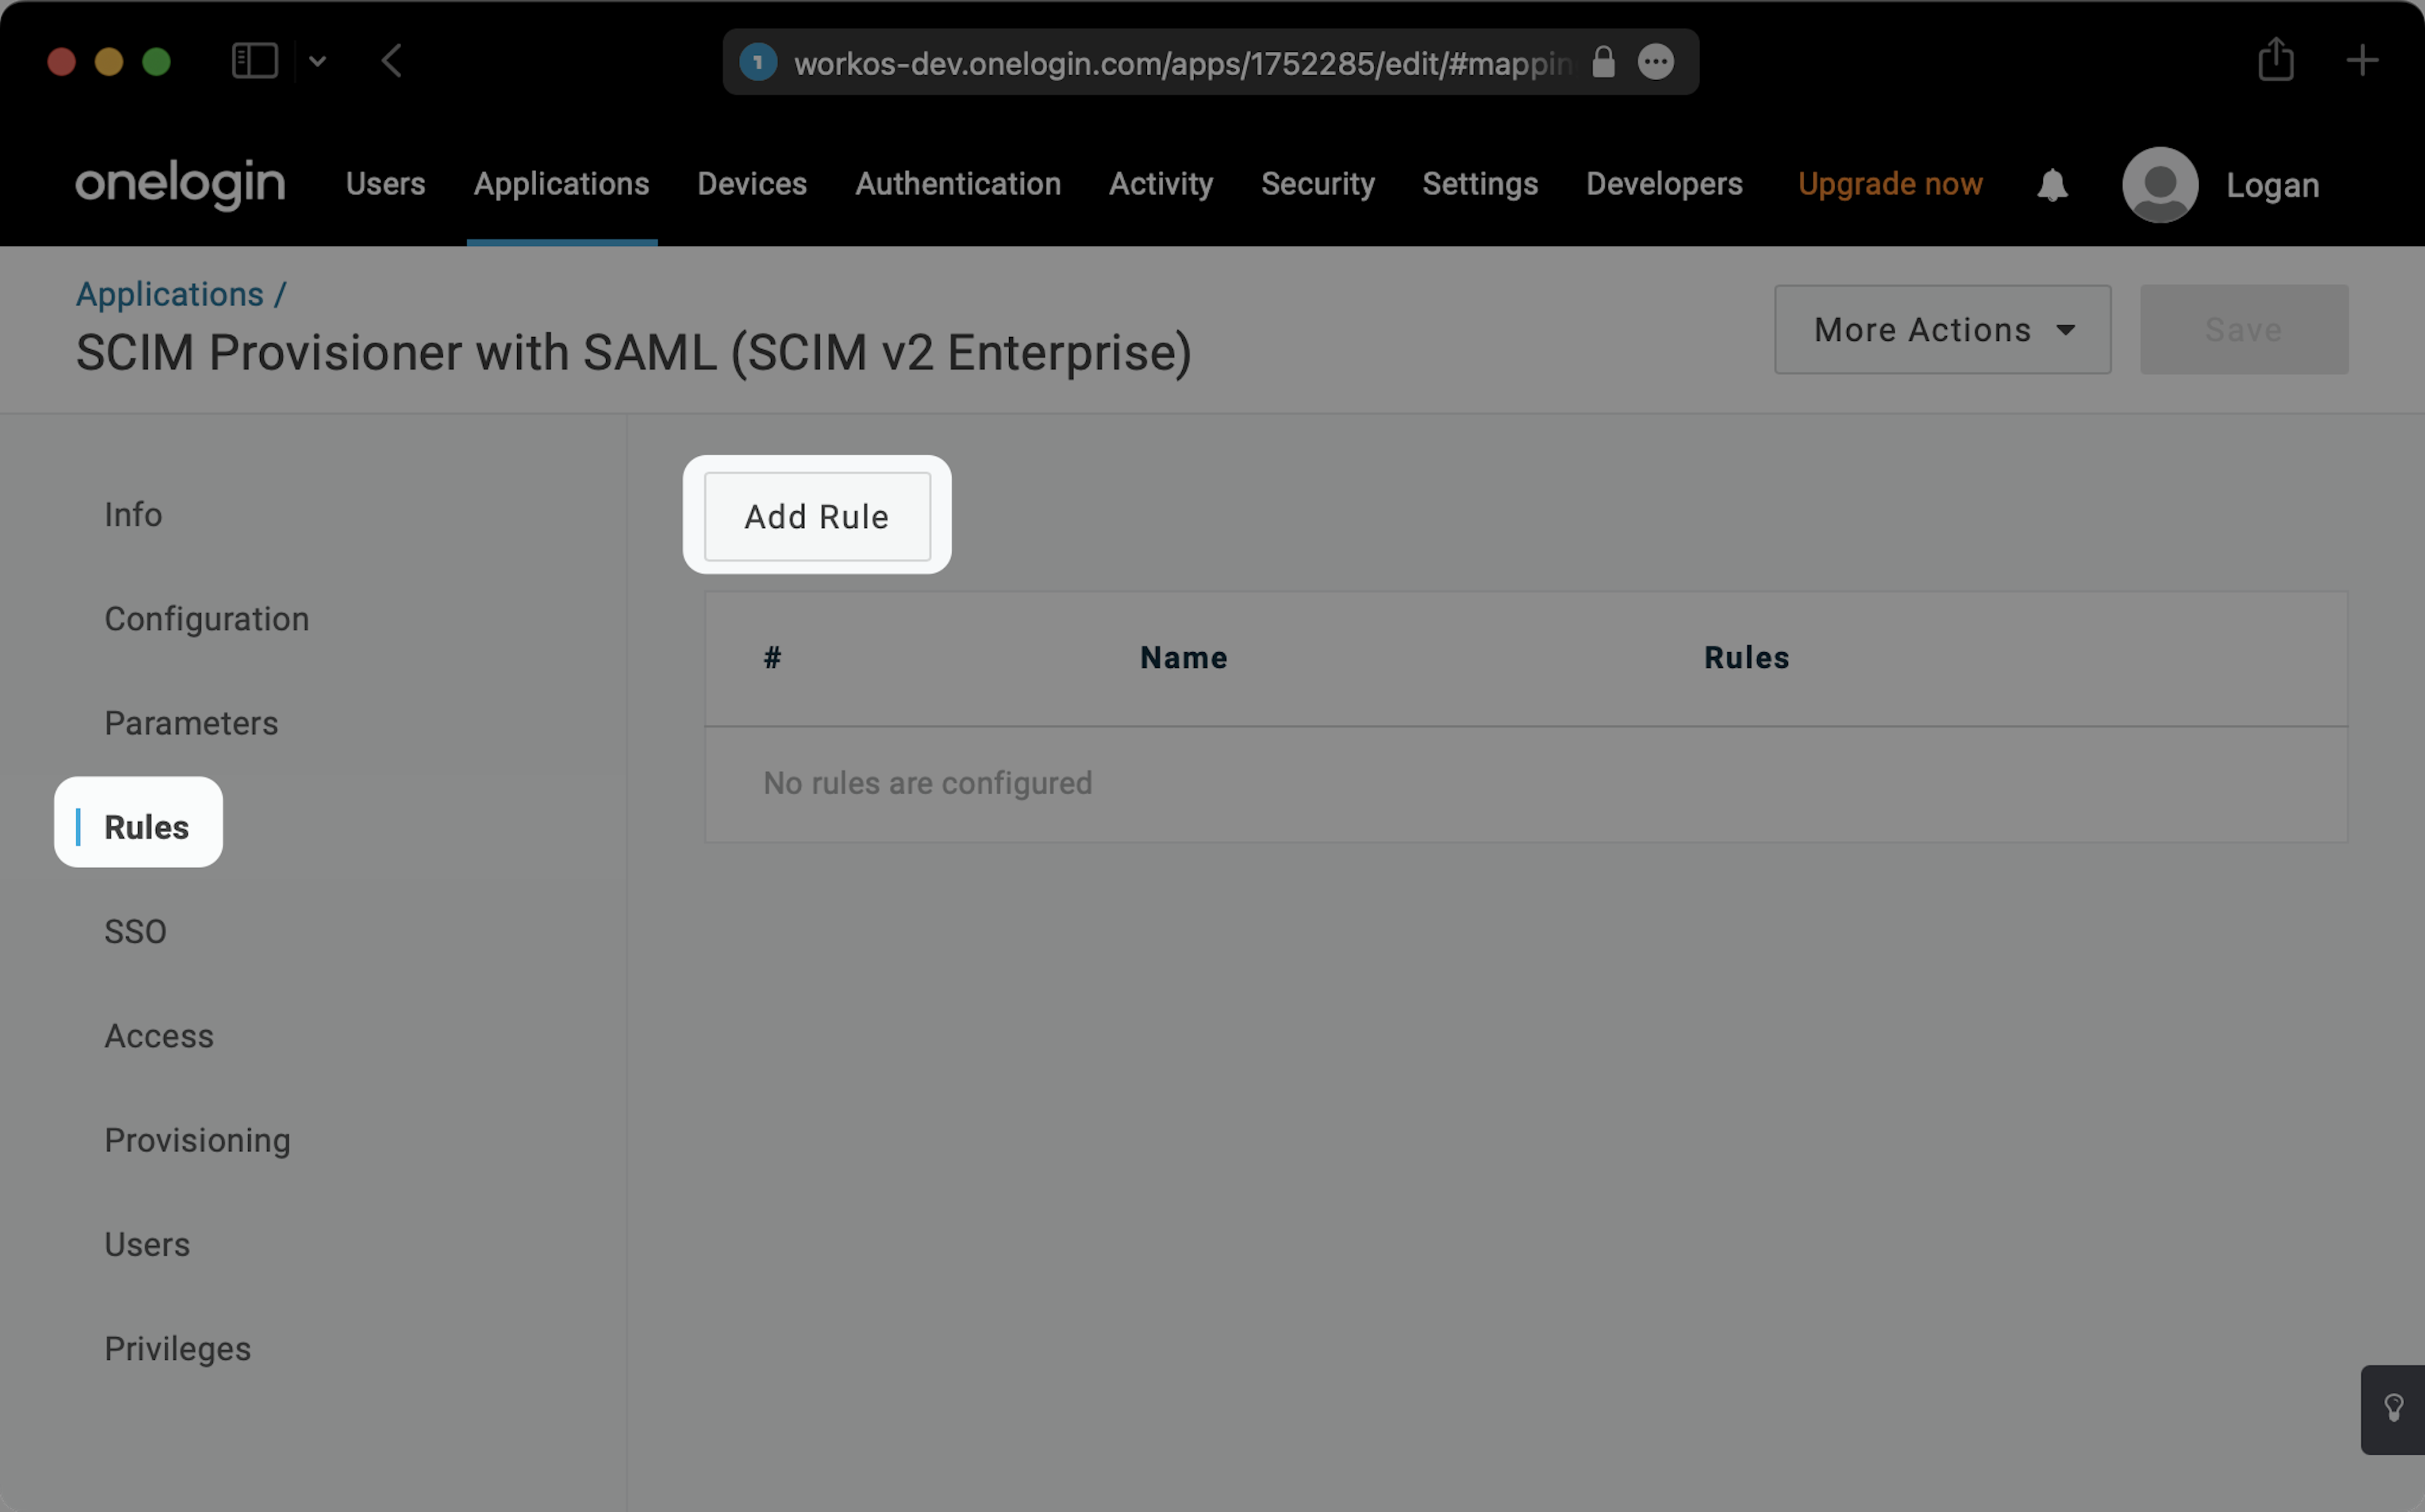
- Navigate back to your Spekit SCIM application.
- Click the Rules tab on the left.
- Click Add Rule.
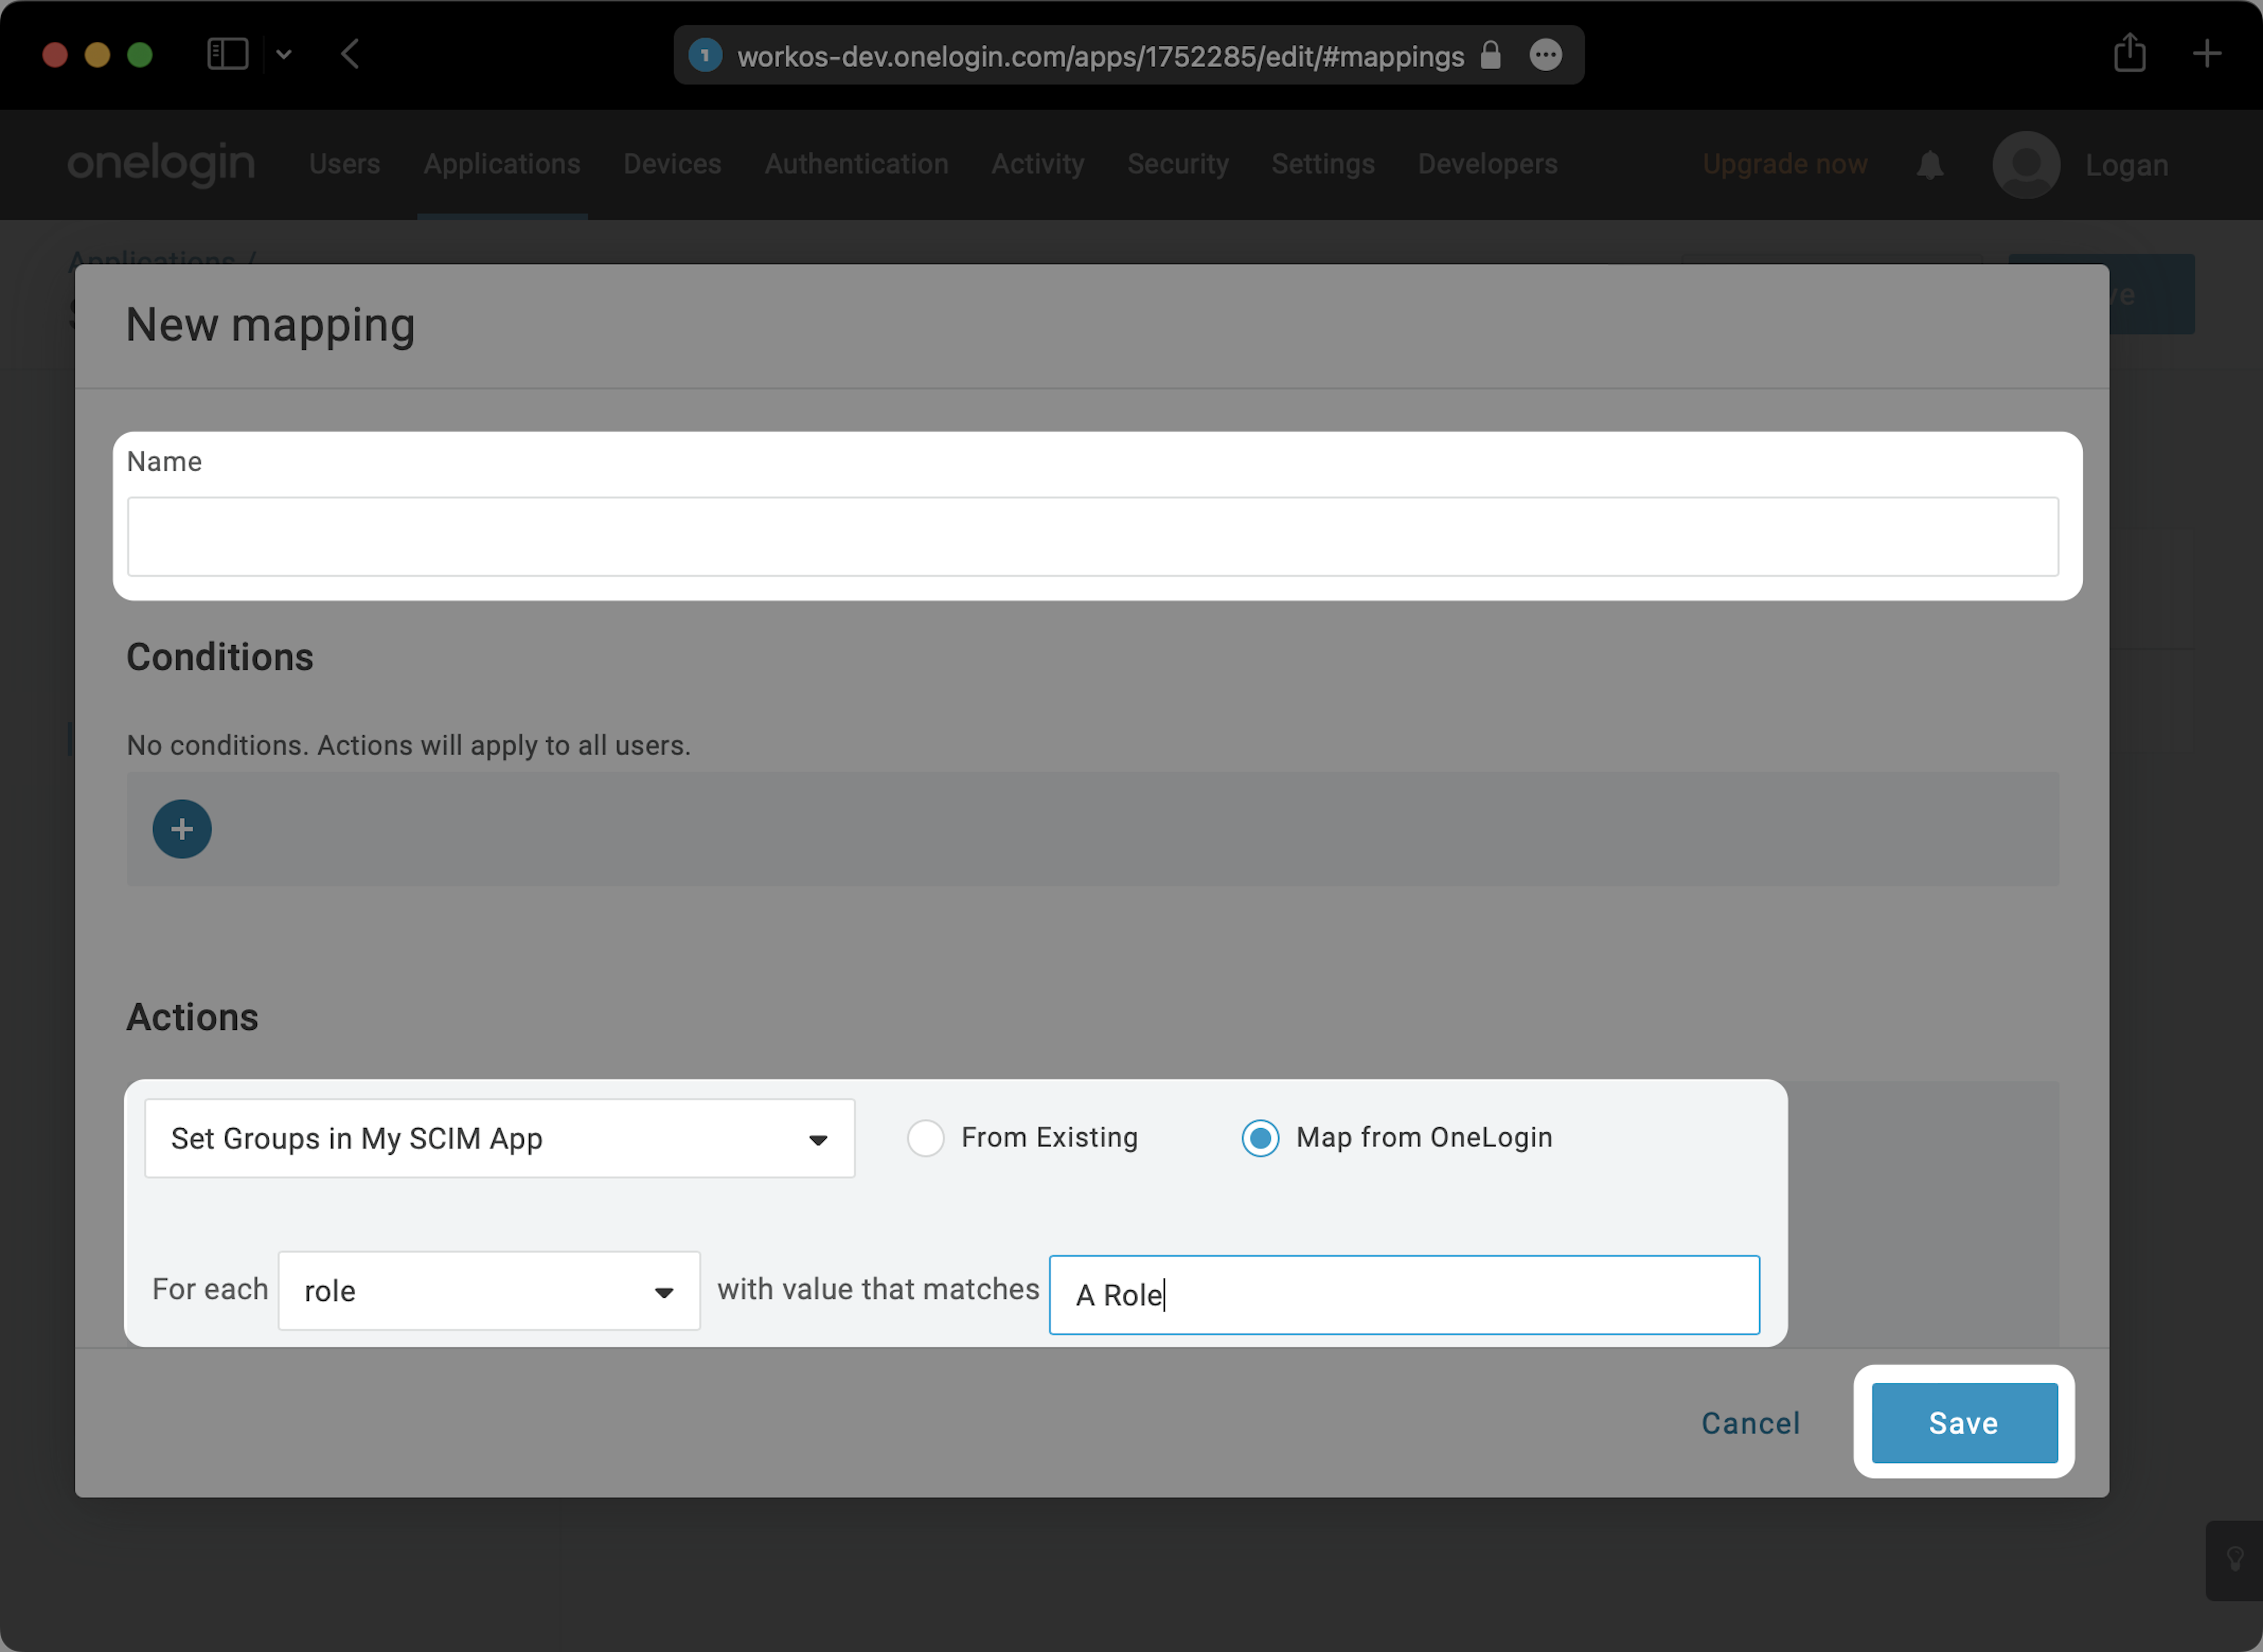
- Give the Rule a descriptive name.
- Under Actions, select Set Groups in Spekit SCIM.
- Set the condition to For each role with value that matches [your-role-name].
- Click Save.
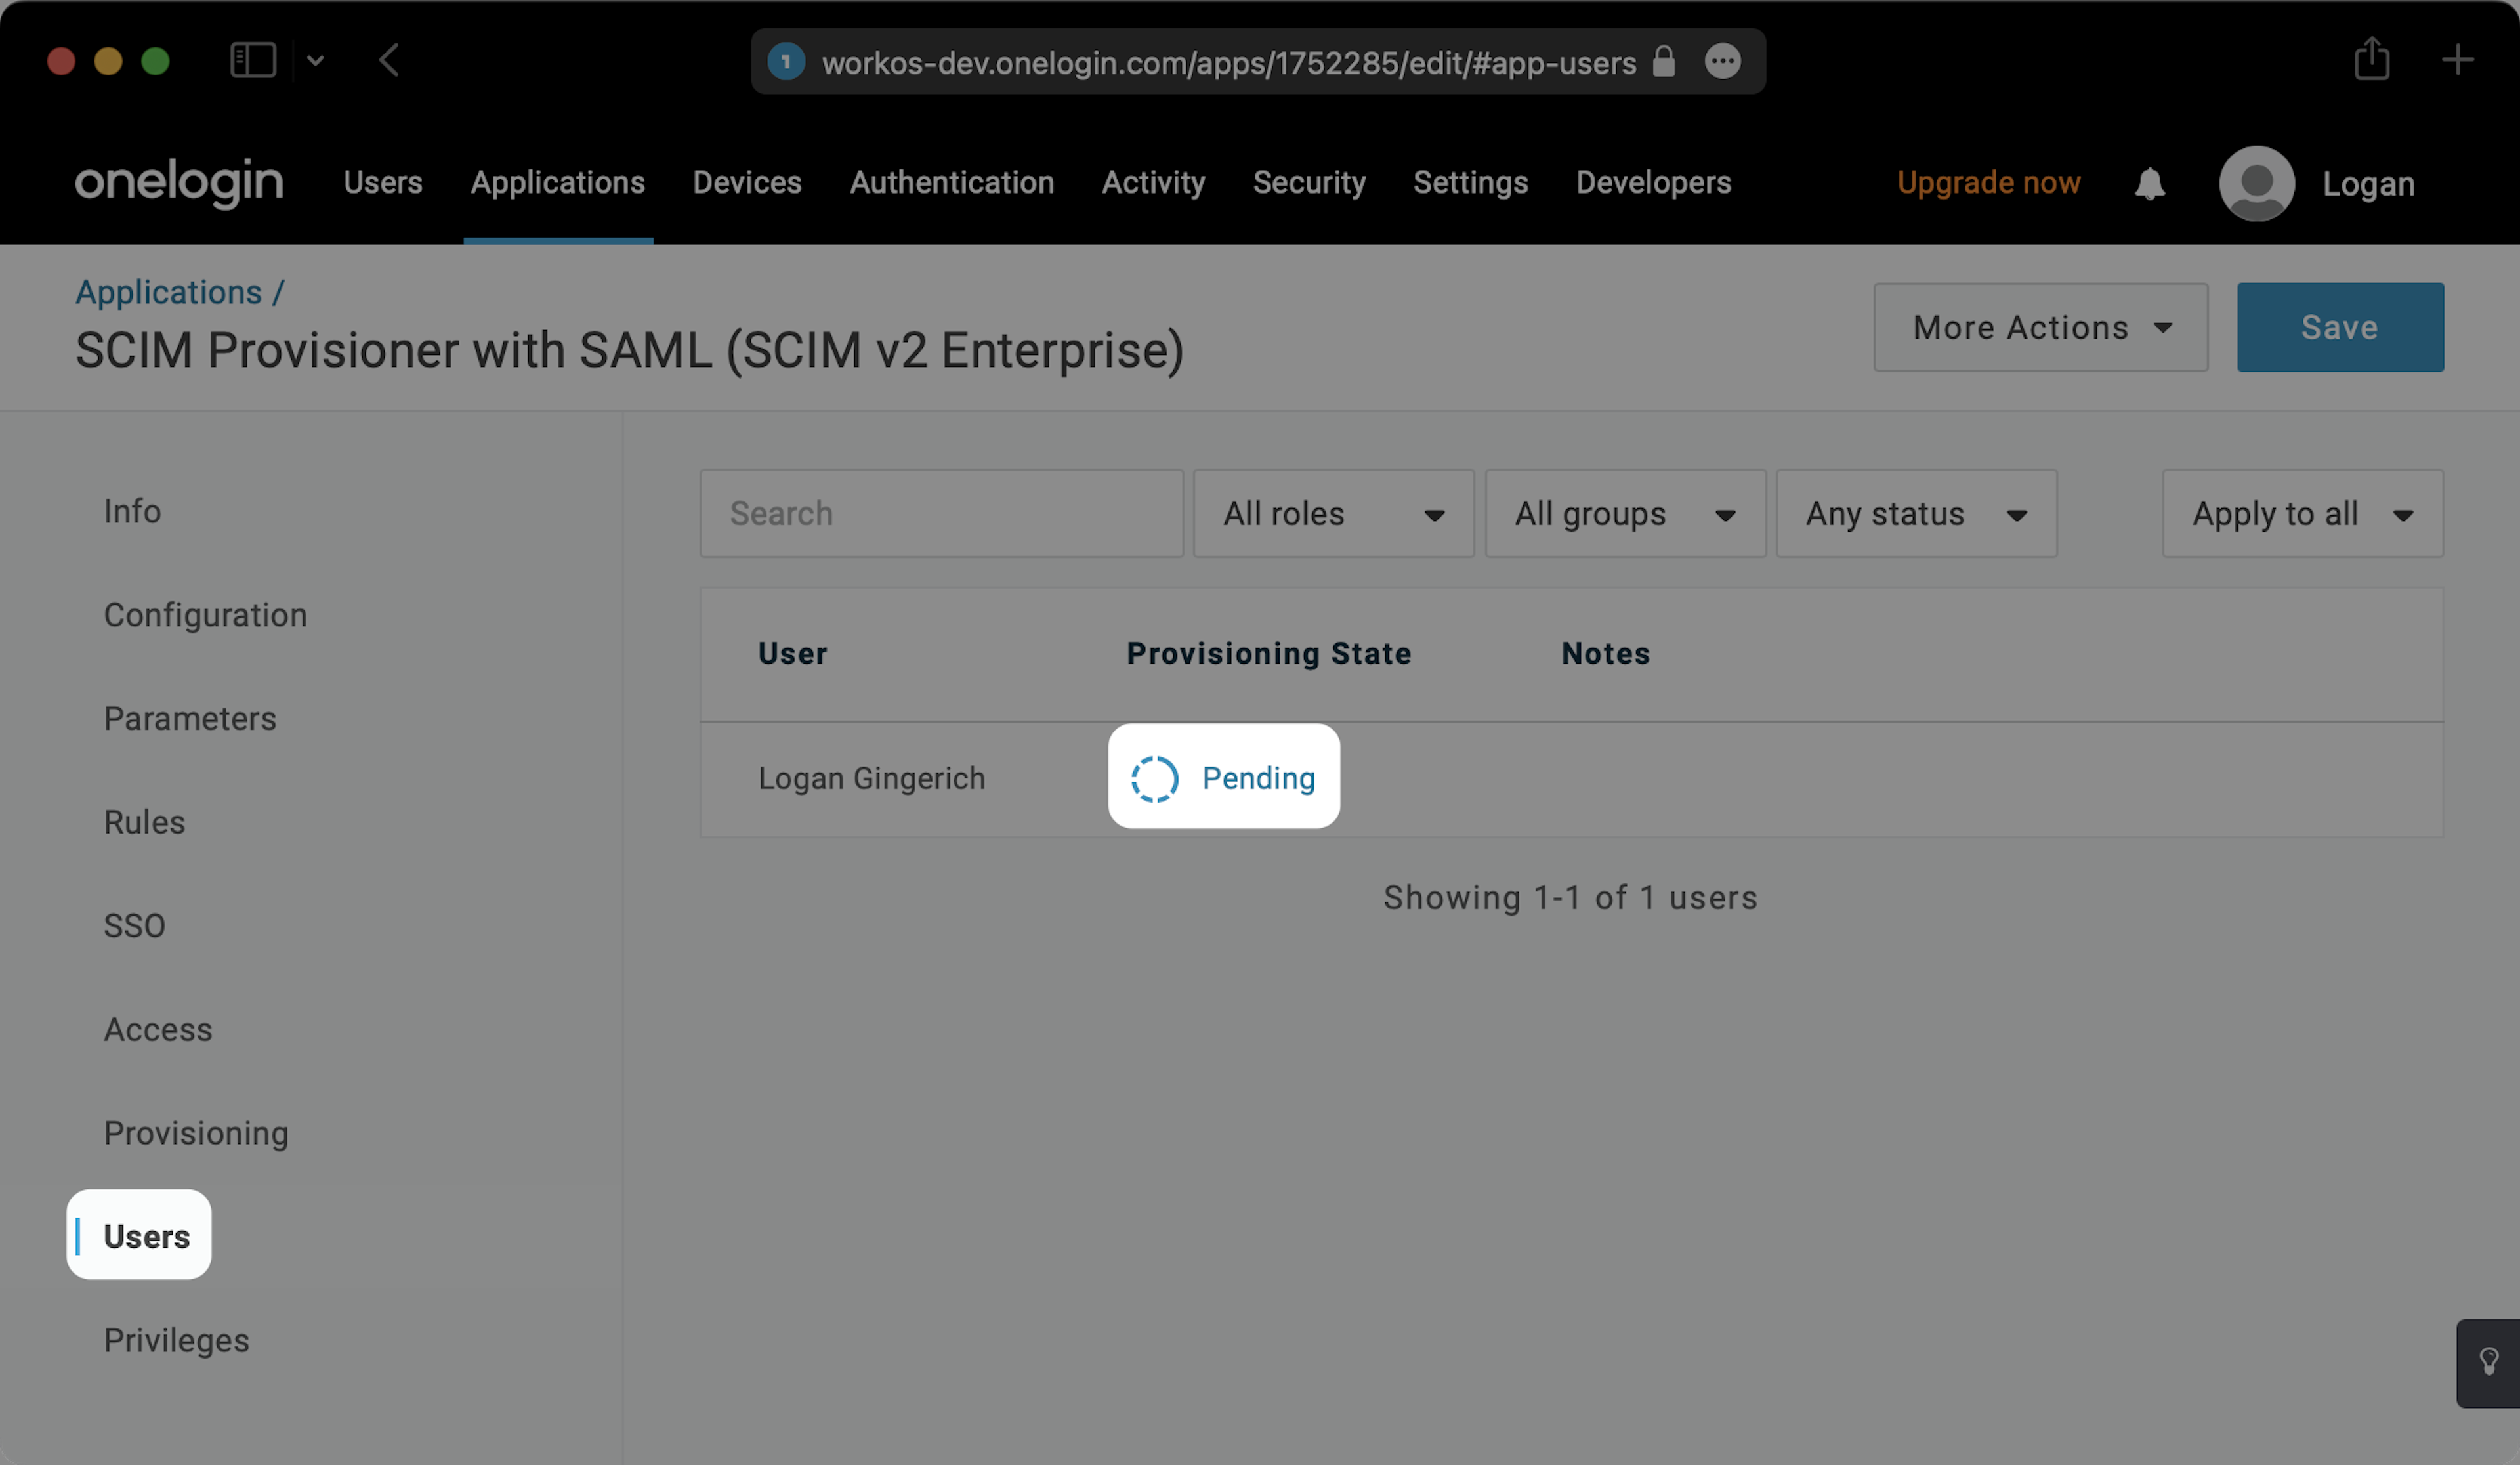
Confirm pending user updates:
- Within your SCIM app, click the Users tab.
- If any users show a Pending status, click on the notification to review and confirm the update.