Note: This guide provides a general idea of what the SSO connection process involves, but should not be used as a step-by-step guide for configuring your SSO. To set up SSO with Spekit, go to the 'Connect' page within your Spekit Web App and proceed through the setup walkthroughs.
1) Create SAML Application
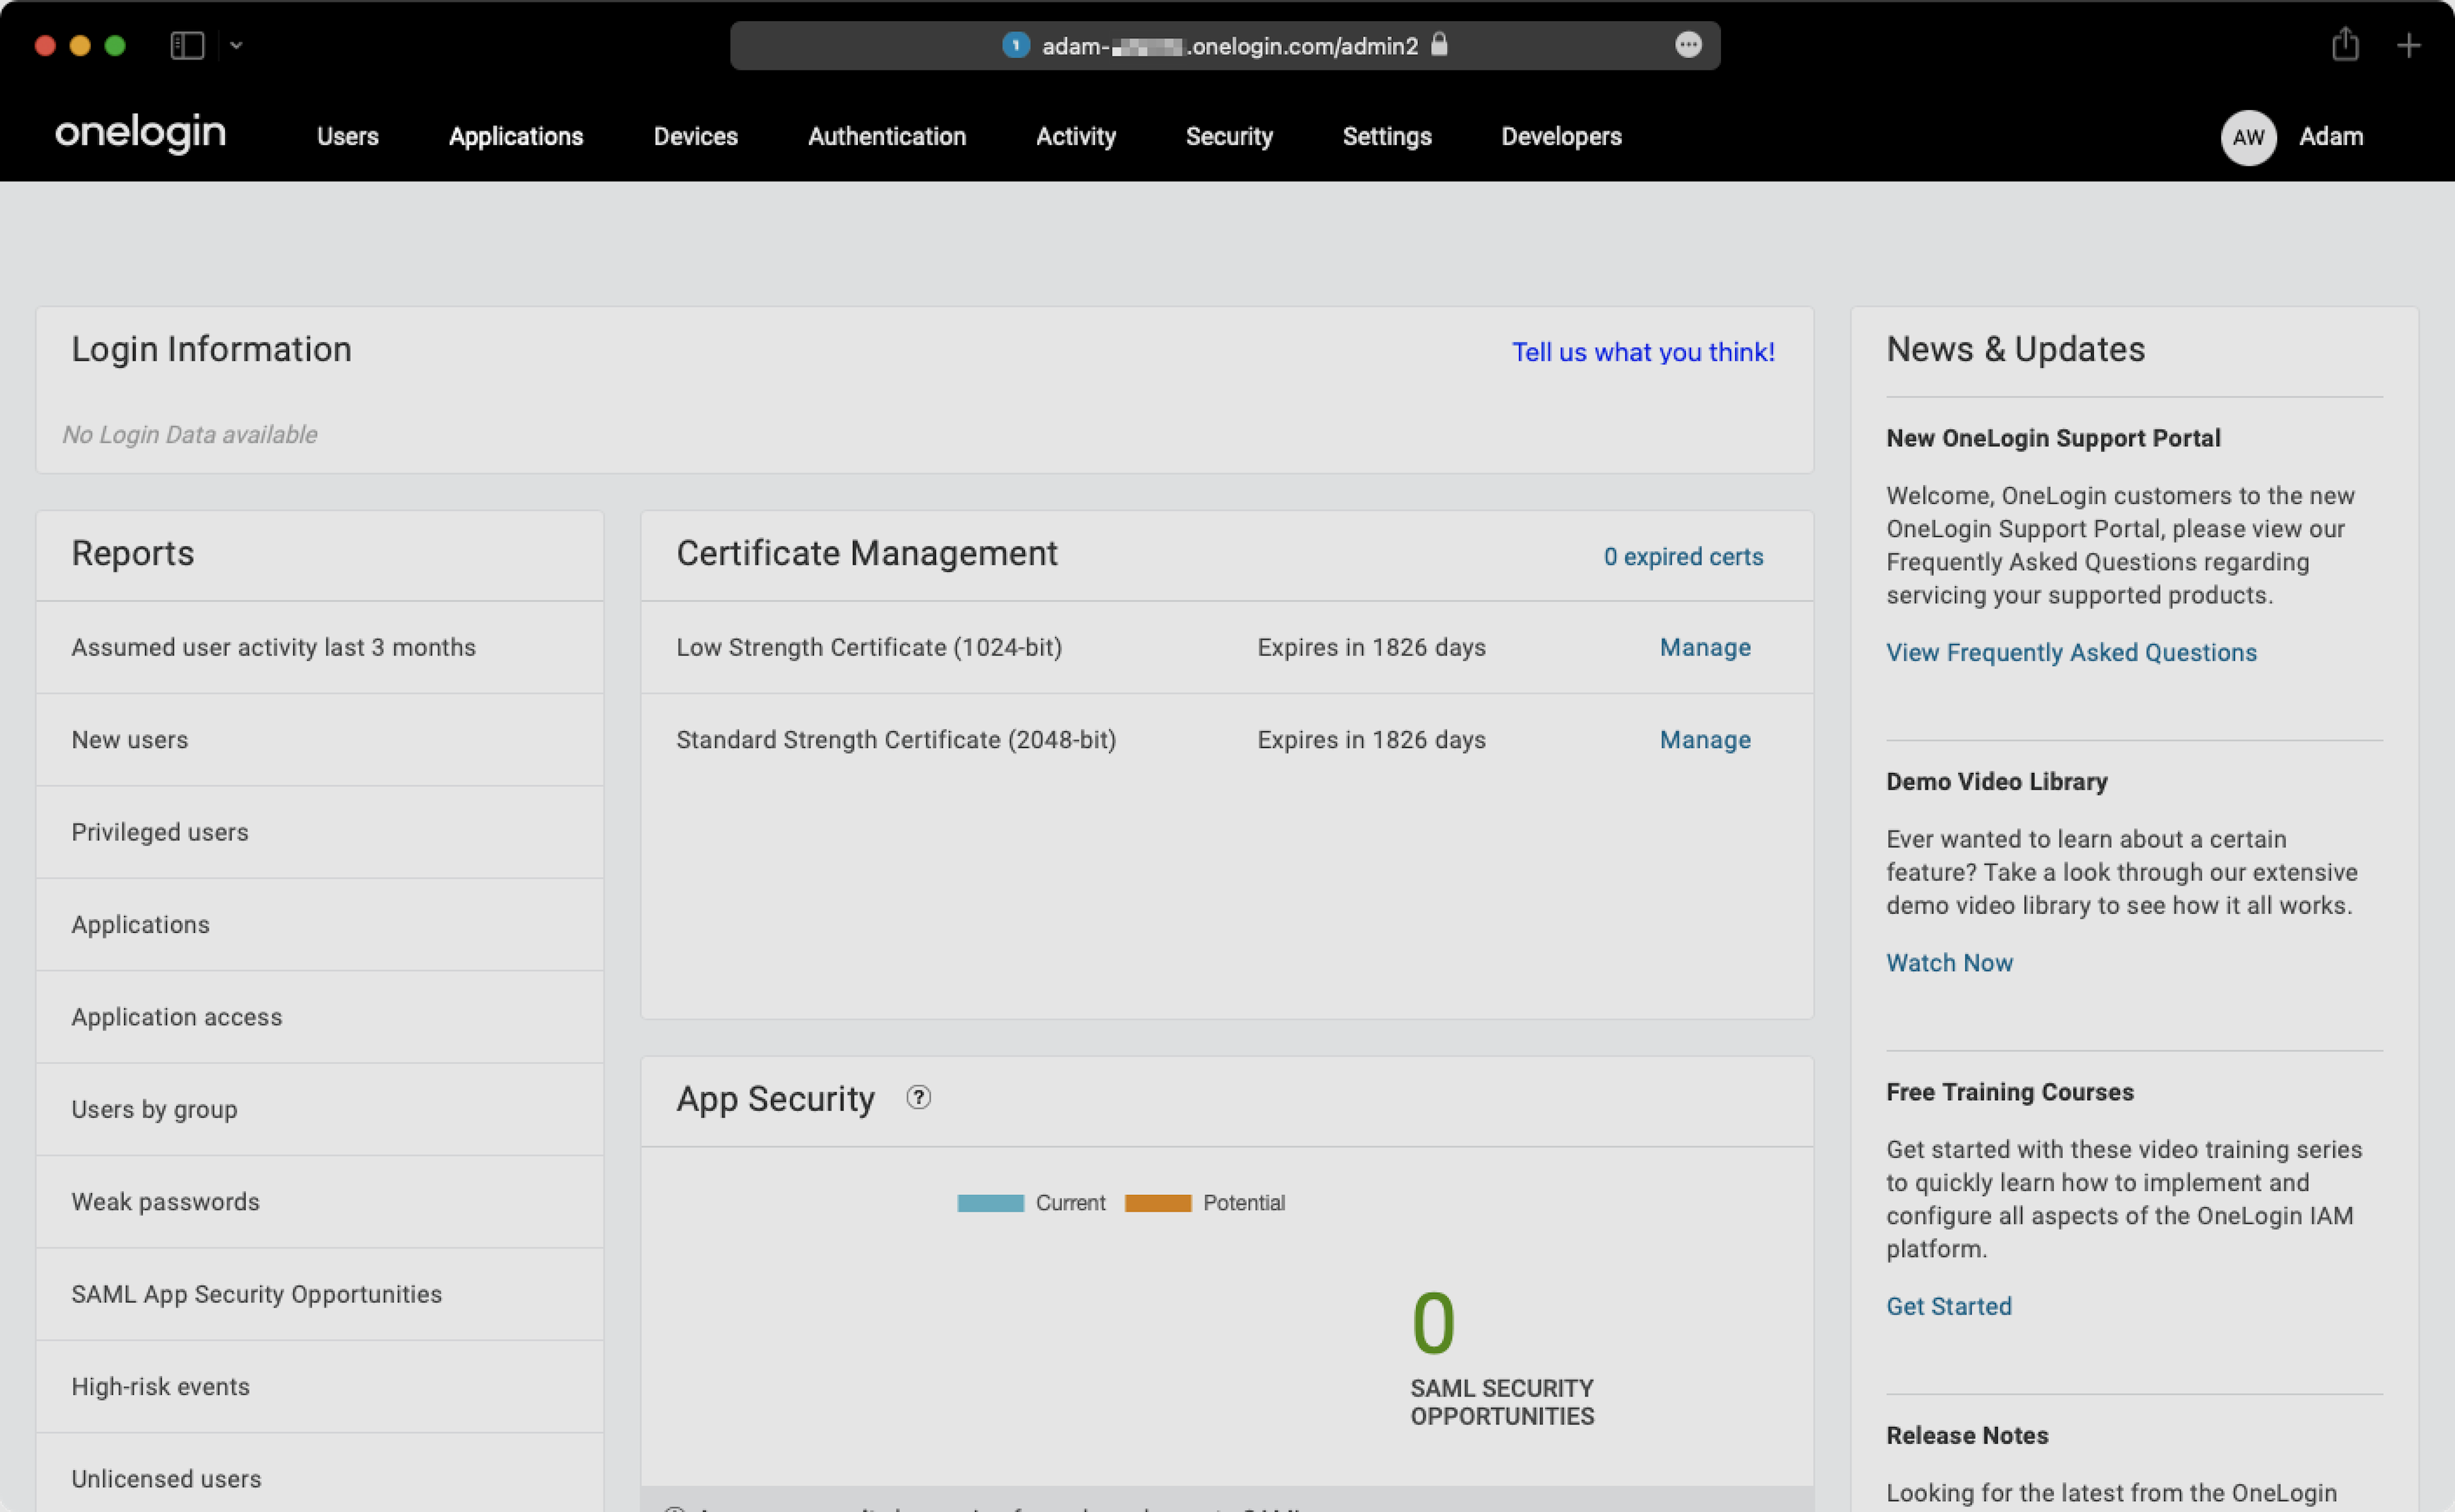
Go to the Admin Dashboard and select the "Applications" tab in the navigation bar.
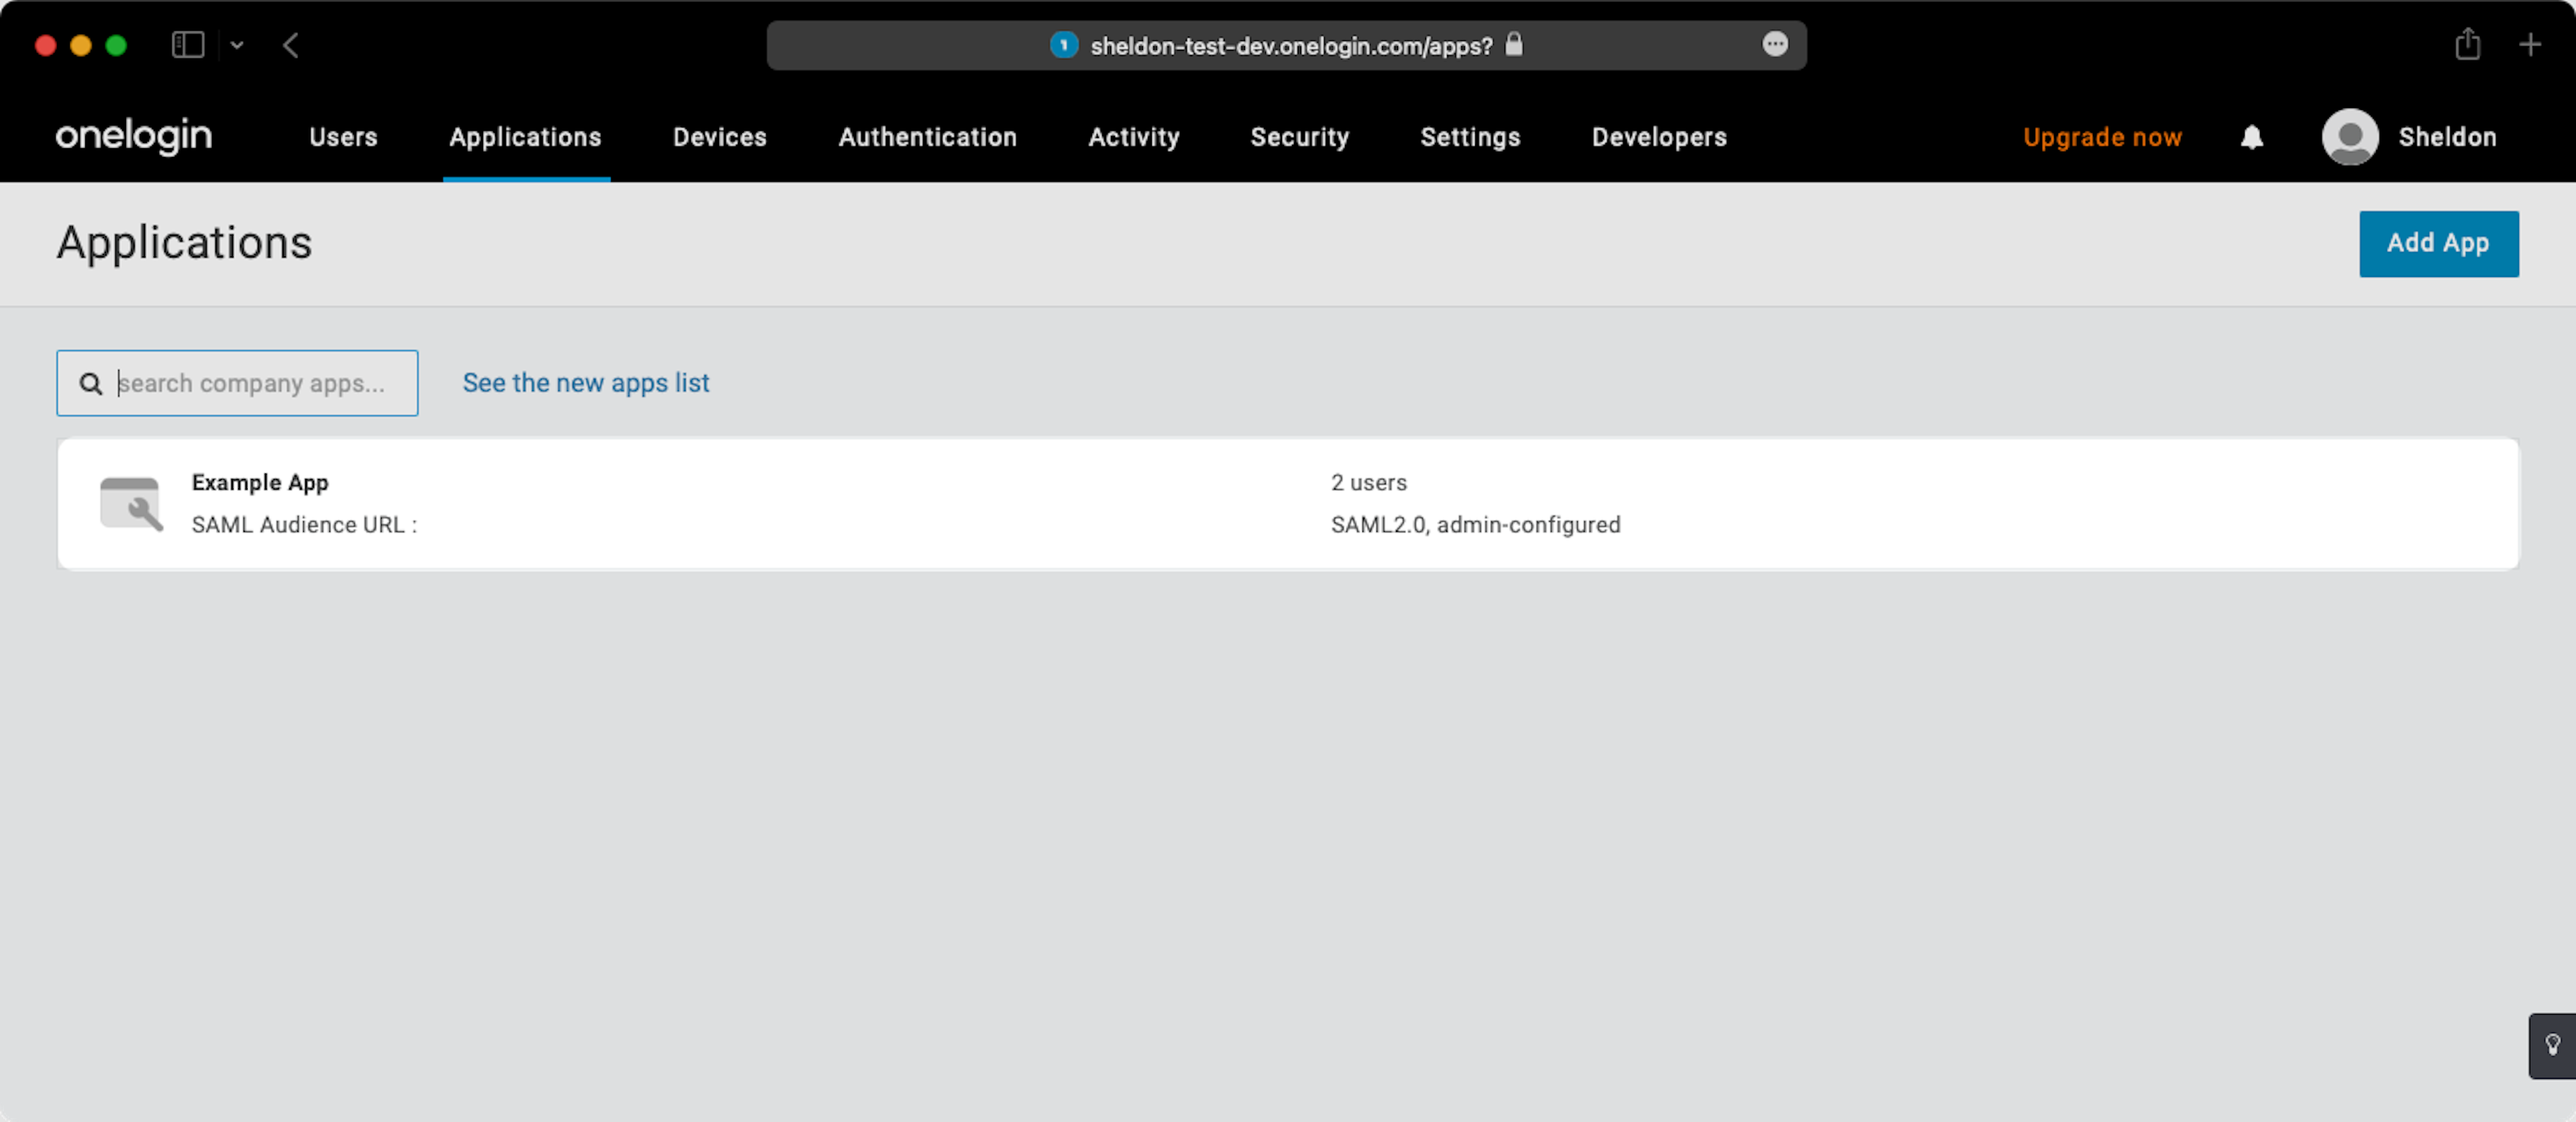
Click 'Add App' on the top right corner, and select the "SAML Custom Connector (Advanced)" type.
2) SAML Configuration
Click the "Configuration" tab from the left sidebar.
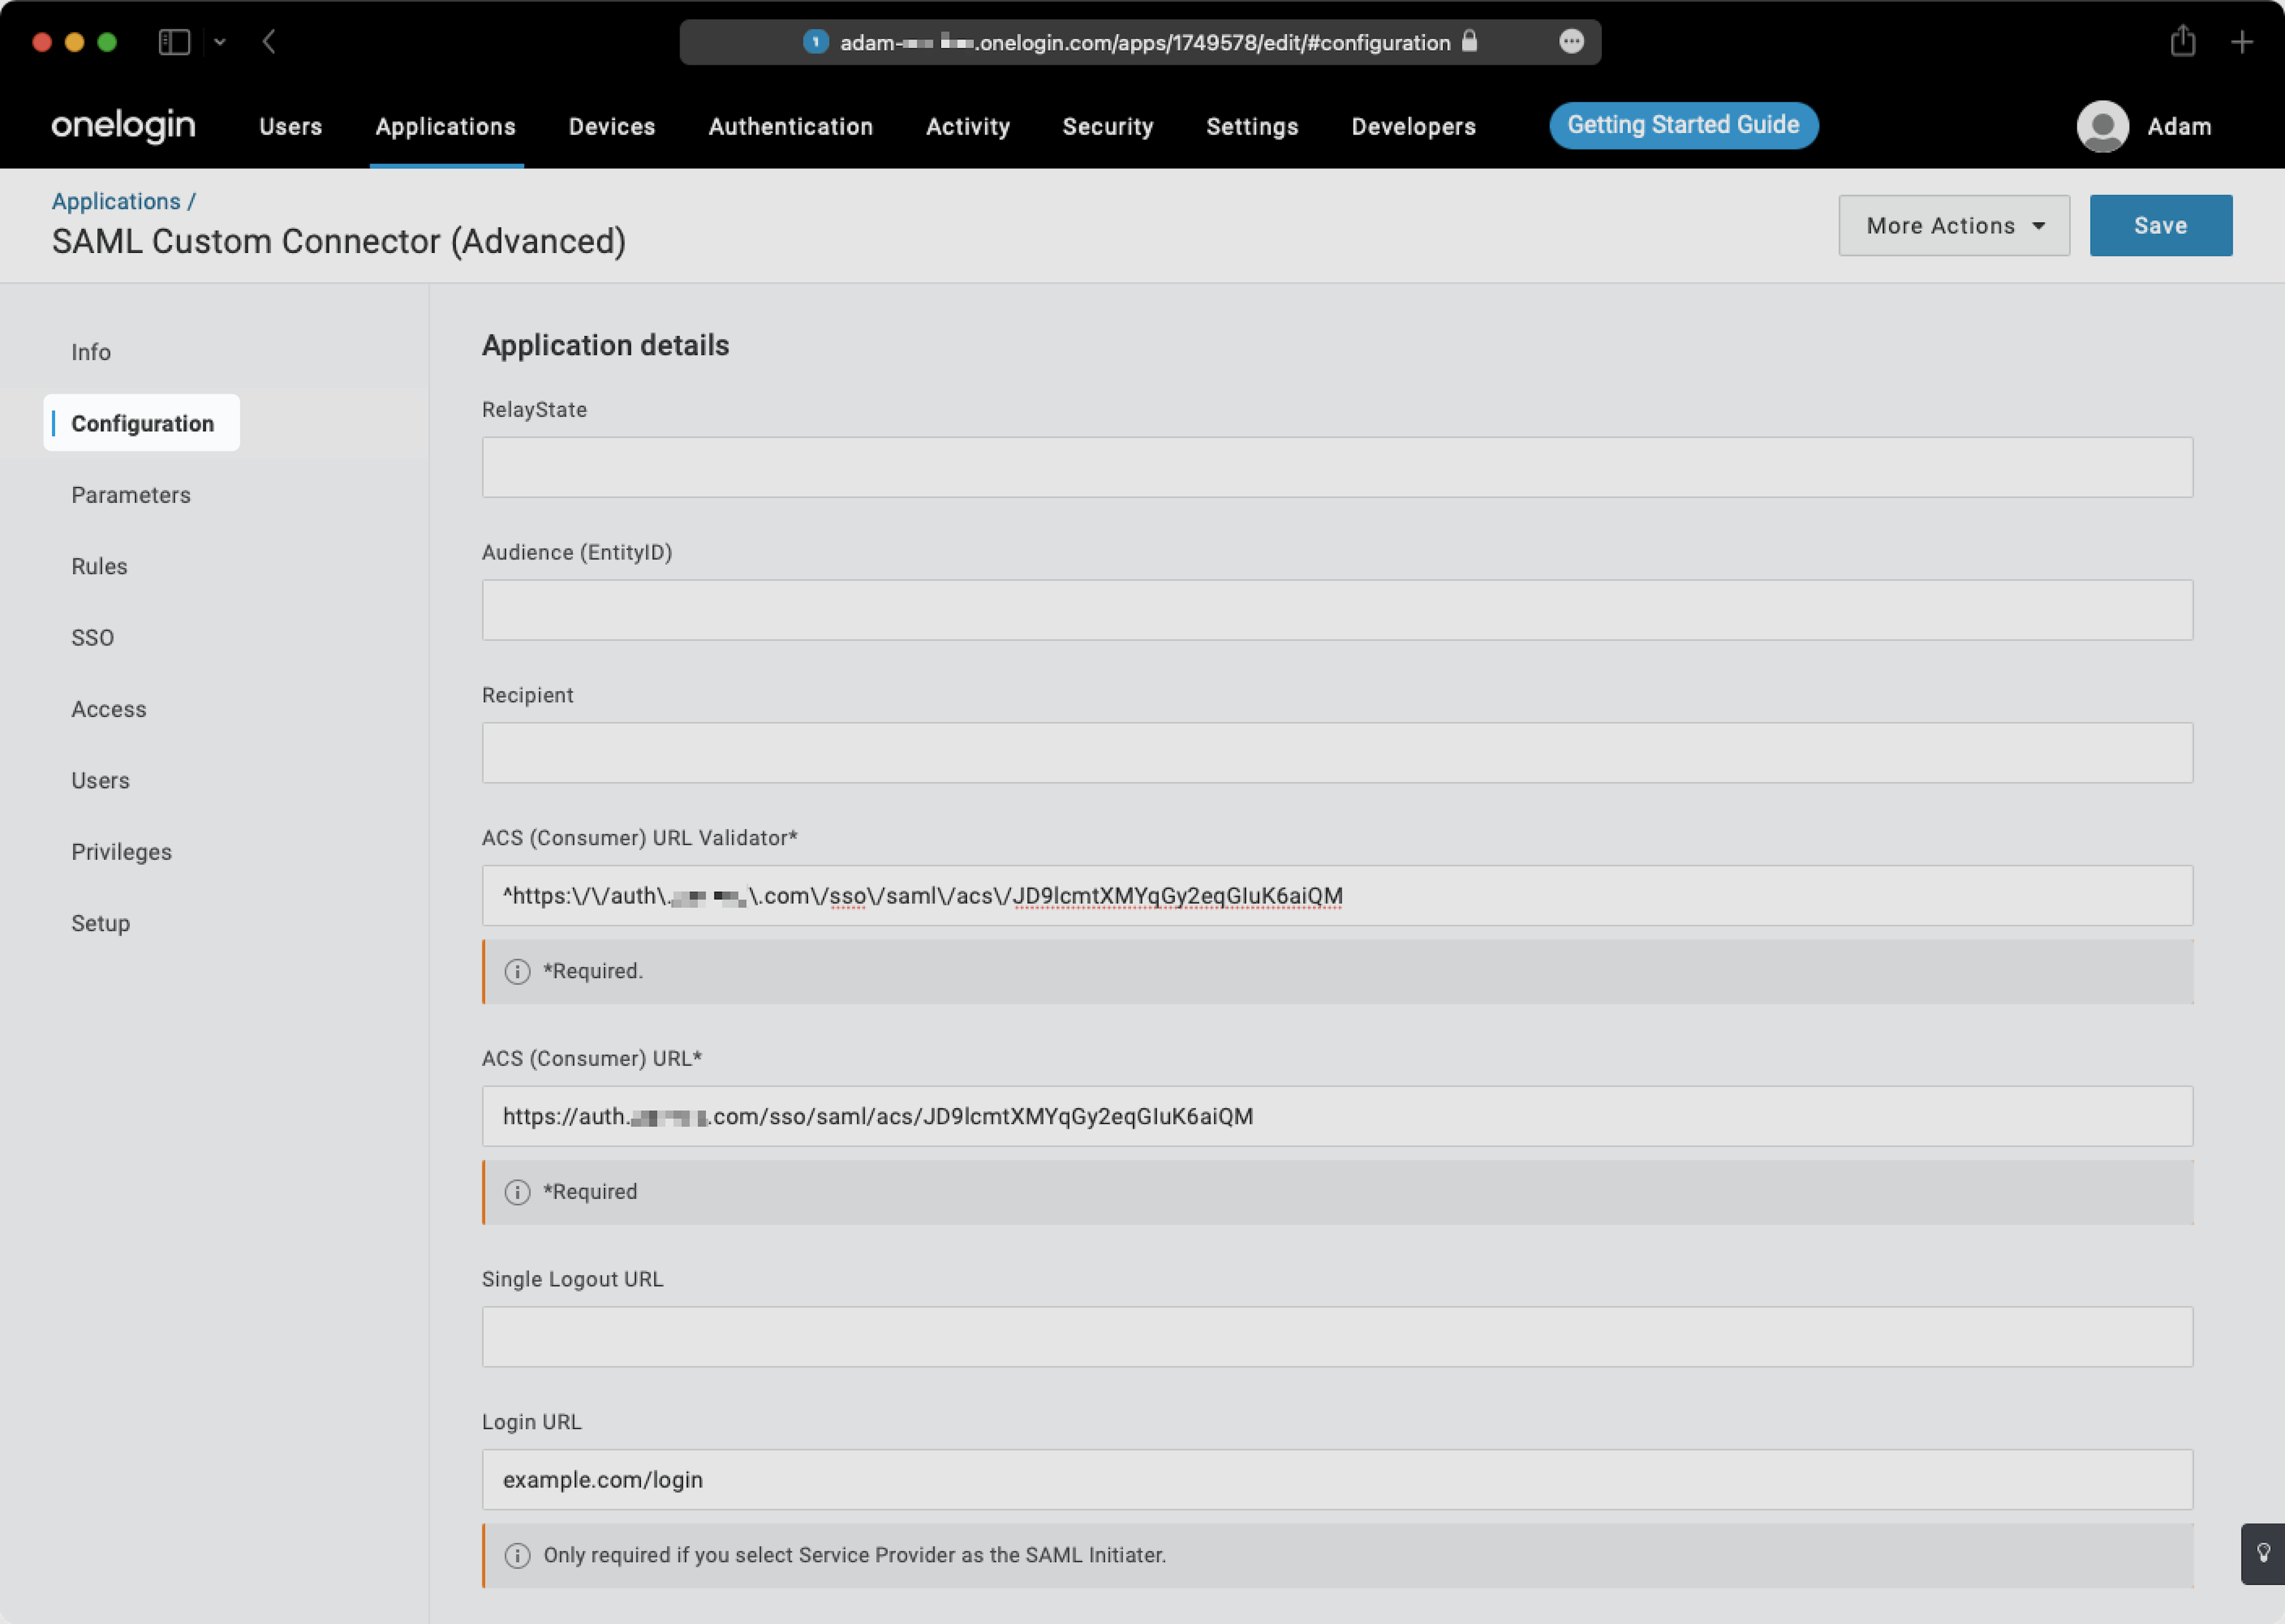
Input the "ACS URL Validator" provided in your Spekit walkthrough into the corresponding text box.
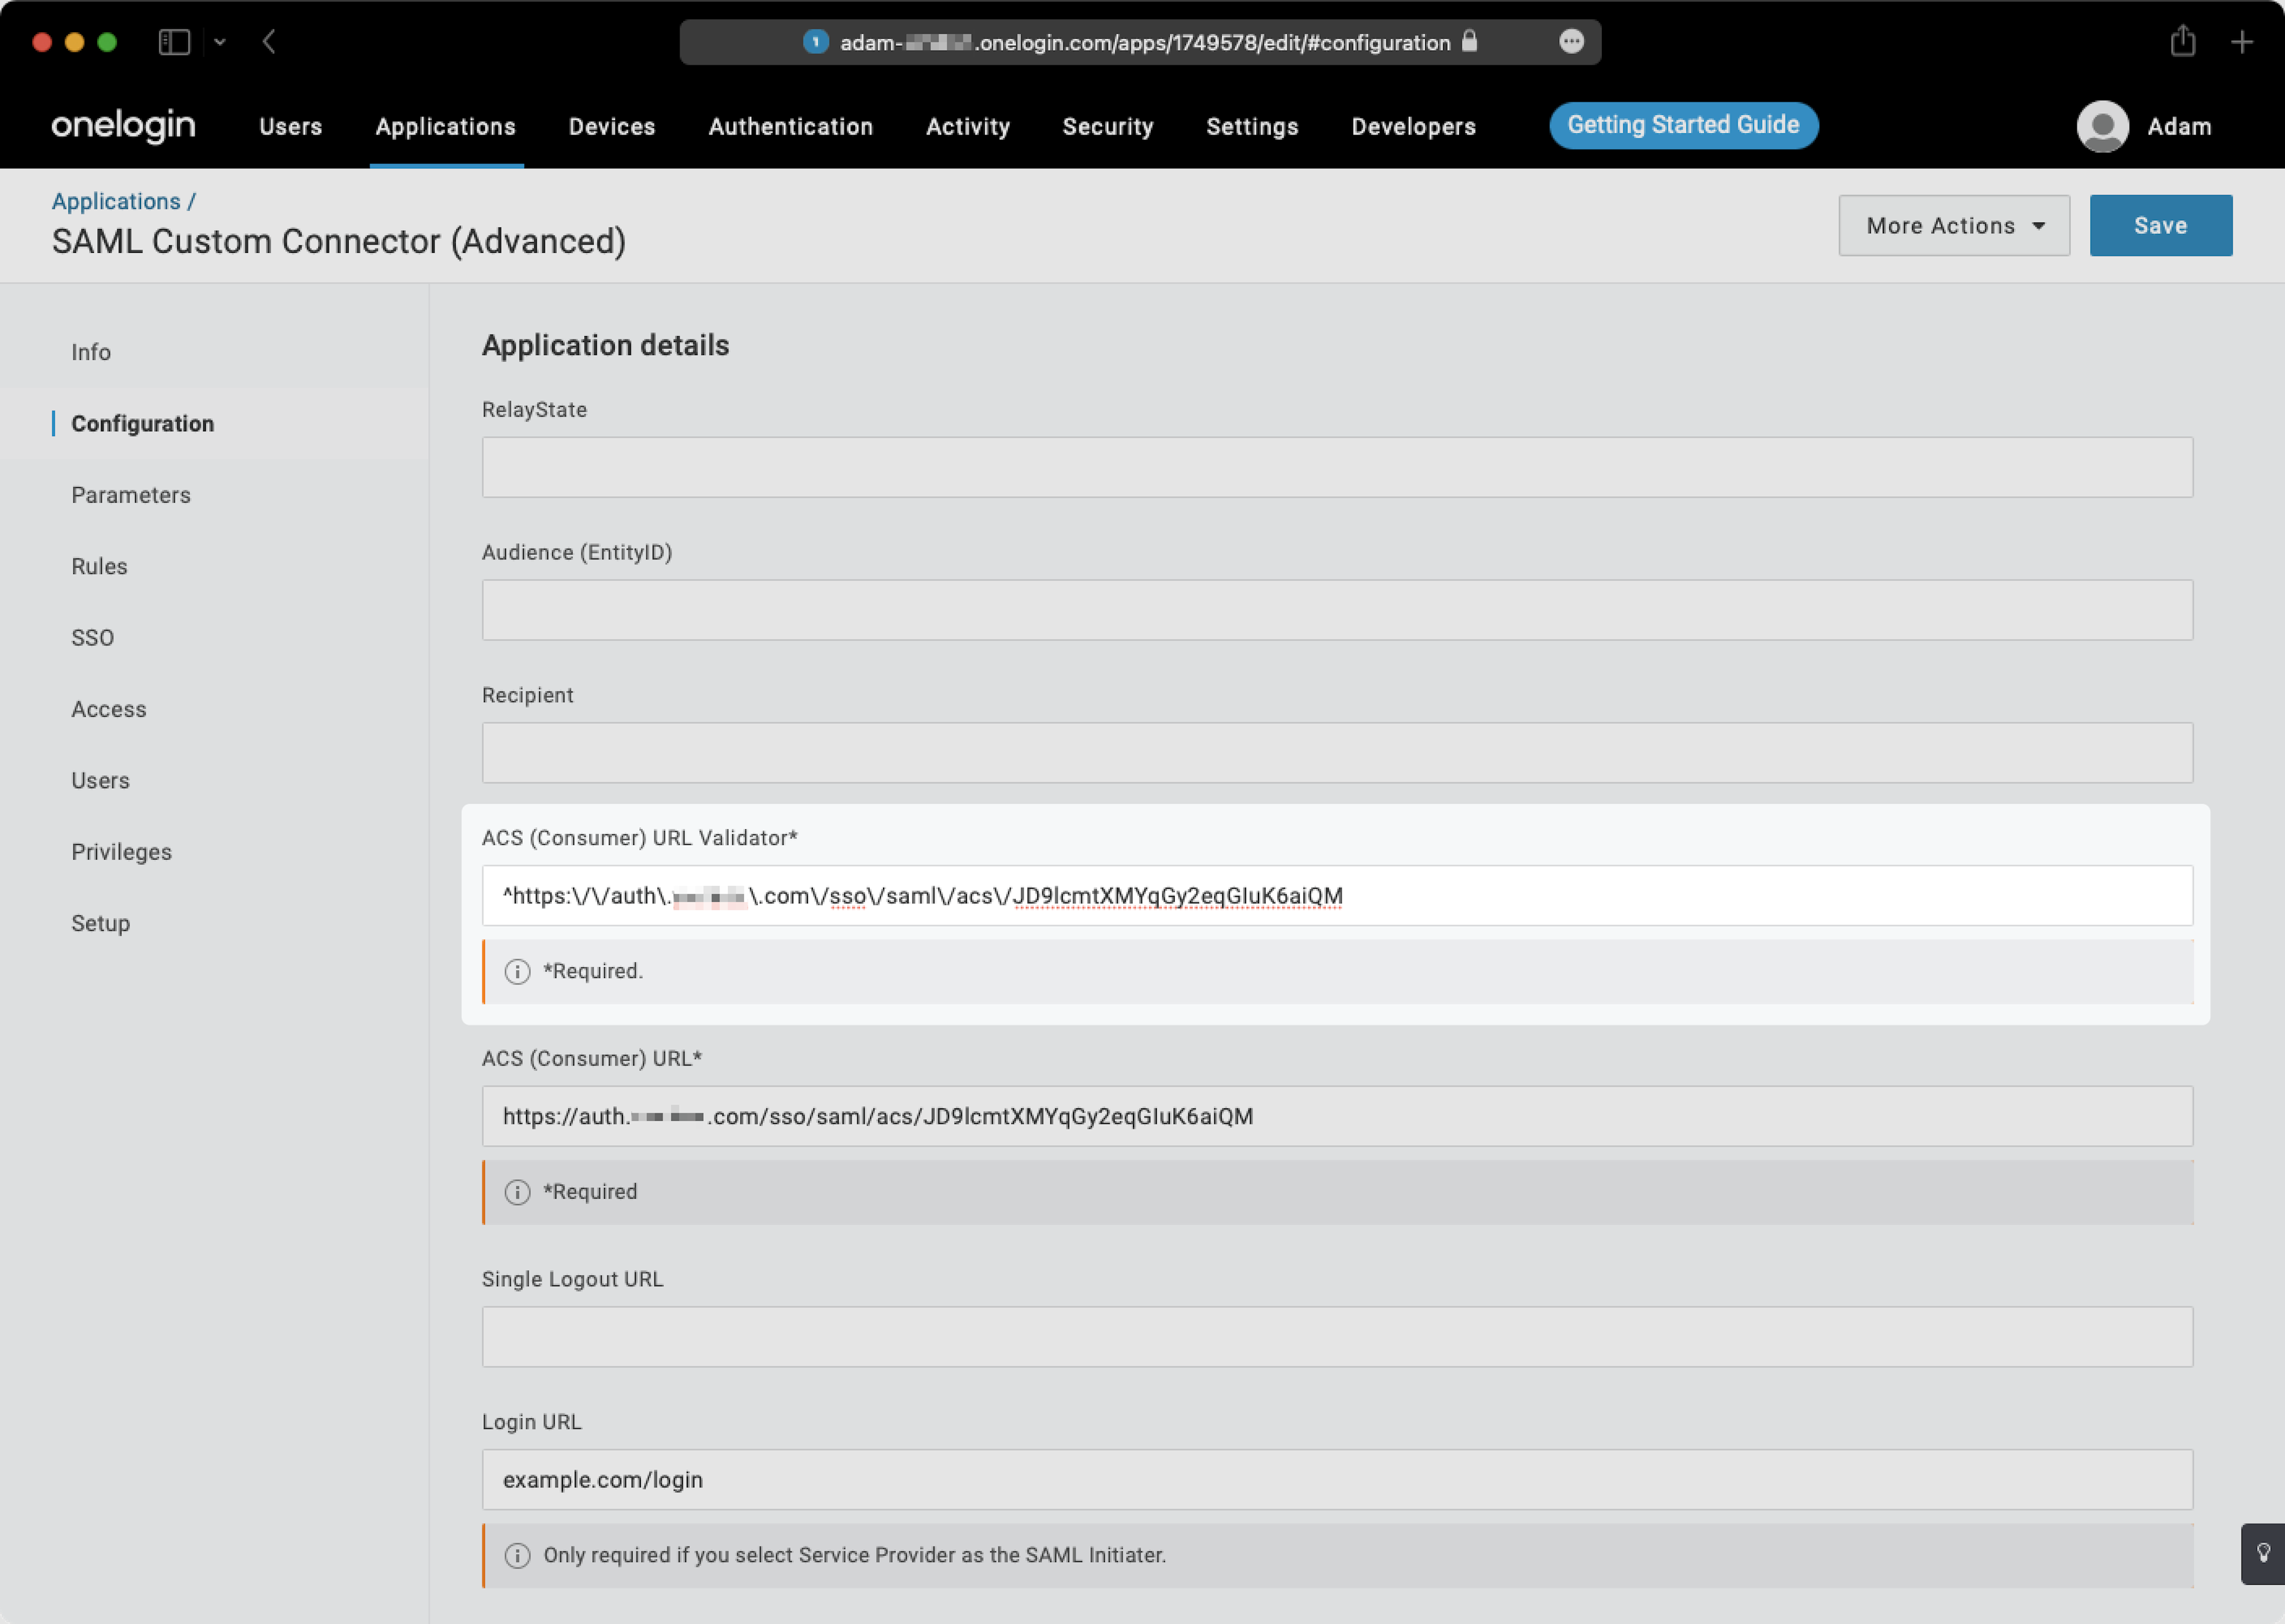
Input the "ACS URL" provided in your Spekit walkthrough into the corresponding text box.
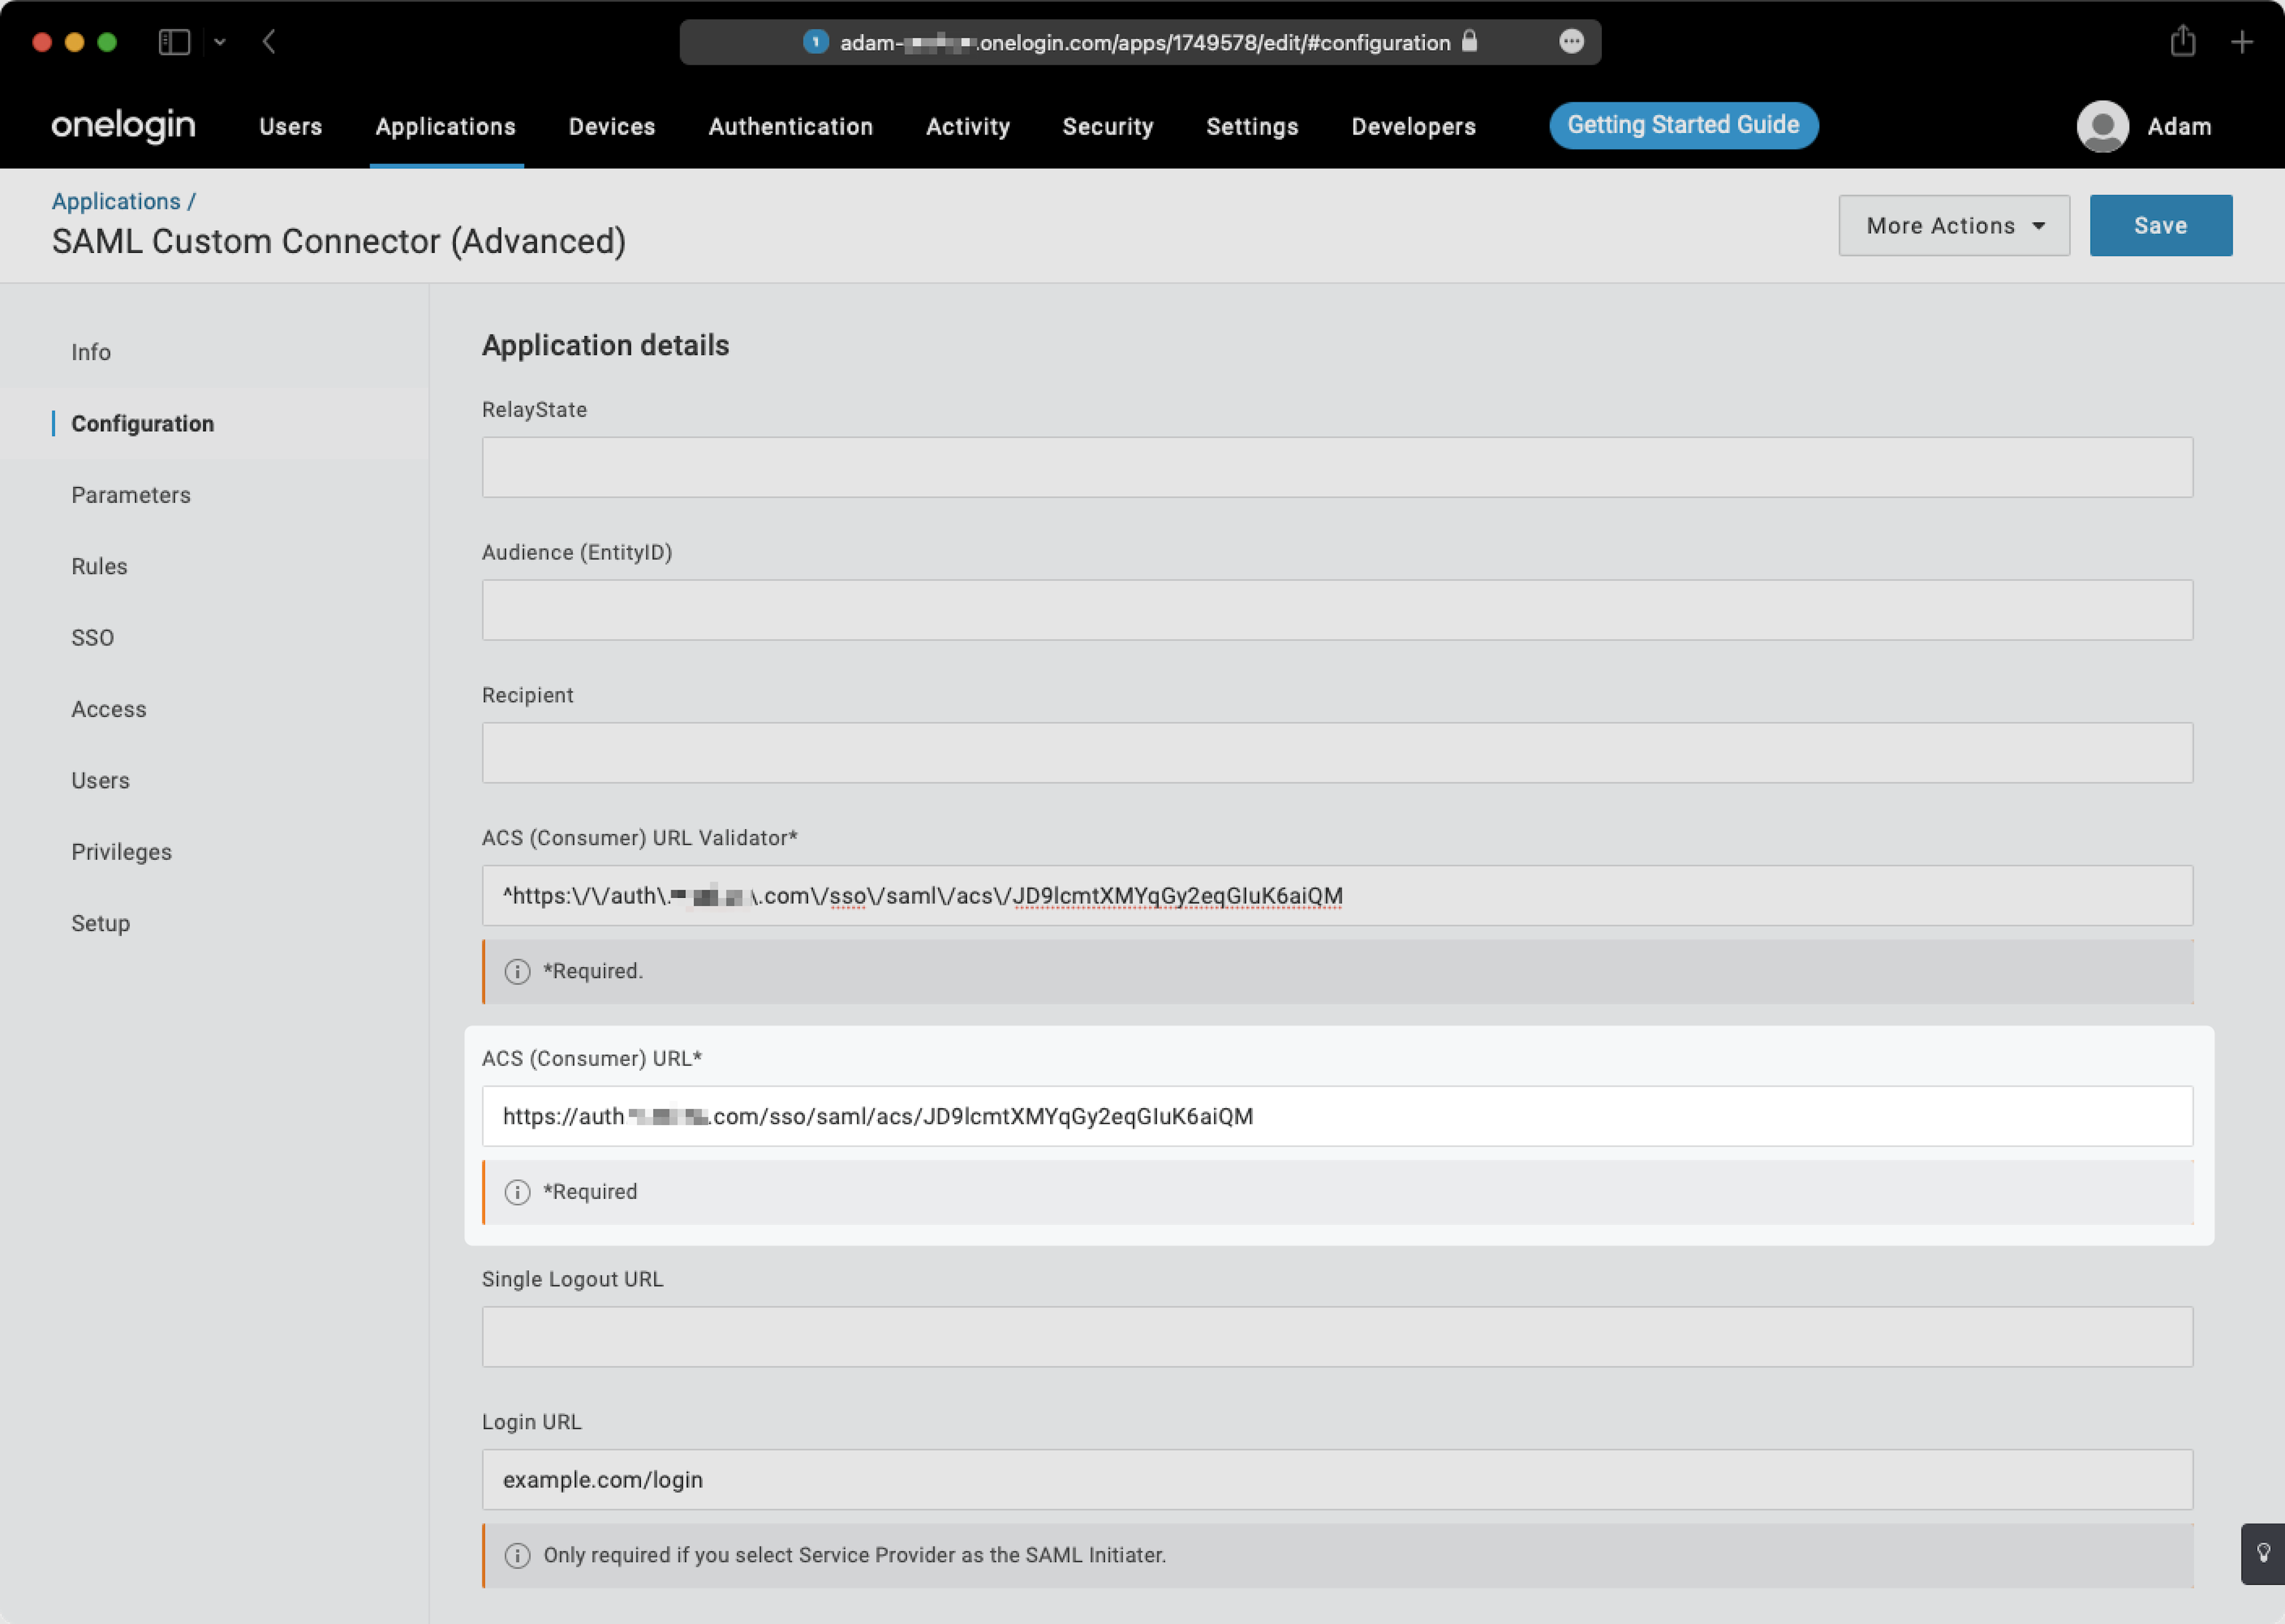
Make sure that the SAML initiator is set to "OneLogin" and the SAML signature element is set to "Assertion". This is not required but you can enter https://app.spekit.co/app/generate as the "Login URL".
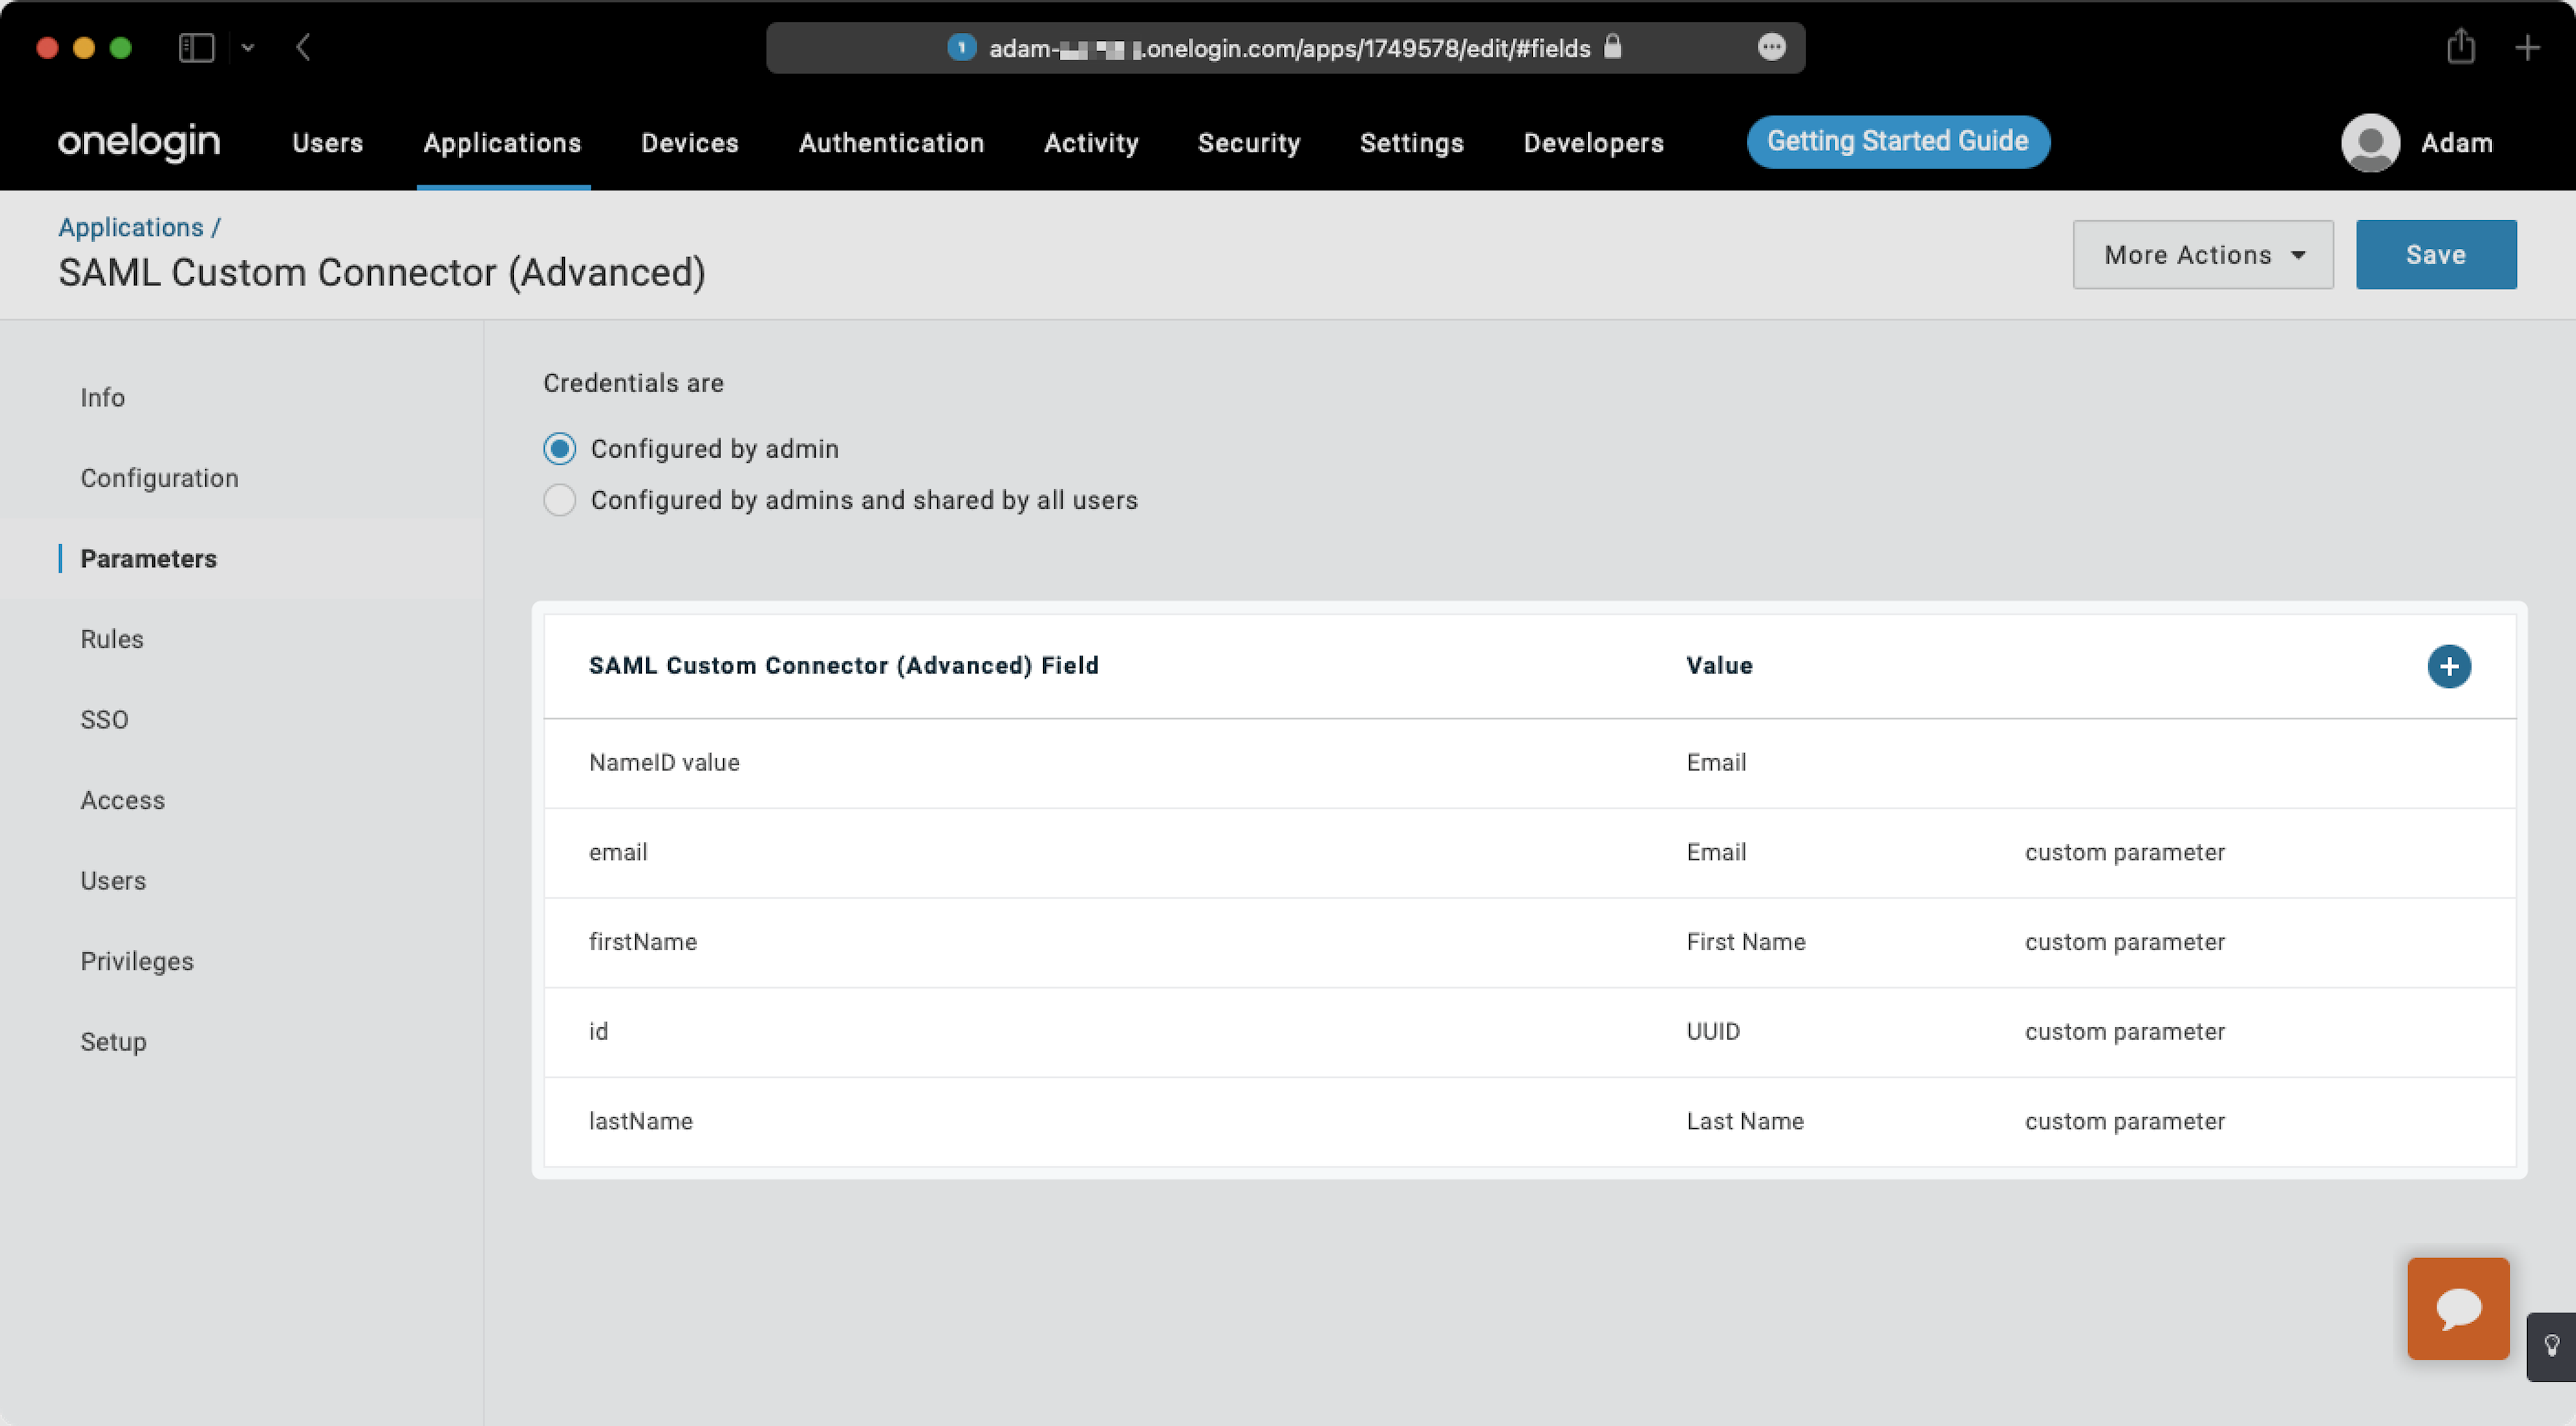
3) Configure Parameters
Add the following fields and mapped values on the "Parameters" settings page. Check the "Include in SAML assertion" flag for each pair of attributes.
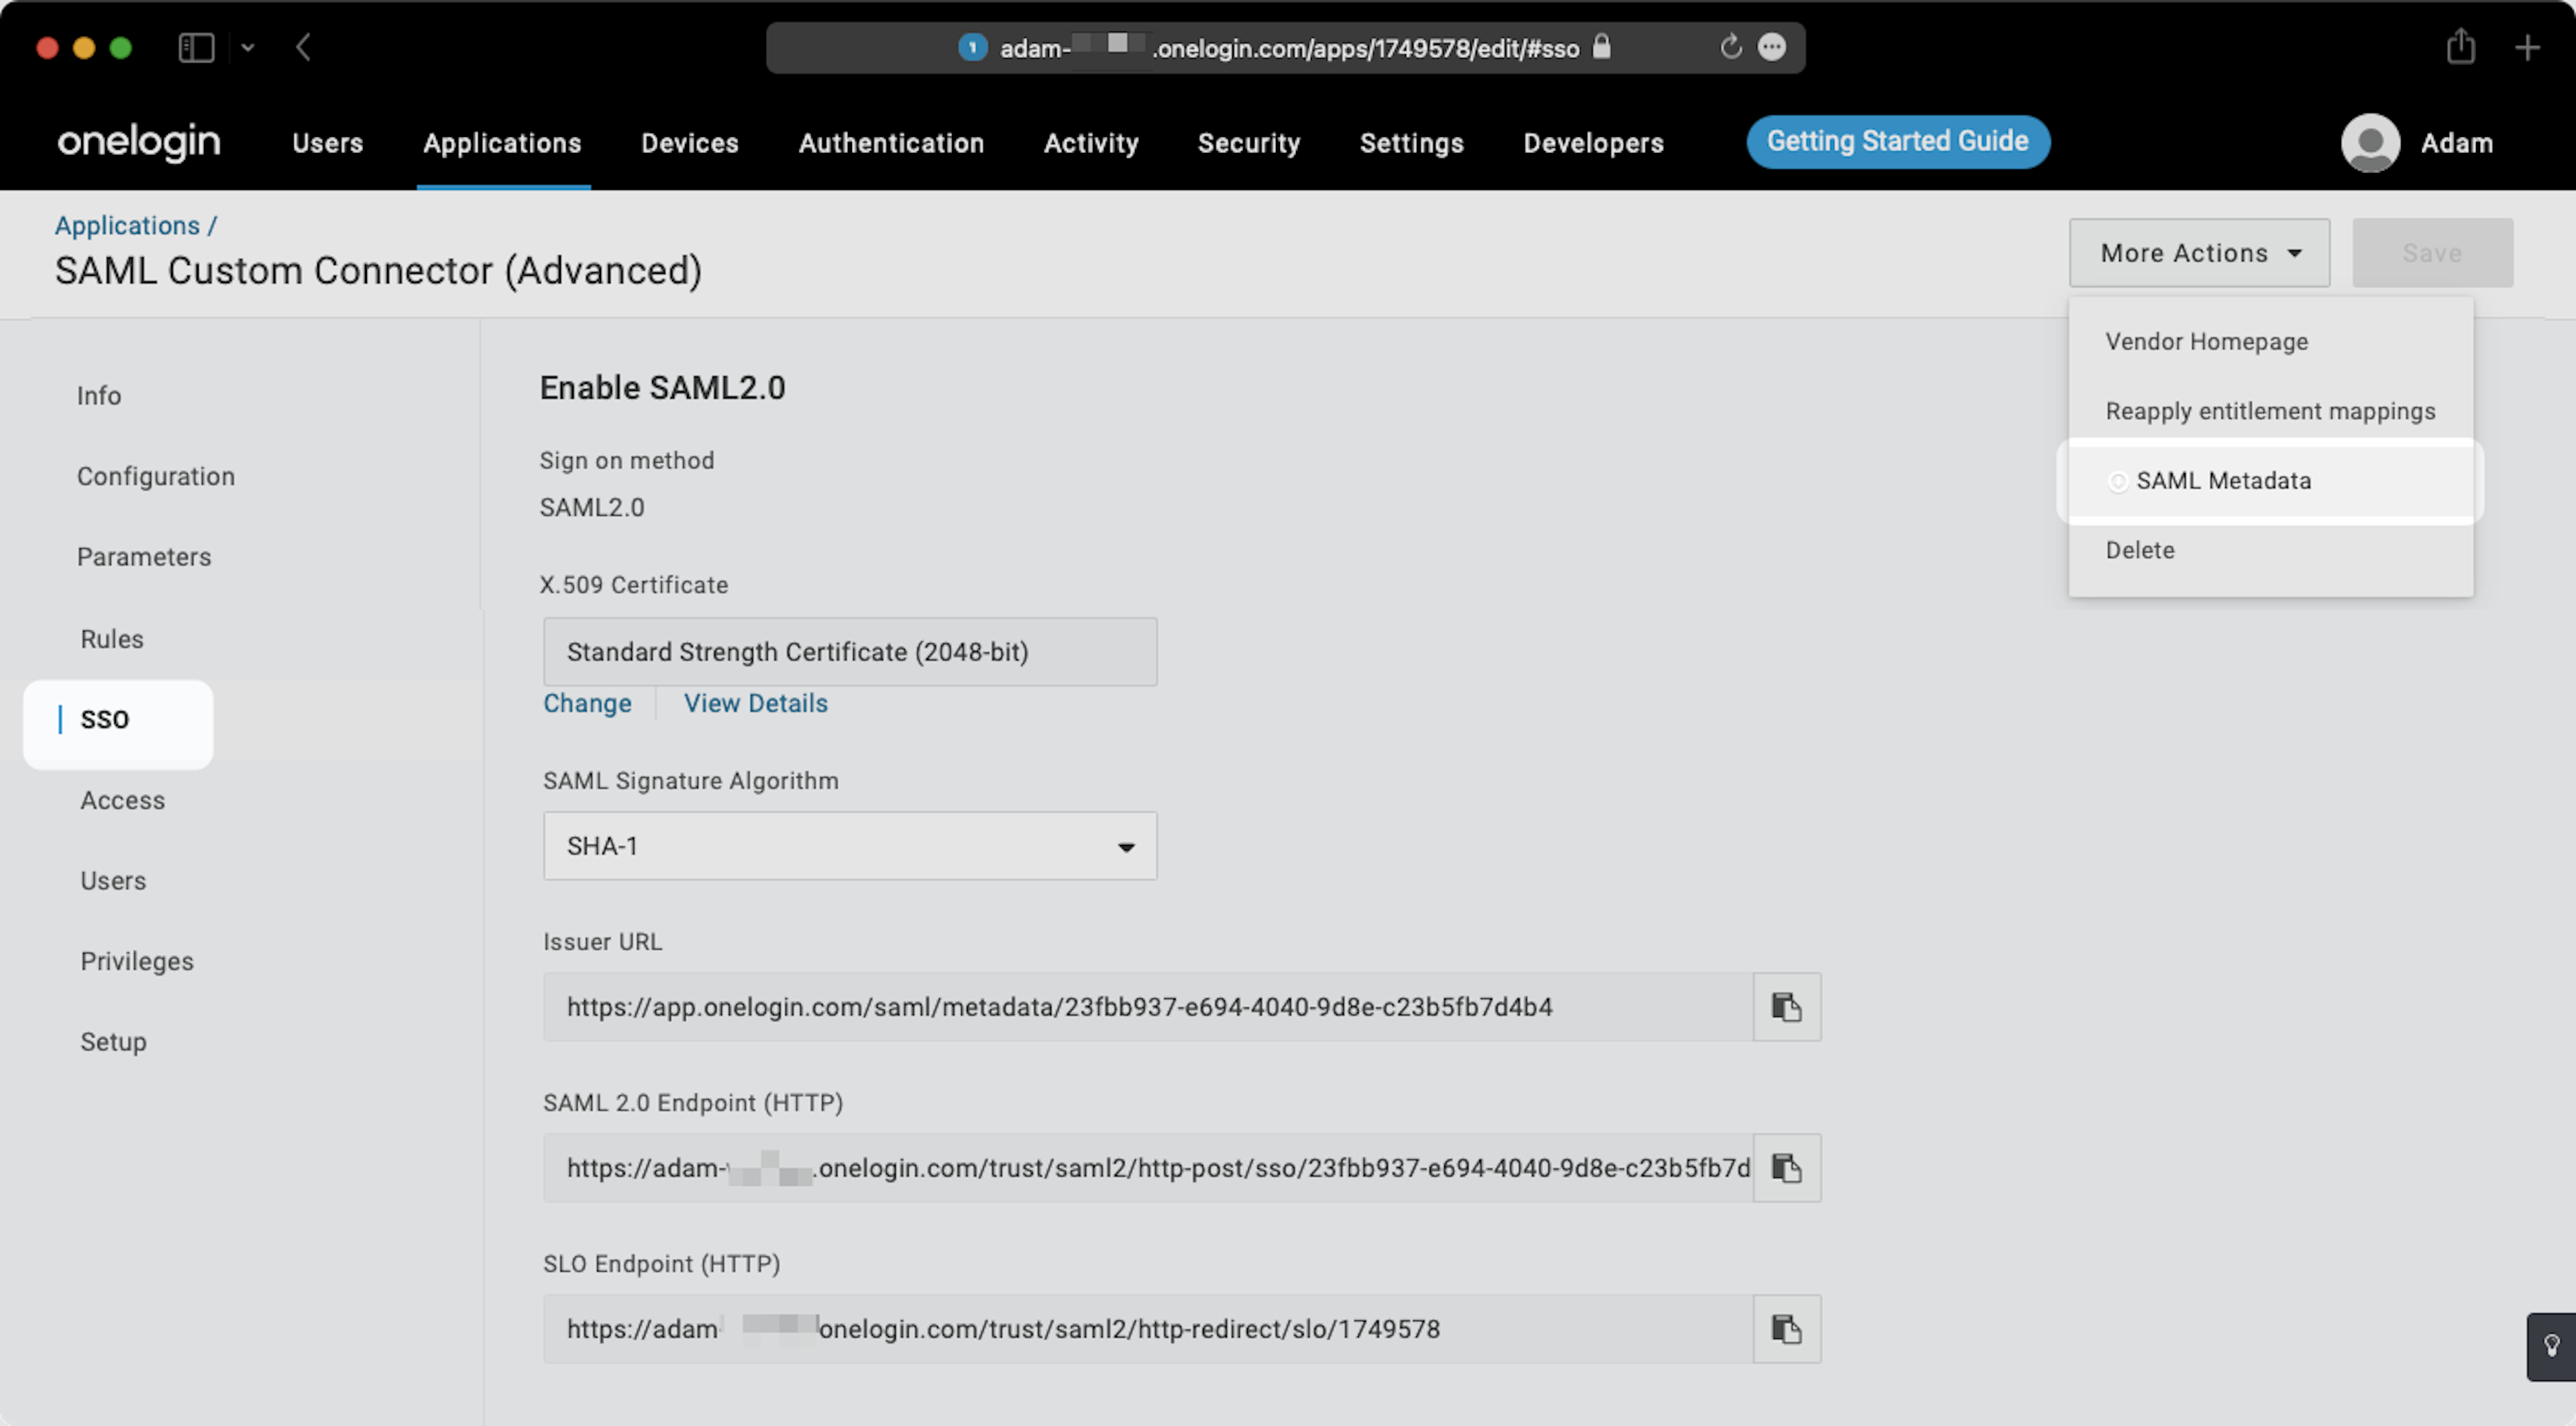
4) Upload Metadata File
Click on the "SSO" tab from the left sidebar. Click on the "More Actions" option in the top right and choose "SAML Metadata". An XML file will download that you'll need to upload into your Spekit walkthrough.
*Please note that in the next step of the in-app walkthrough, you can test the configuration. If you intend to use JIT user provisioning then you're done but you must notify Spekit Support that you'll be using that provisioning type. If you intend to use SCIM then there is now another walkthrough in Spekit for you to complete.