Setting up Microsoft Entra ID (Azure) SCIM provisioning with Spekit? This guide provides a general overview of how to create a SCIM application in Entra ID, configure admin credentials, set up attribute mapping, and sync users into Spekit.
⚠️ Important: This guide provides a general overview of the SSO connection process and should not be used as a step-by-step configuration guide. To set up SSO with Spekit, go to the Connect page within your Spekit Web App and proceed through the in-app setup walkthrough.
📌 Quick-Jump Topics
- Step 1: Create an Entra ID SCIM Application: Setting up a new SCIM app in Azure
- Step 2: Configure SCIM Admin Credentials: Connecting the SCIM app to Spekit
- Step 3: Set Up and Enable Attribute Mapping: Ensuring user and group fields sync correctly
- Step 4: Assign Users to the Spekit SCIM App: Syncing users and groups into Spekit
Step 1: Create an Entra ID SCIM Application
How do I create a new SCIM application in Microsoft Entra ID?
- From your Enterprise Application dashboard, click New Application.

- Click Create your own application.
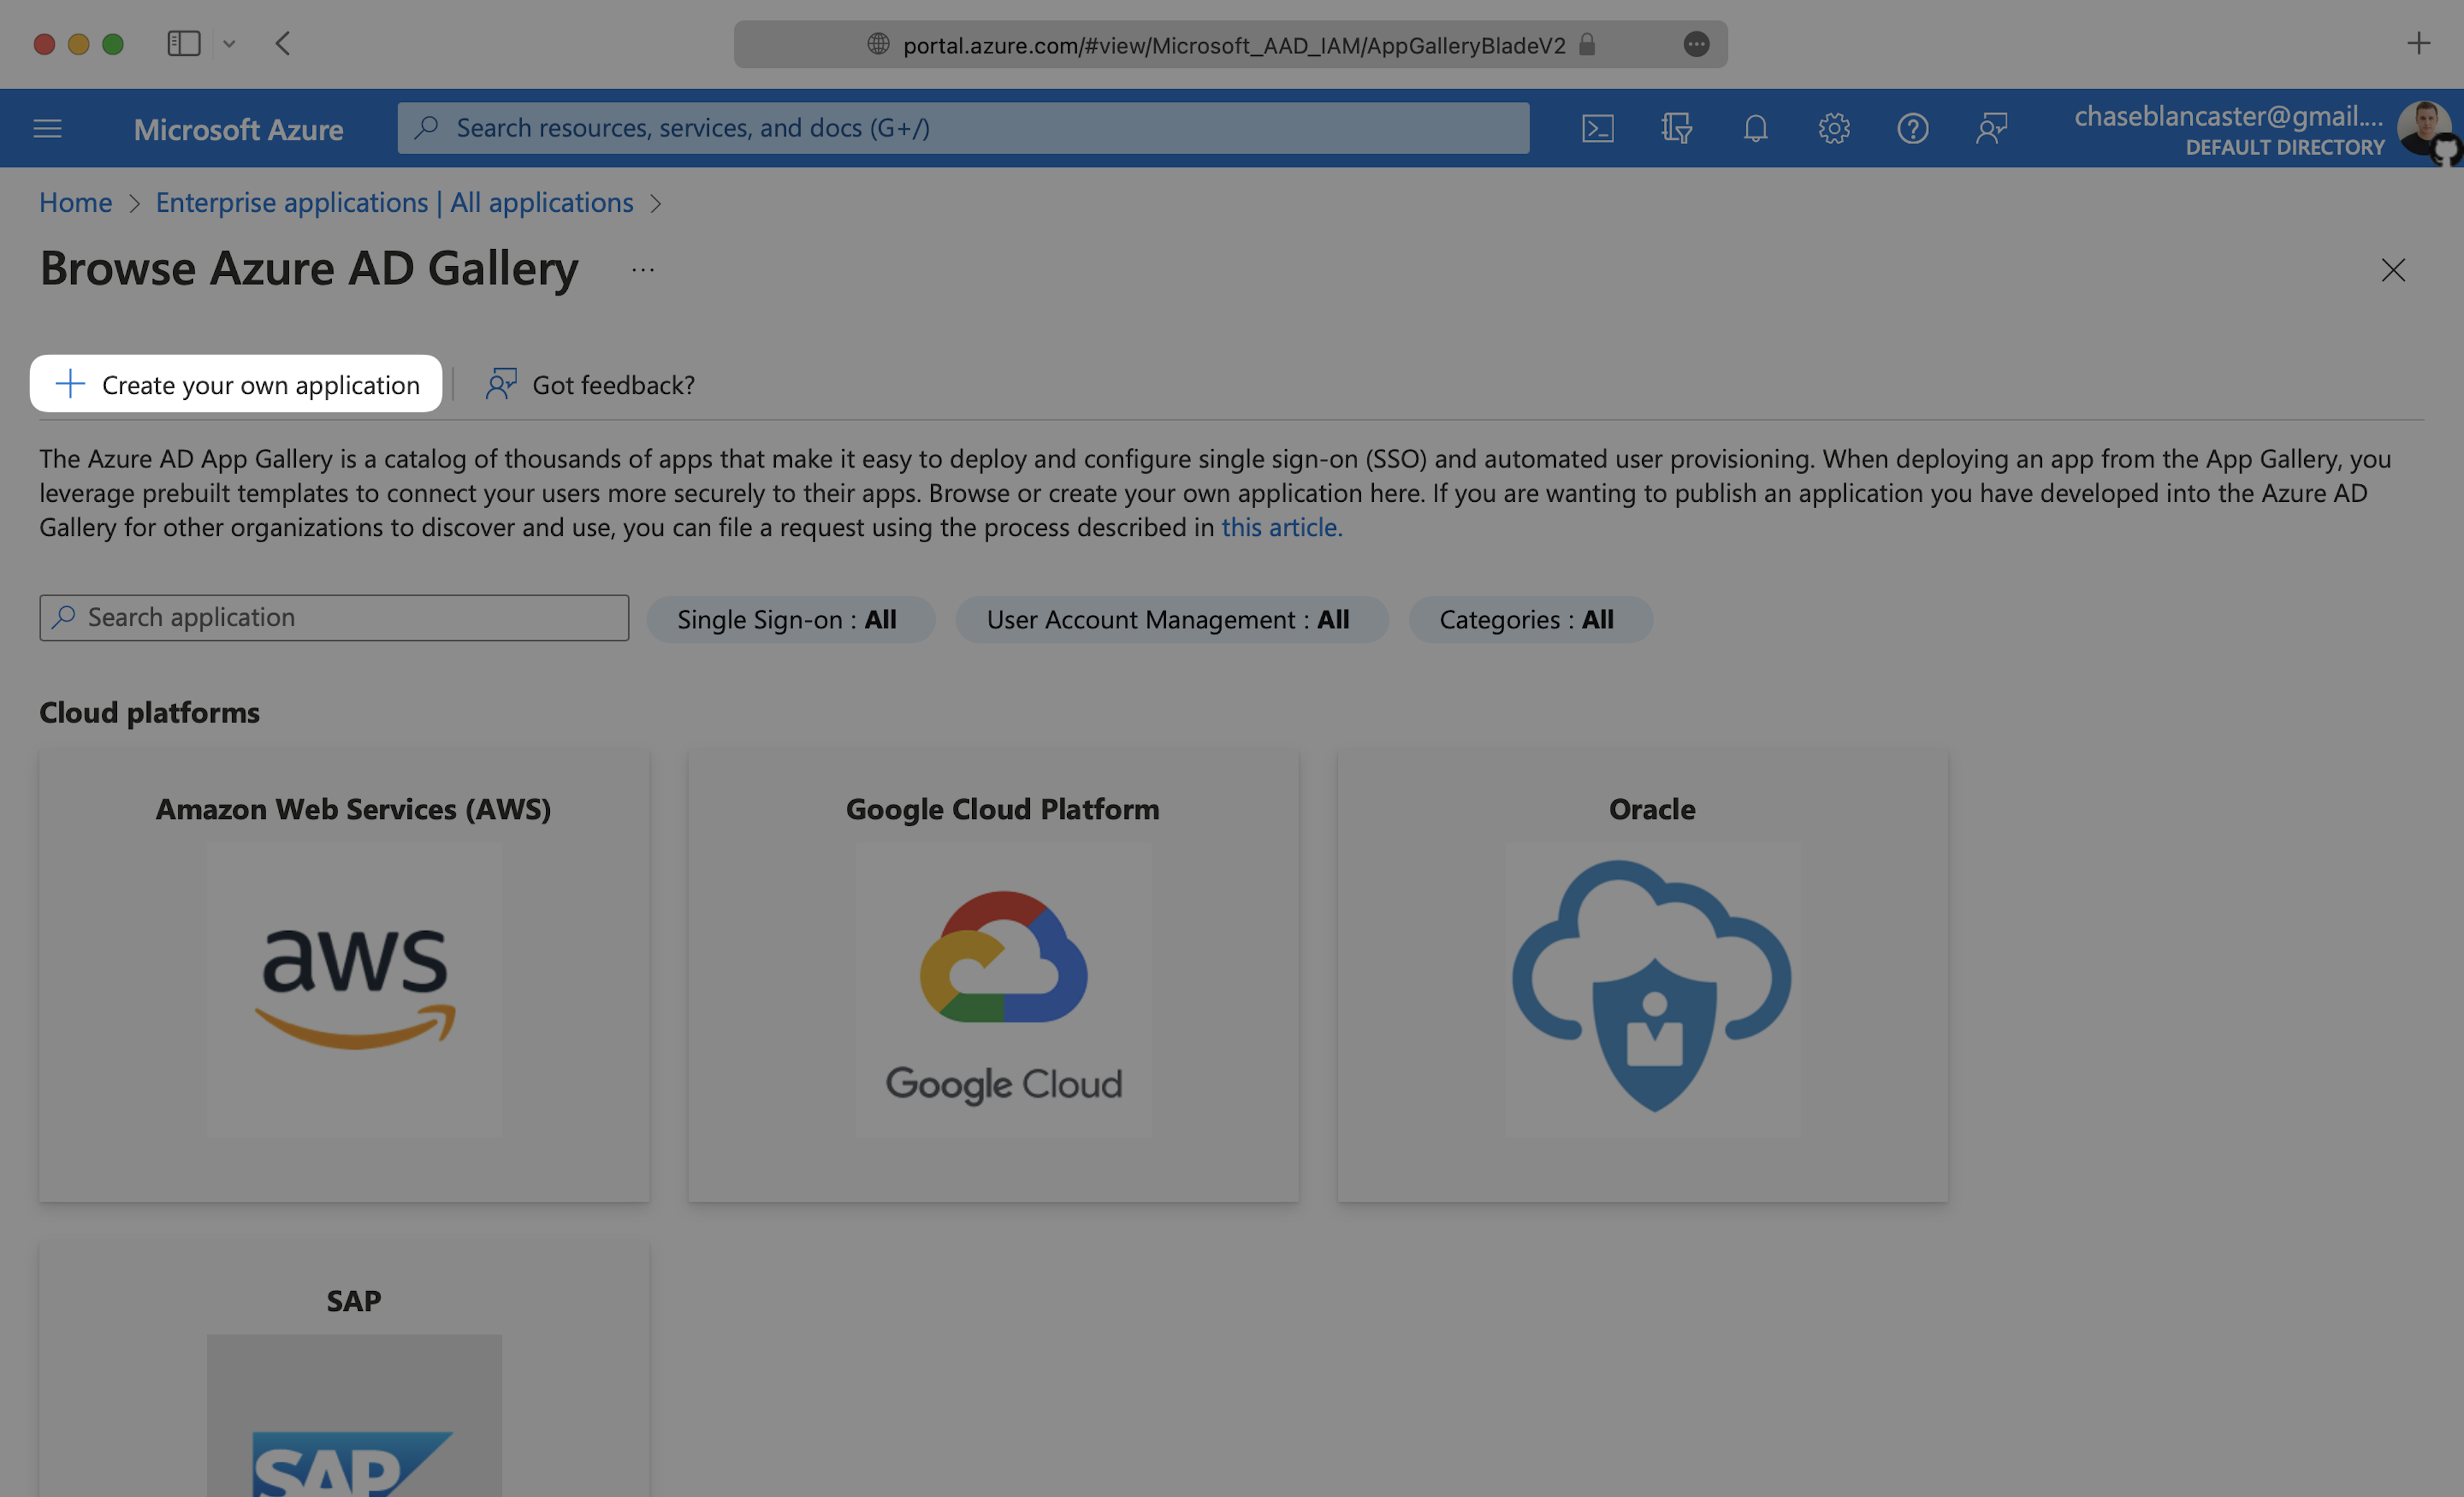
- Give your application a descriptive name such as Spekit SCIM.
- Select Integrate any other application you don't find in the gallery (Non-gallery).
- Click Create.

Step 2: Configure SCIM Admin Credentials
How do I connect the SCIM application to Spekit?
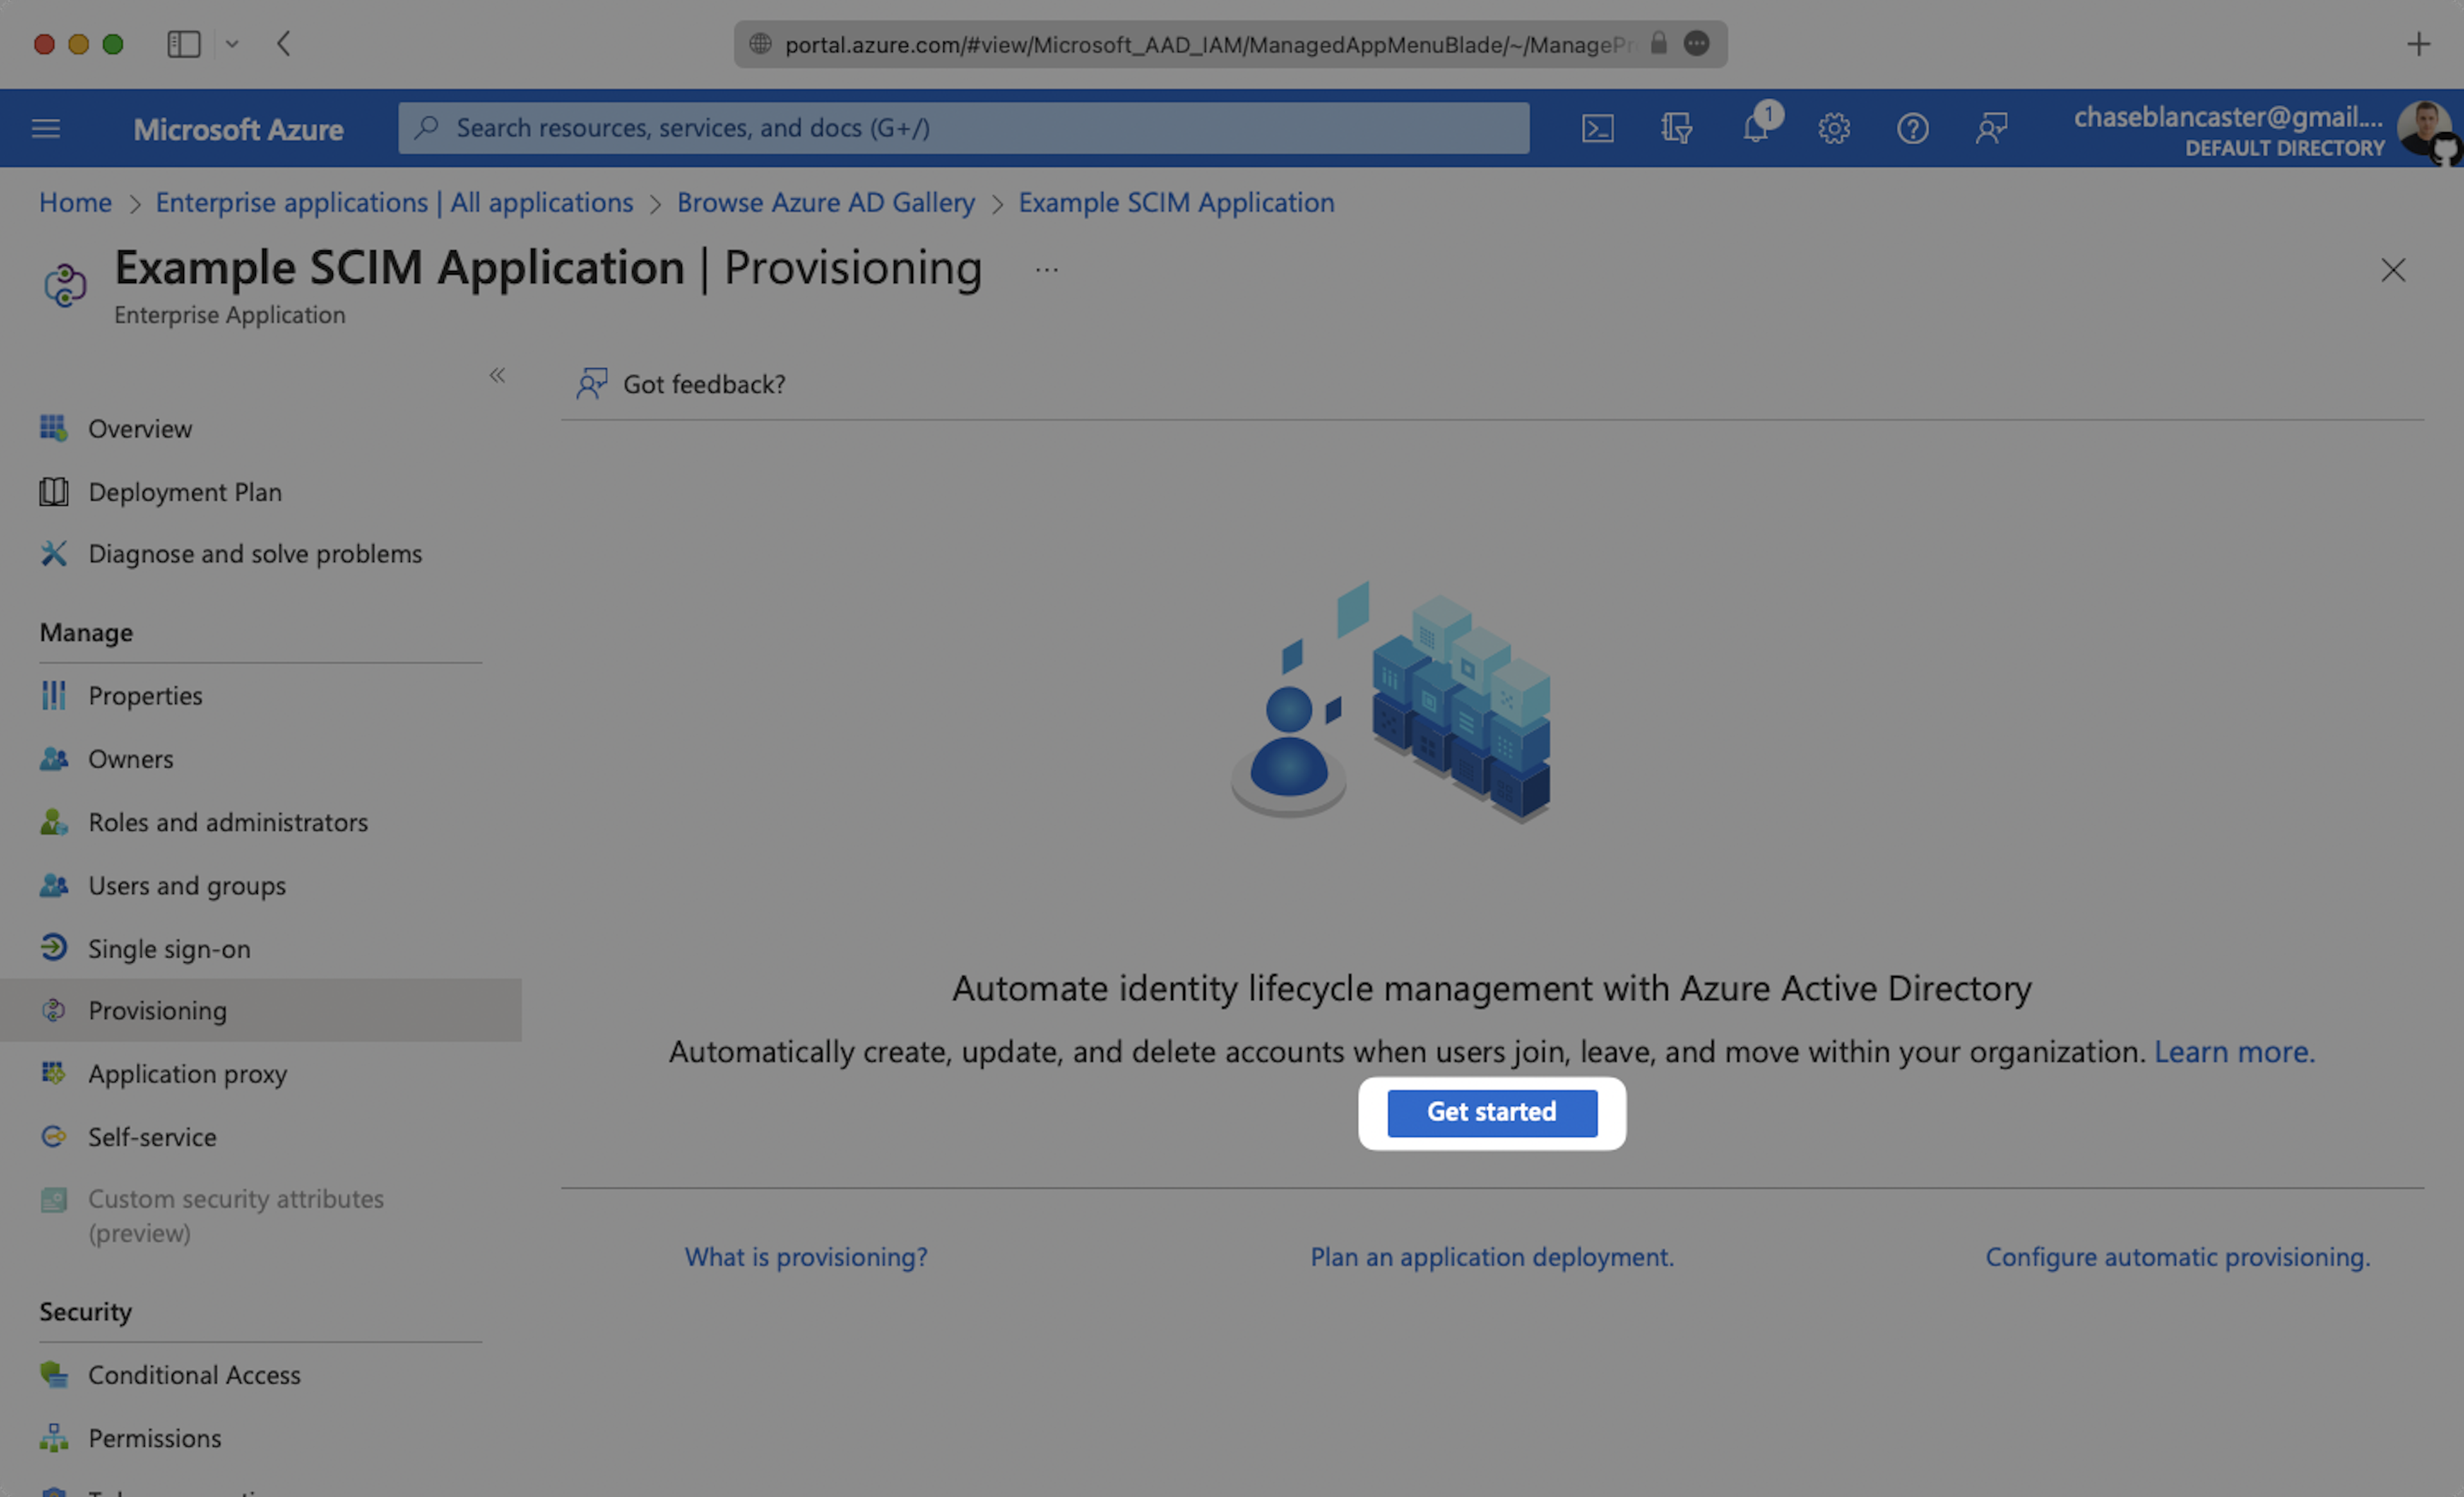
- In the left sidebar under the Manage section, click Provisioning.
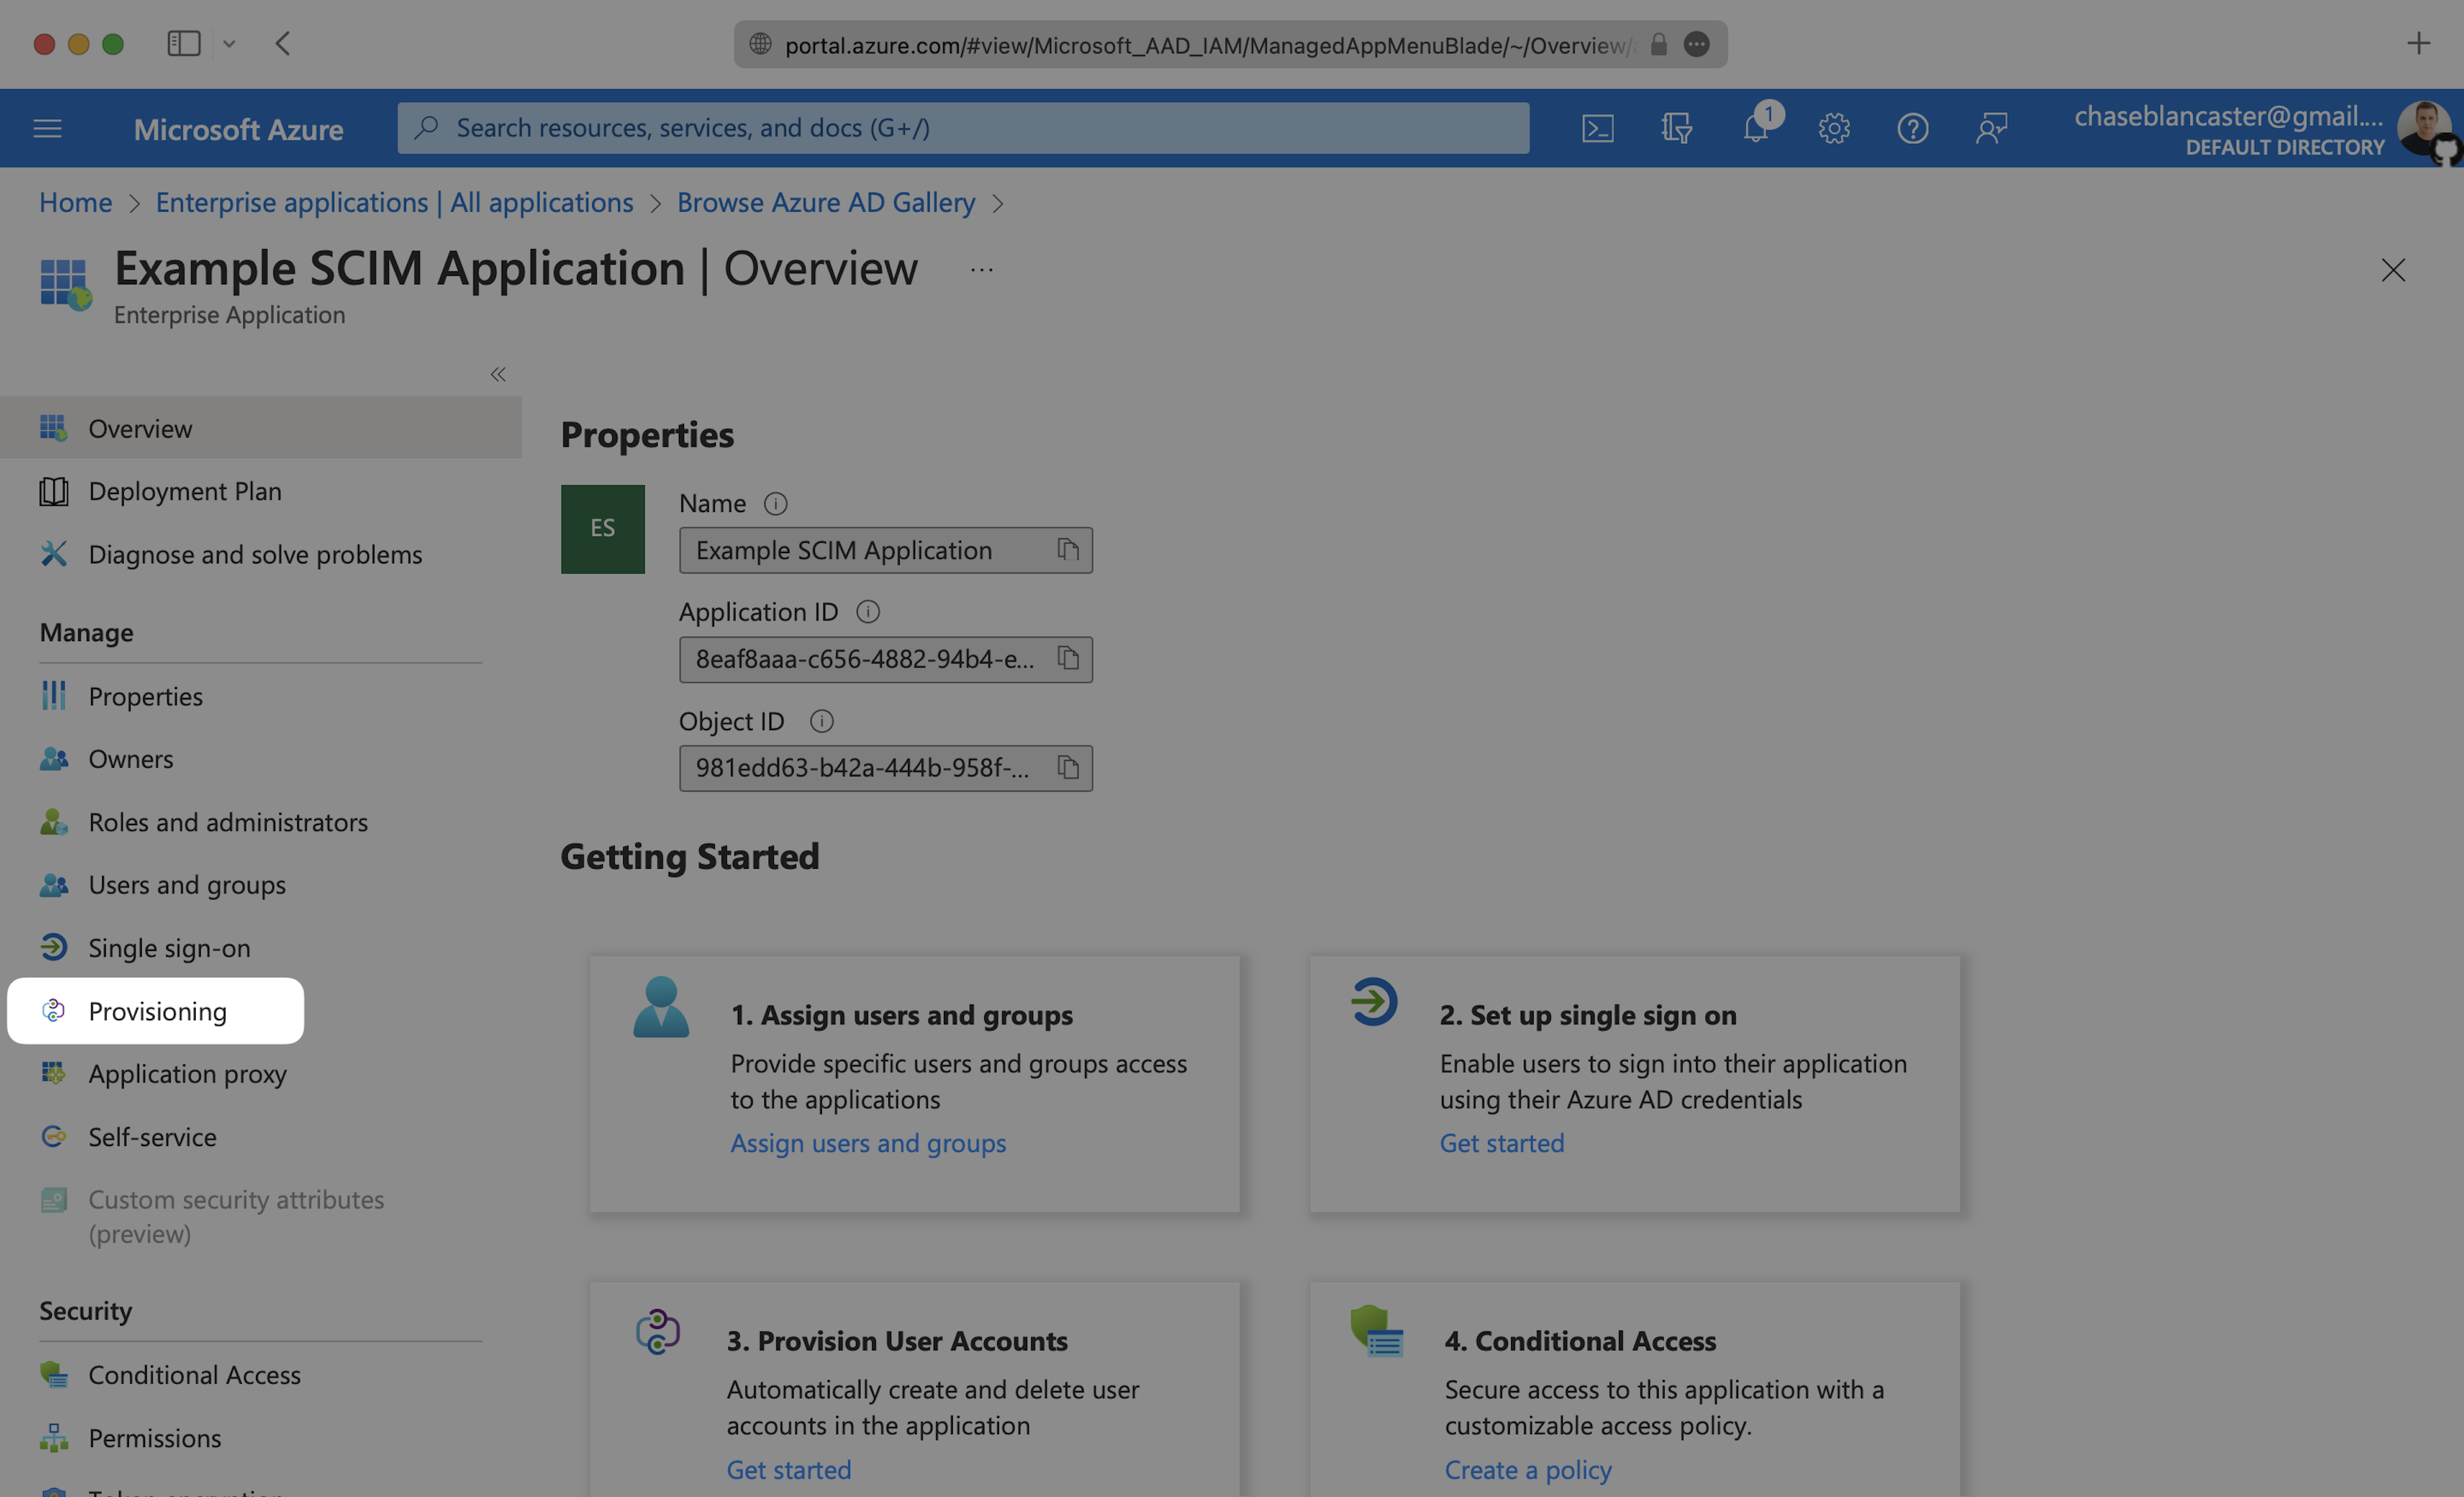
- Click Get Started.
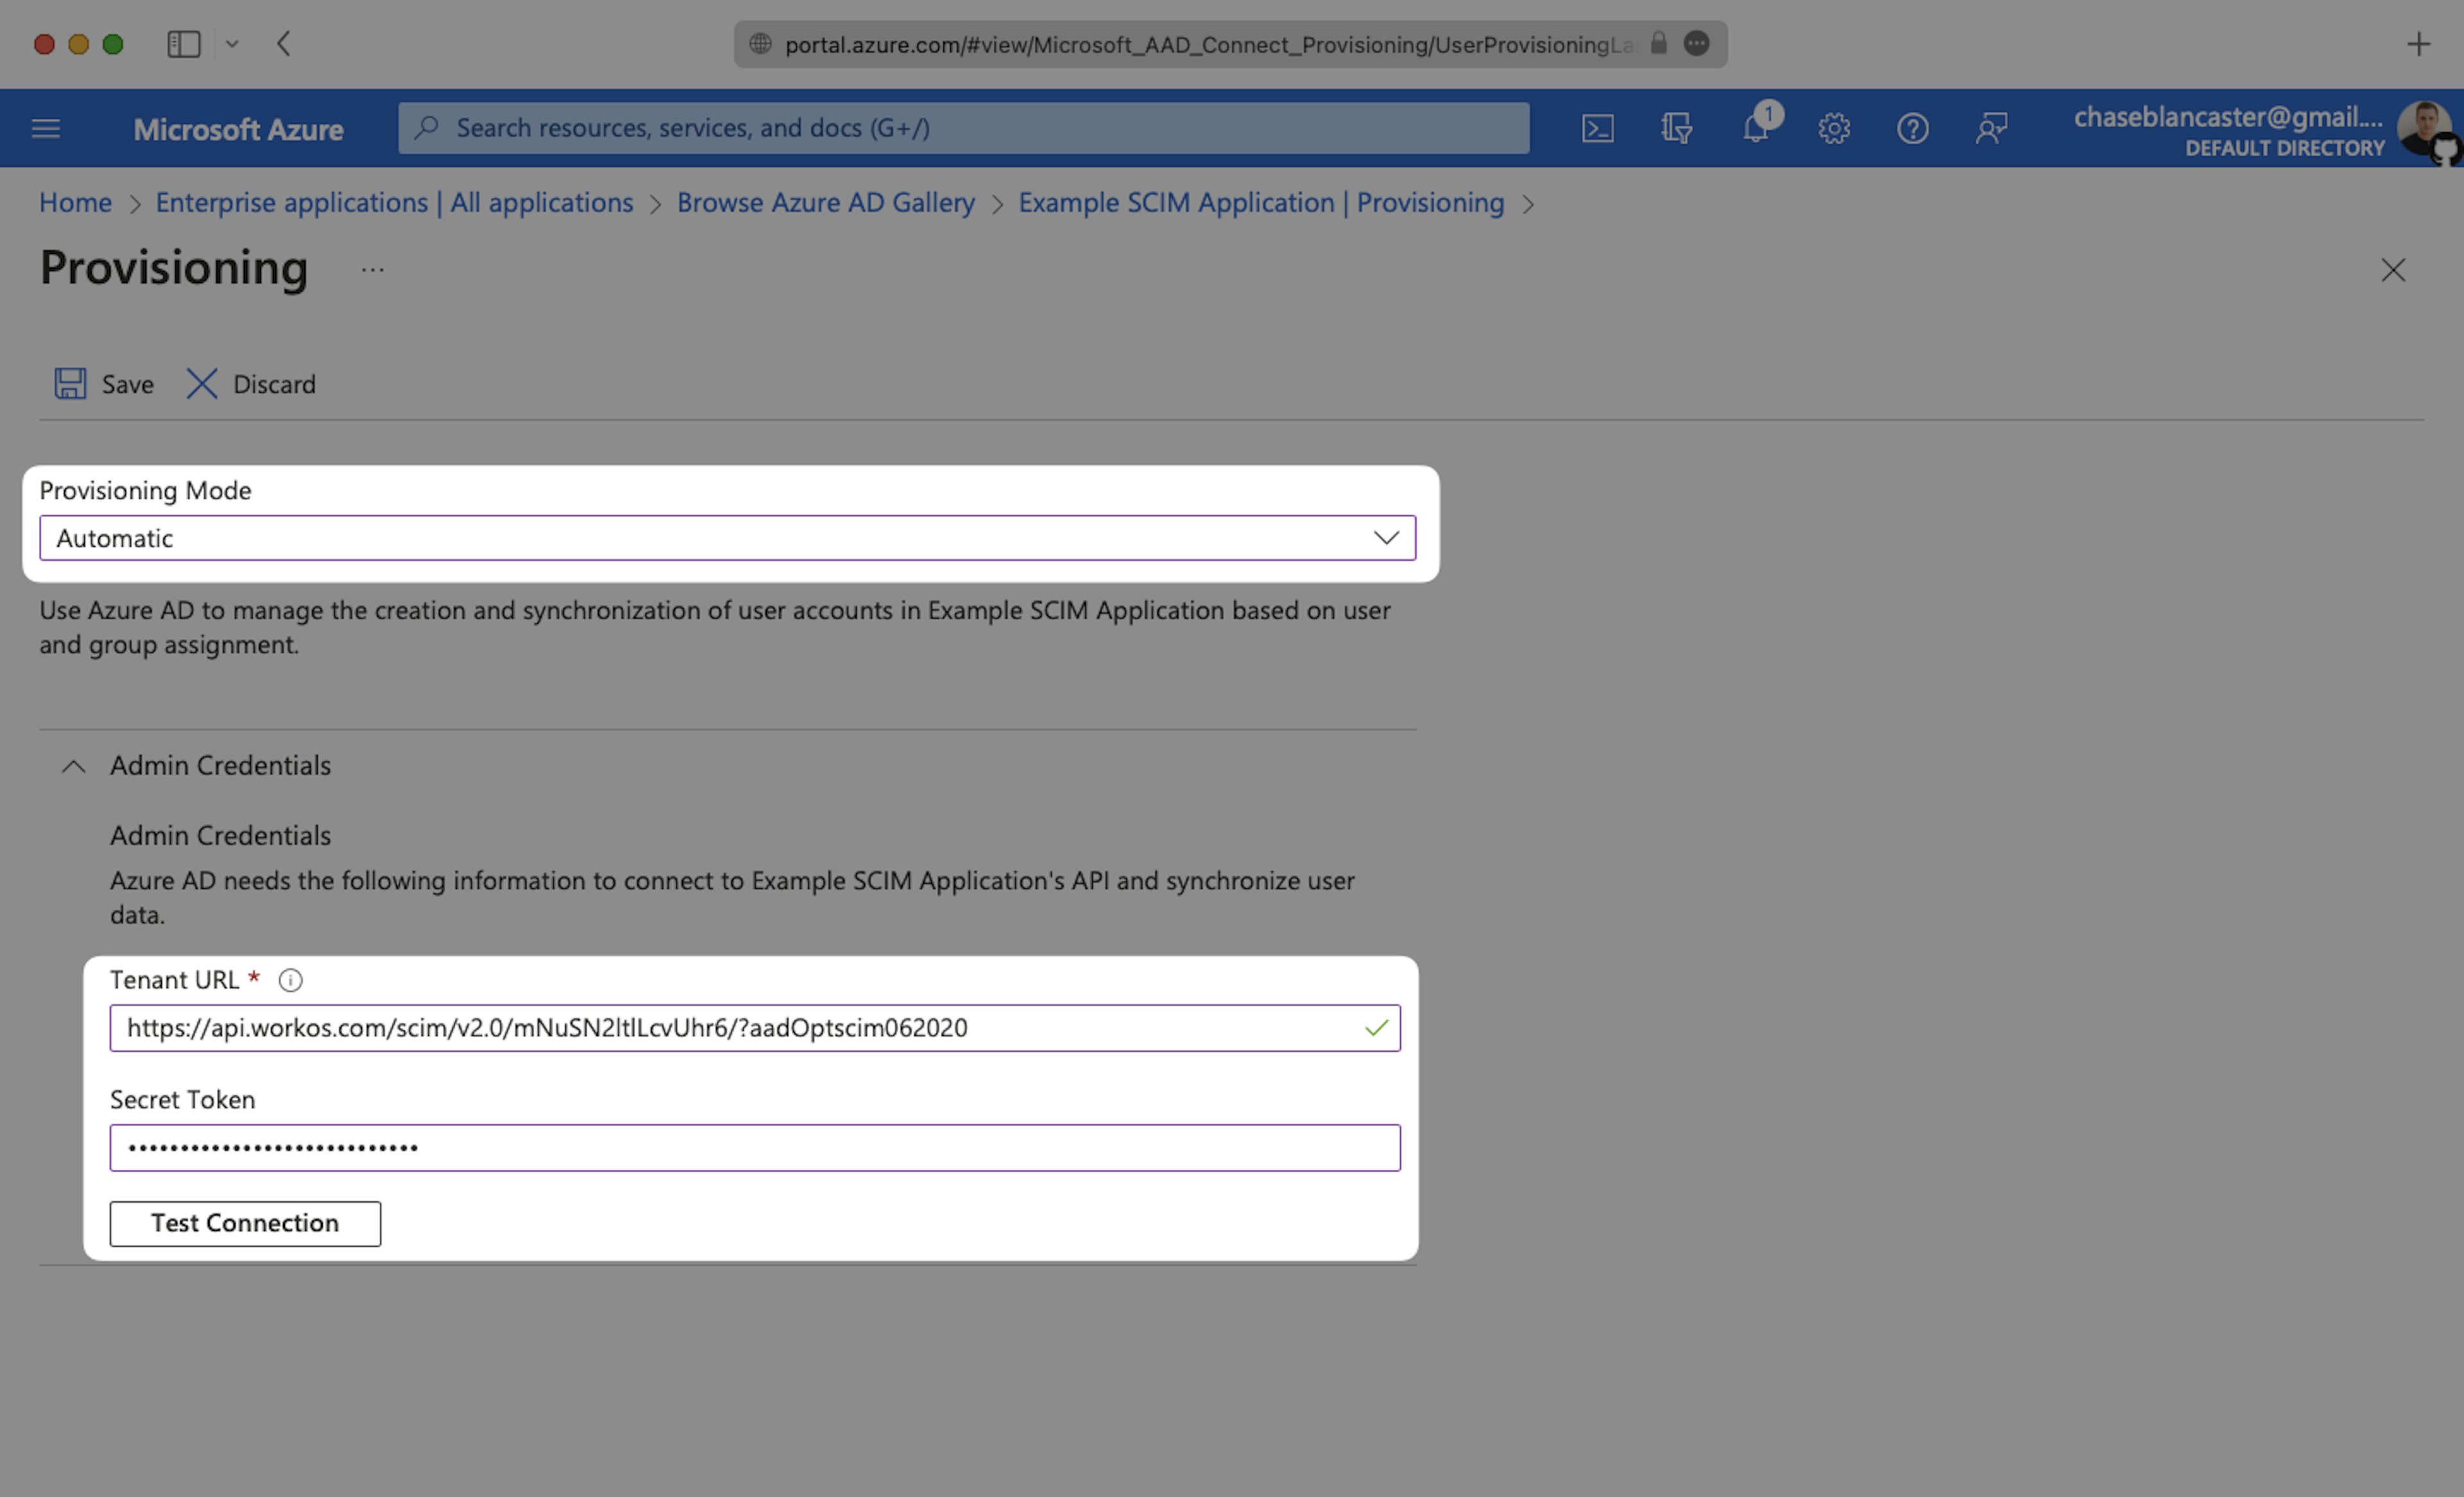
- Set the Provisioning Mode to Automatic from the dropdown menu.
- Copy the Tenant URL from your Spekit in-app walkthrough and paste it into the corresponding field.
- Copy the Secret Token from your Spekit in-app walkthrough and paste it into the corresponding field.
- Click Test Connection to verify the Tenant URL and Token are correct.
- Once confirmed, click Save.
Step 3: Set Up and Enable Attribute Mapping
How do I ensure user and group fields are mapped correctly?
- Expand the Mappings section on the Provisioning page.
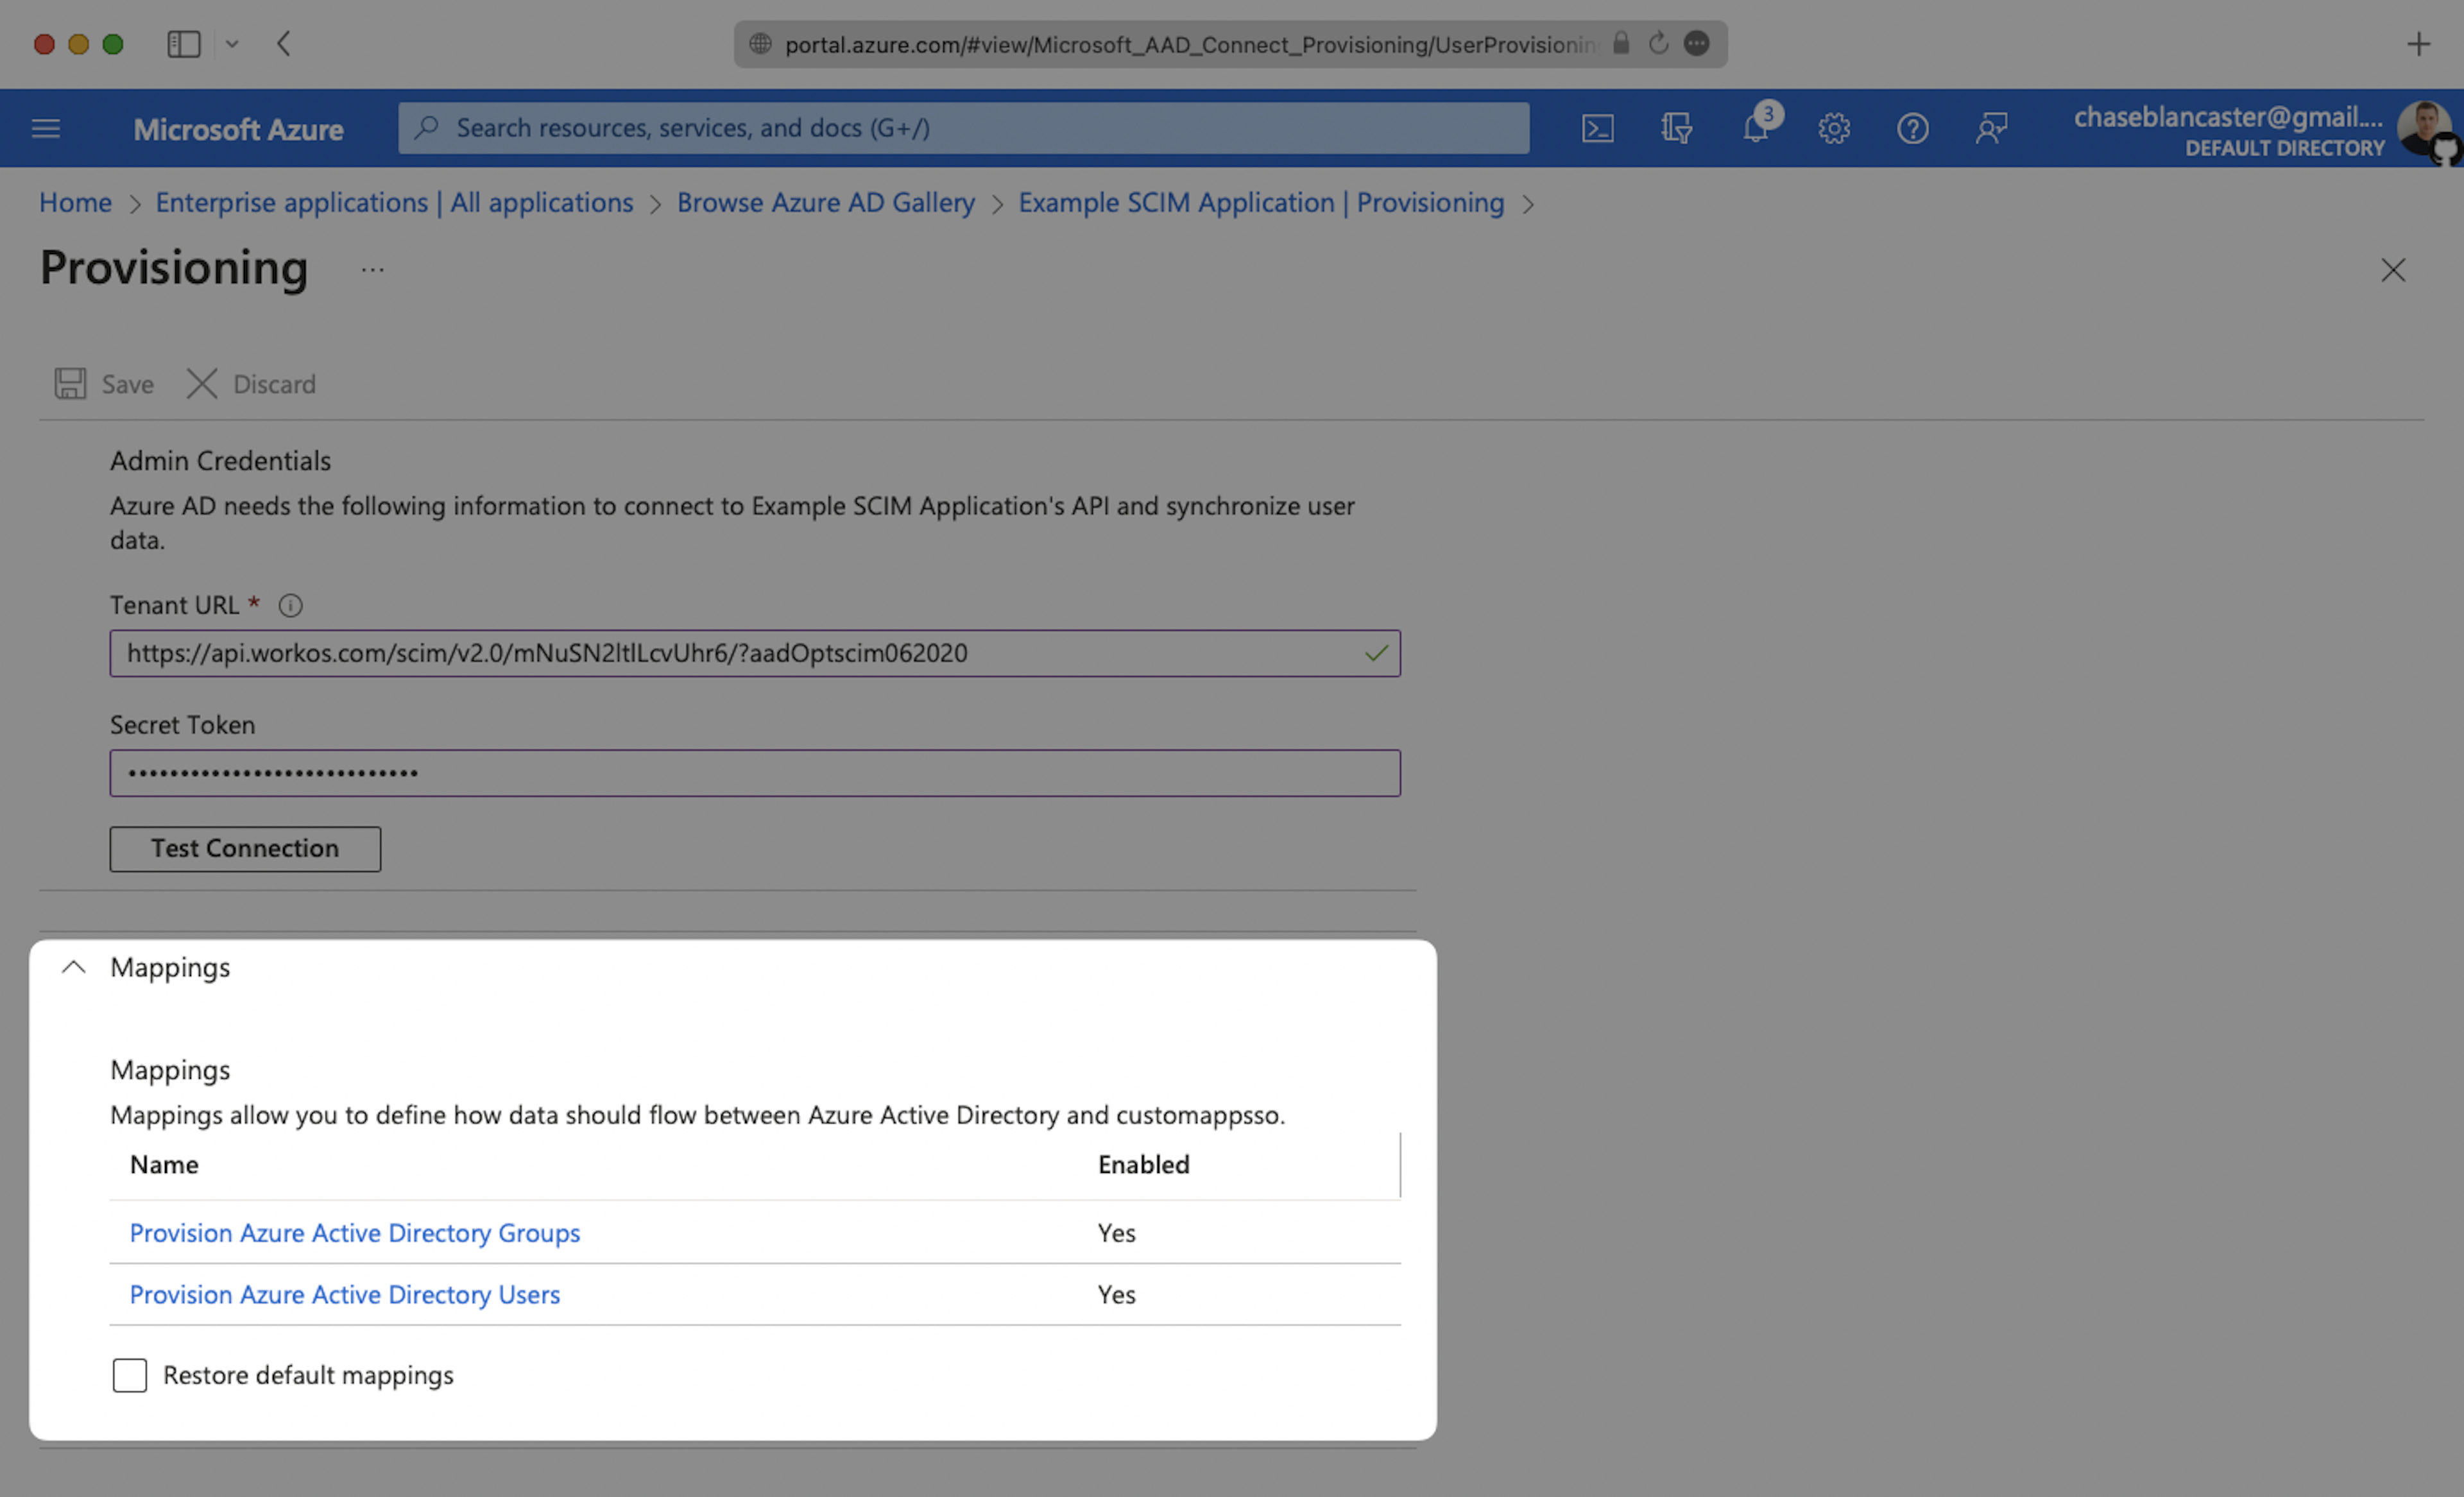
- Confirm that both the group and user attribute mappings are enabled and mapping the correct fields.
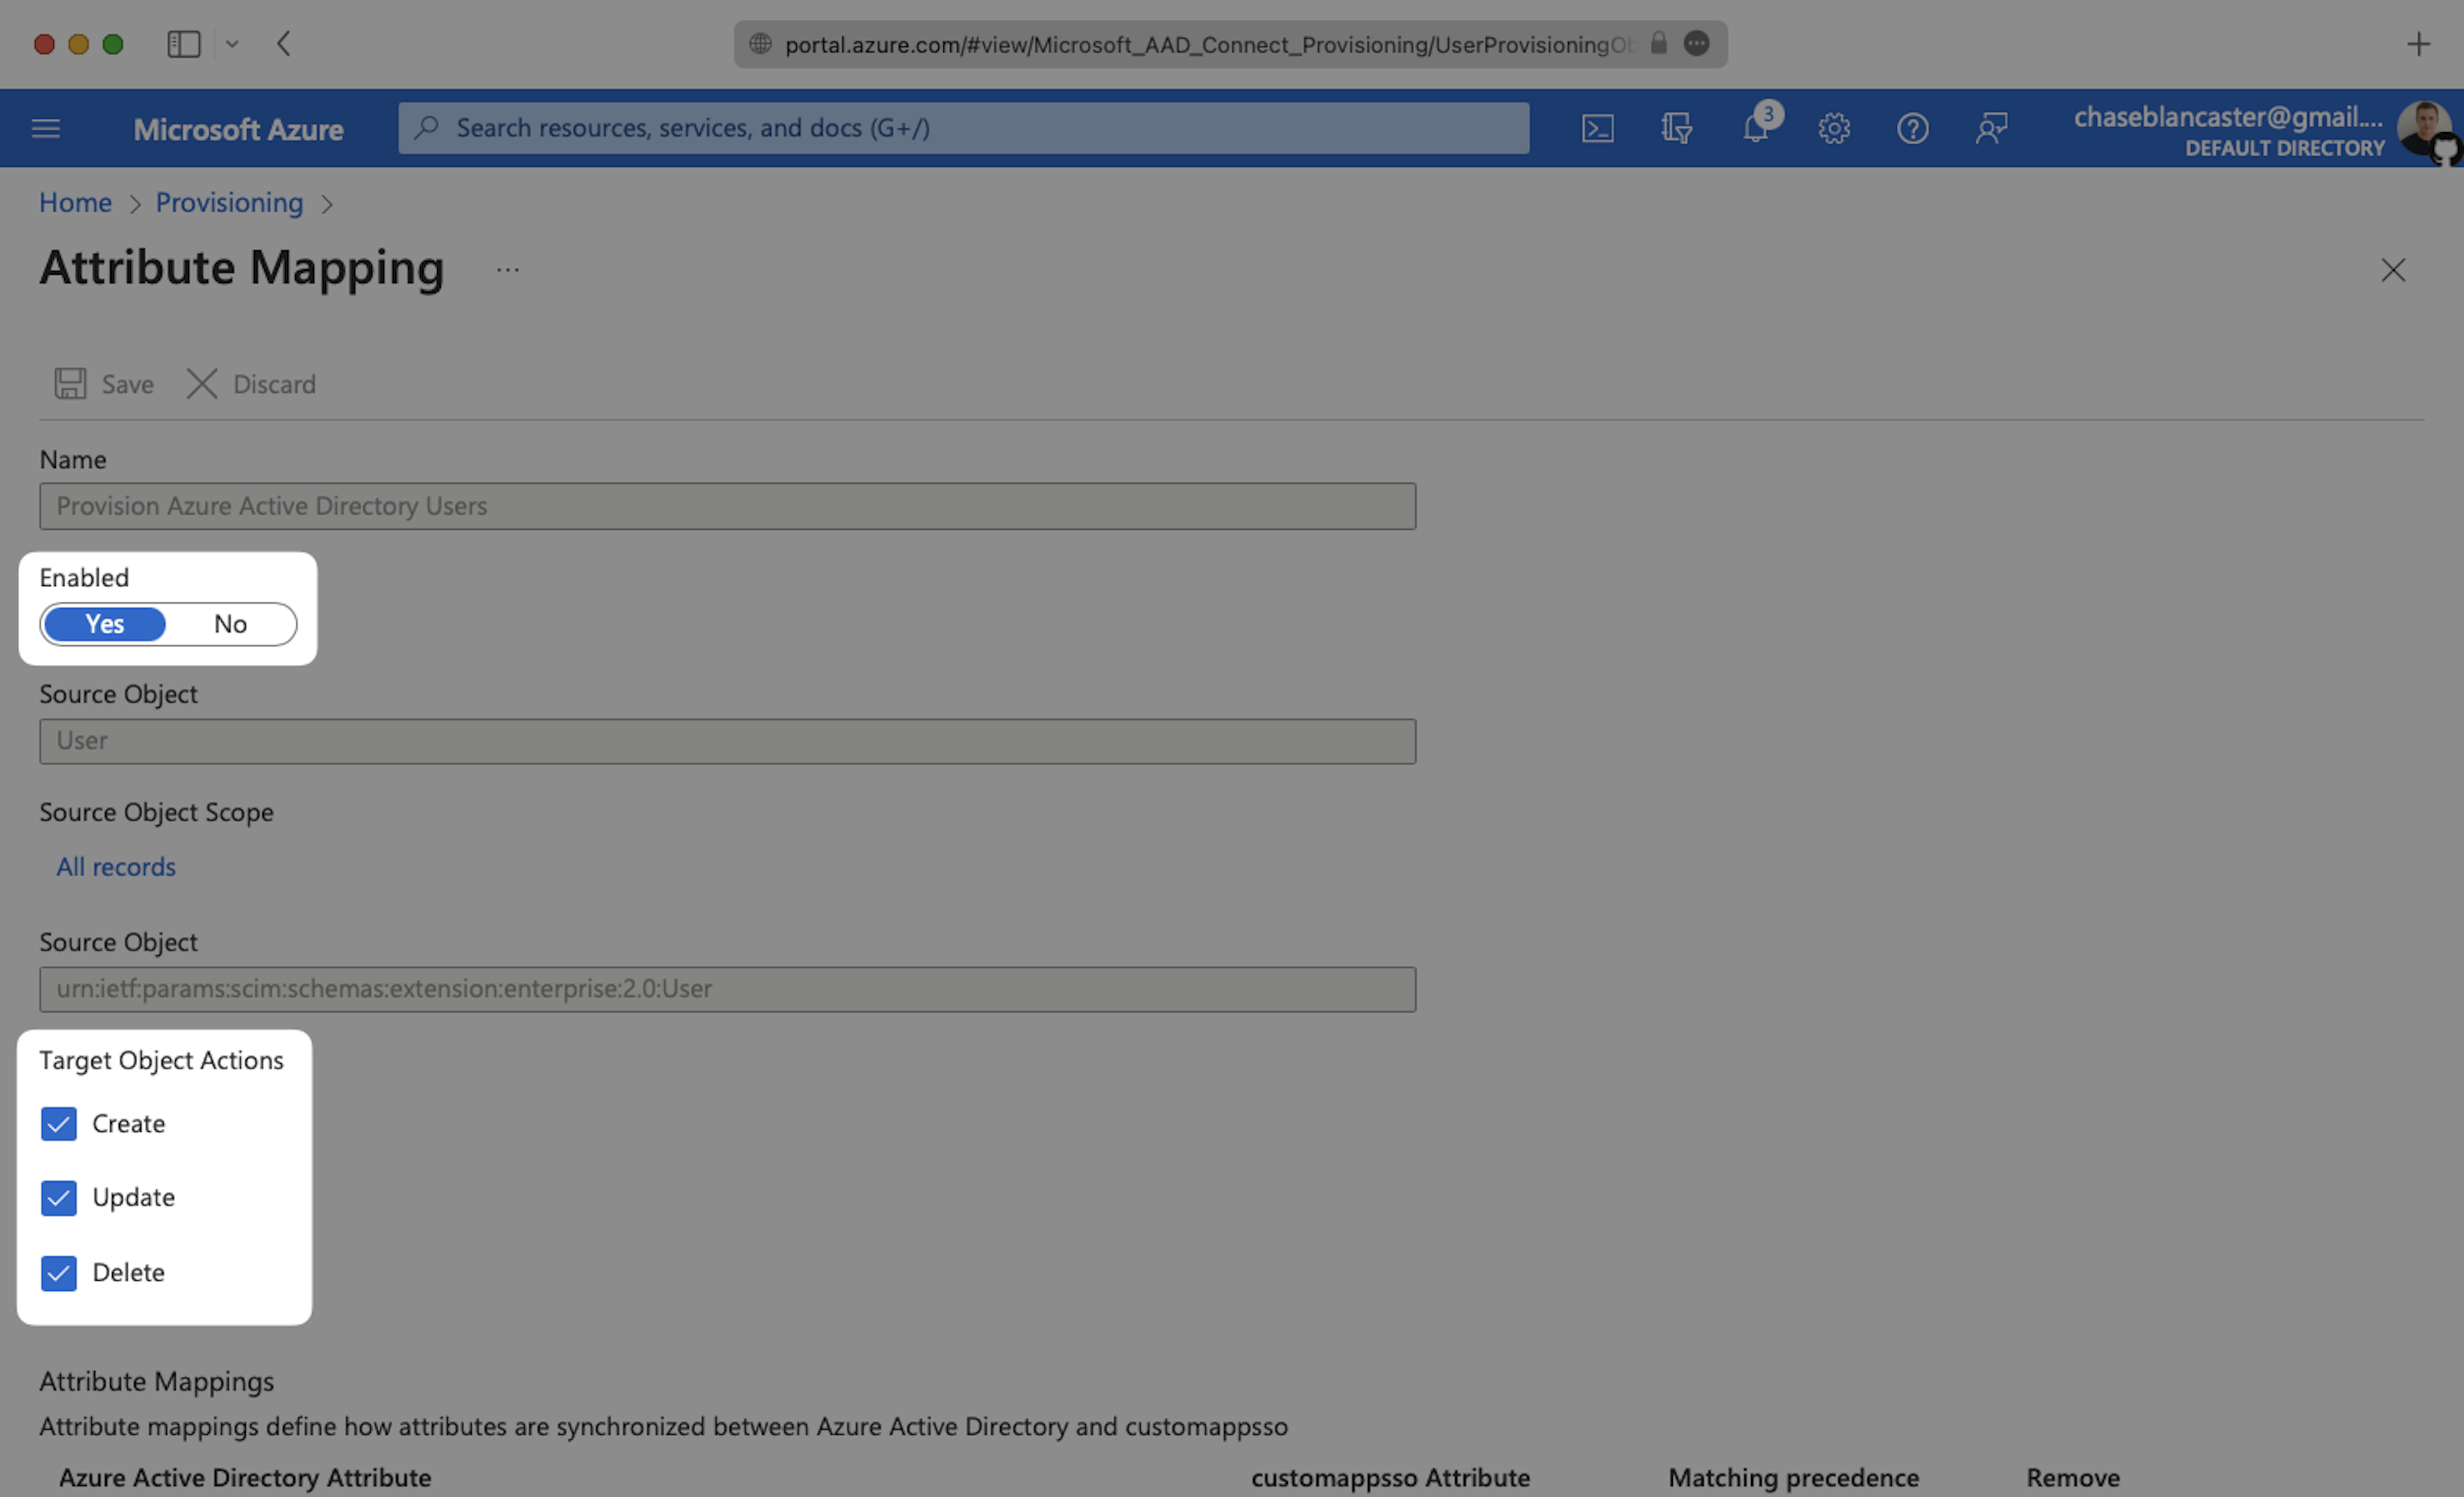
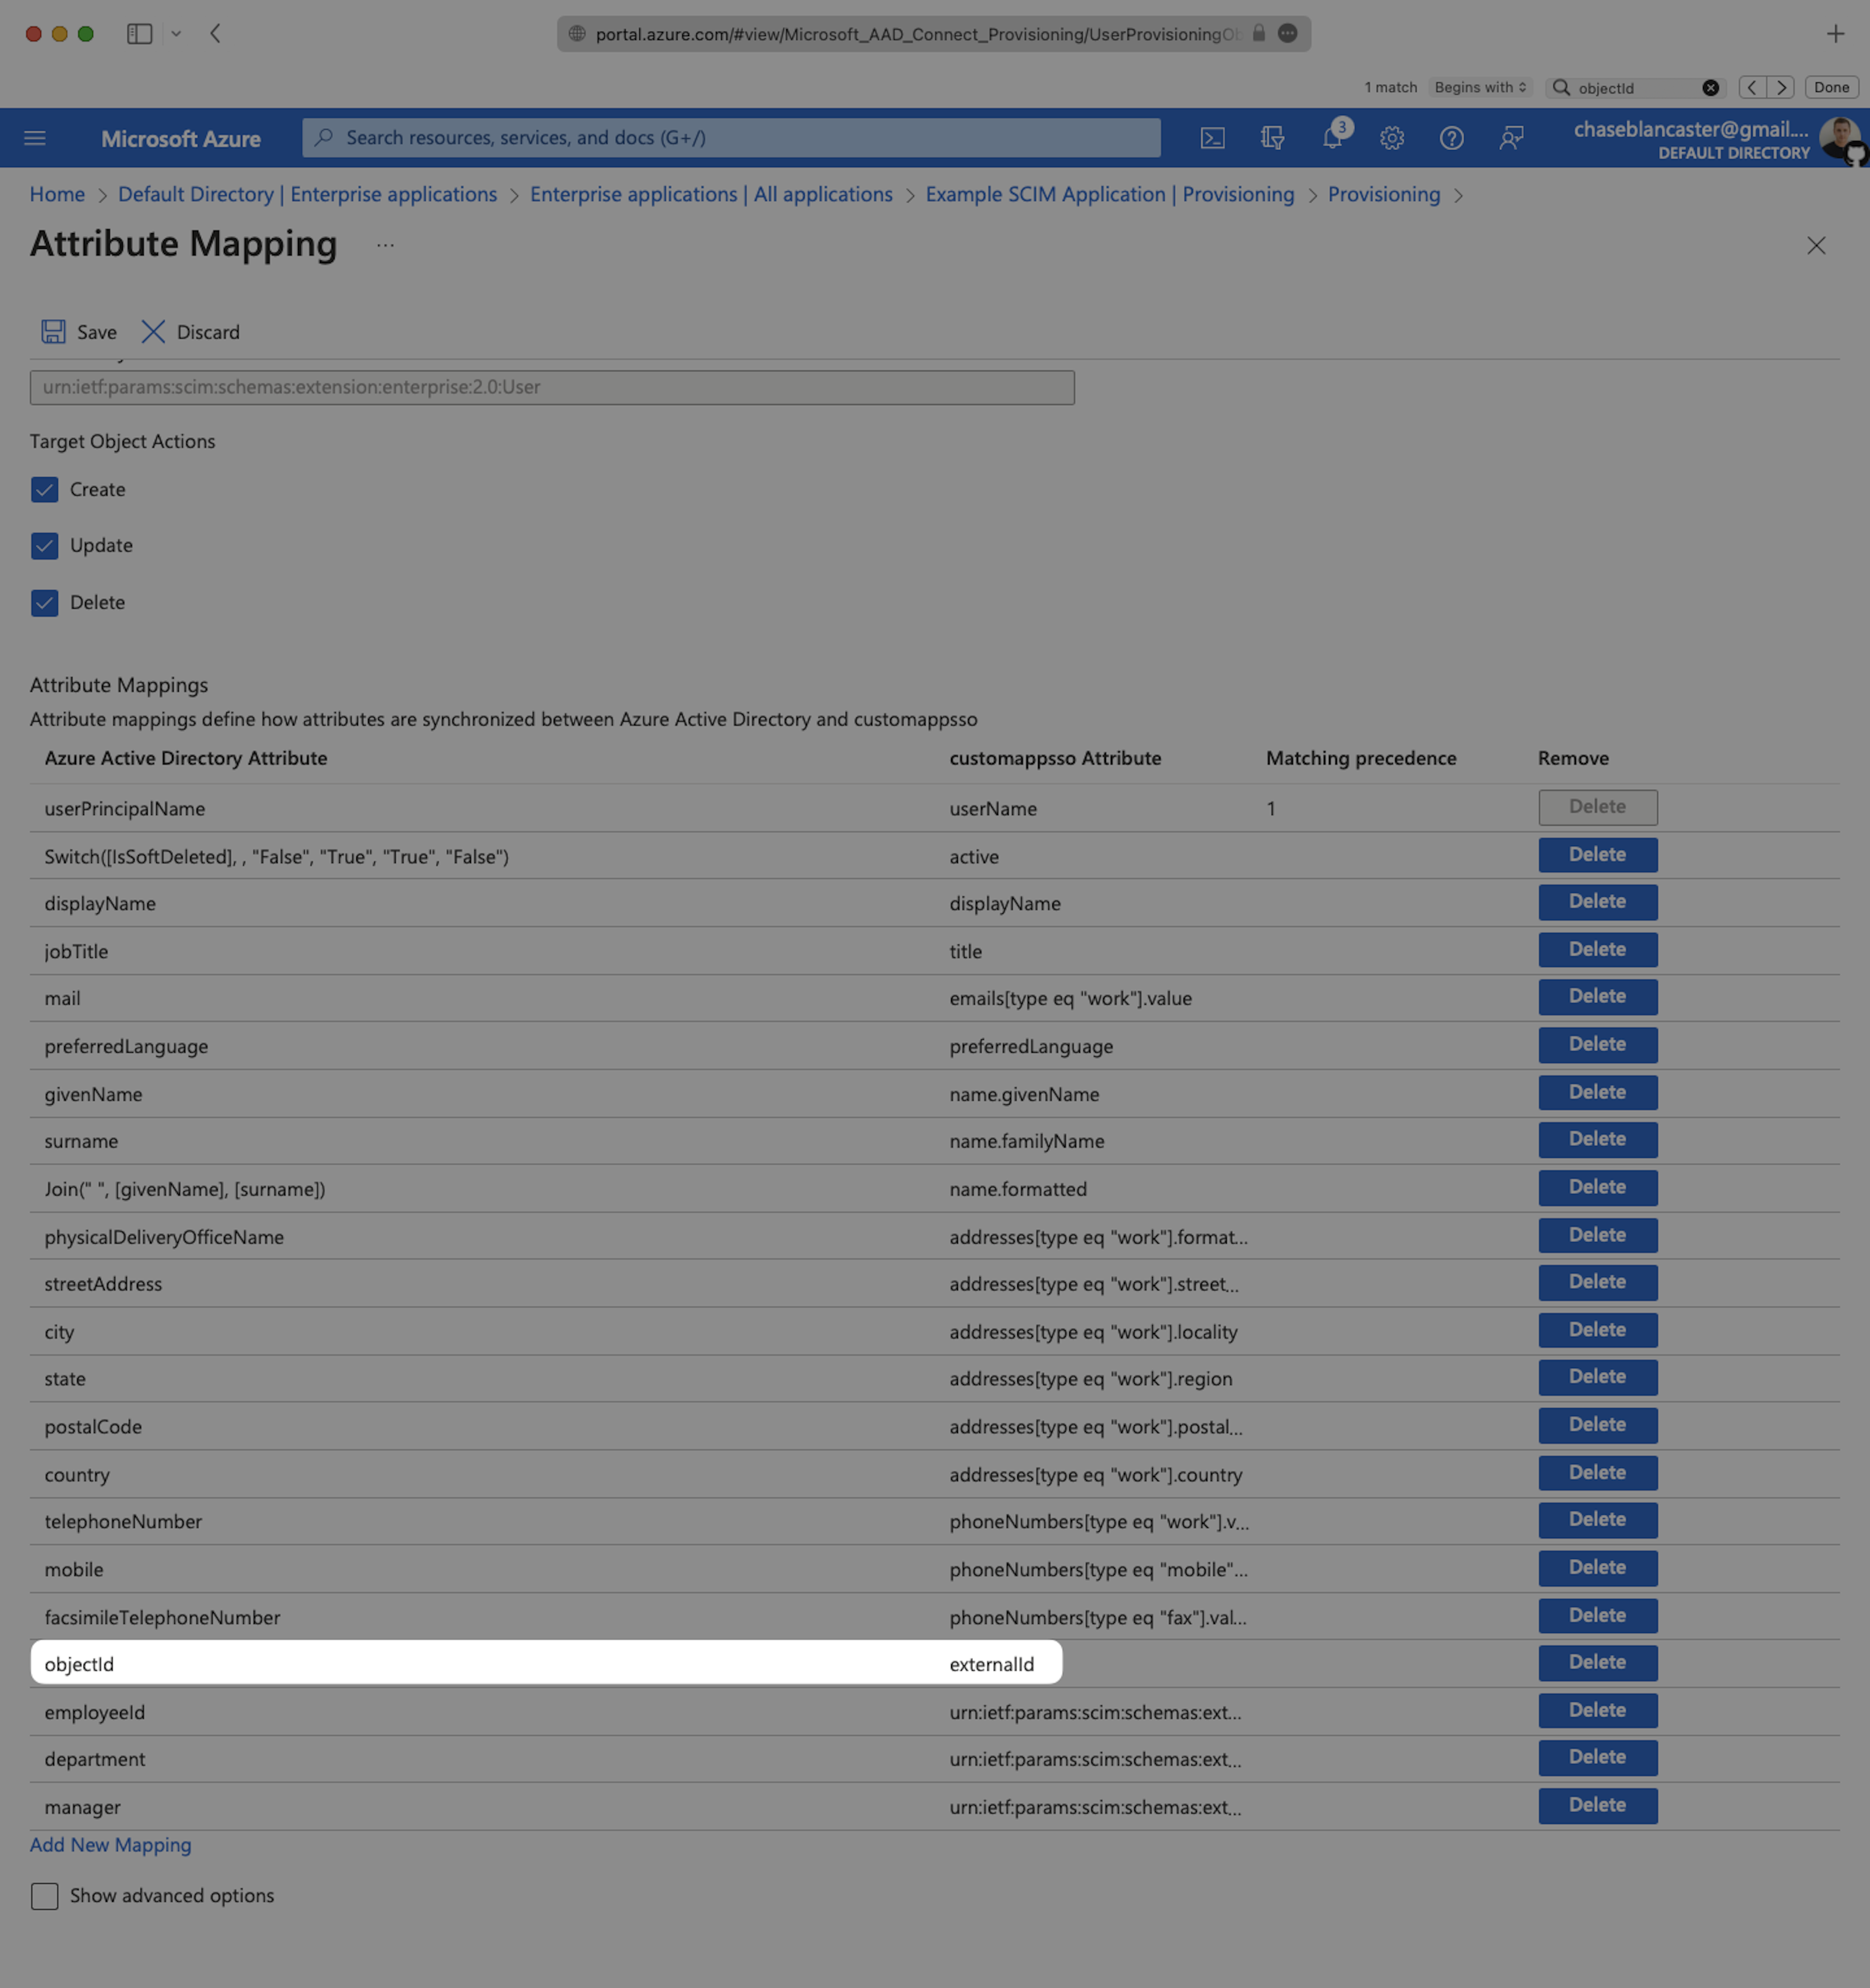
- Open the user attribute mapping section and confirm that objectId is mapped to externalId.
⚠️ Important: The objectId → externalId mapping is not configured correctly by default in Azure. You must manually update this mapping or users will not sync correctly into Spekit.
Step 4: Assign Users to the Spekit SCIM App
How do I assign users and groups to the Spekit SCIM application?
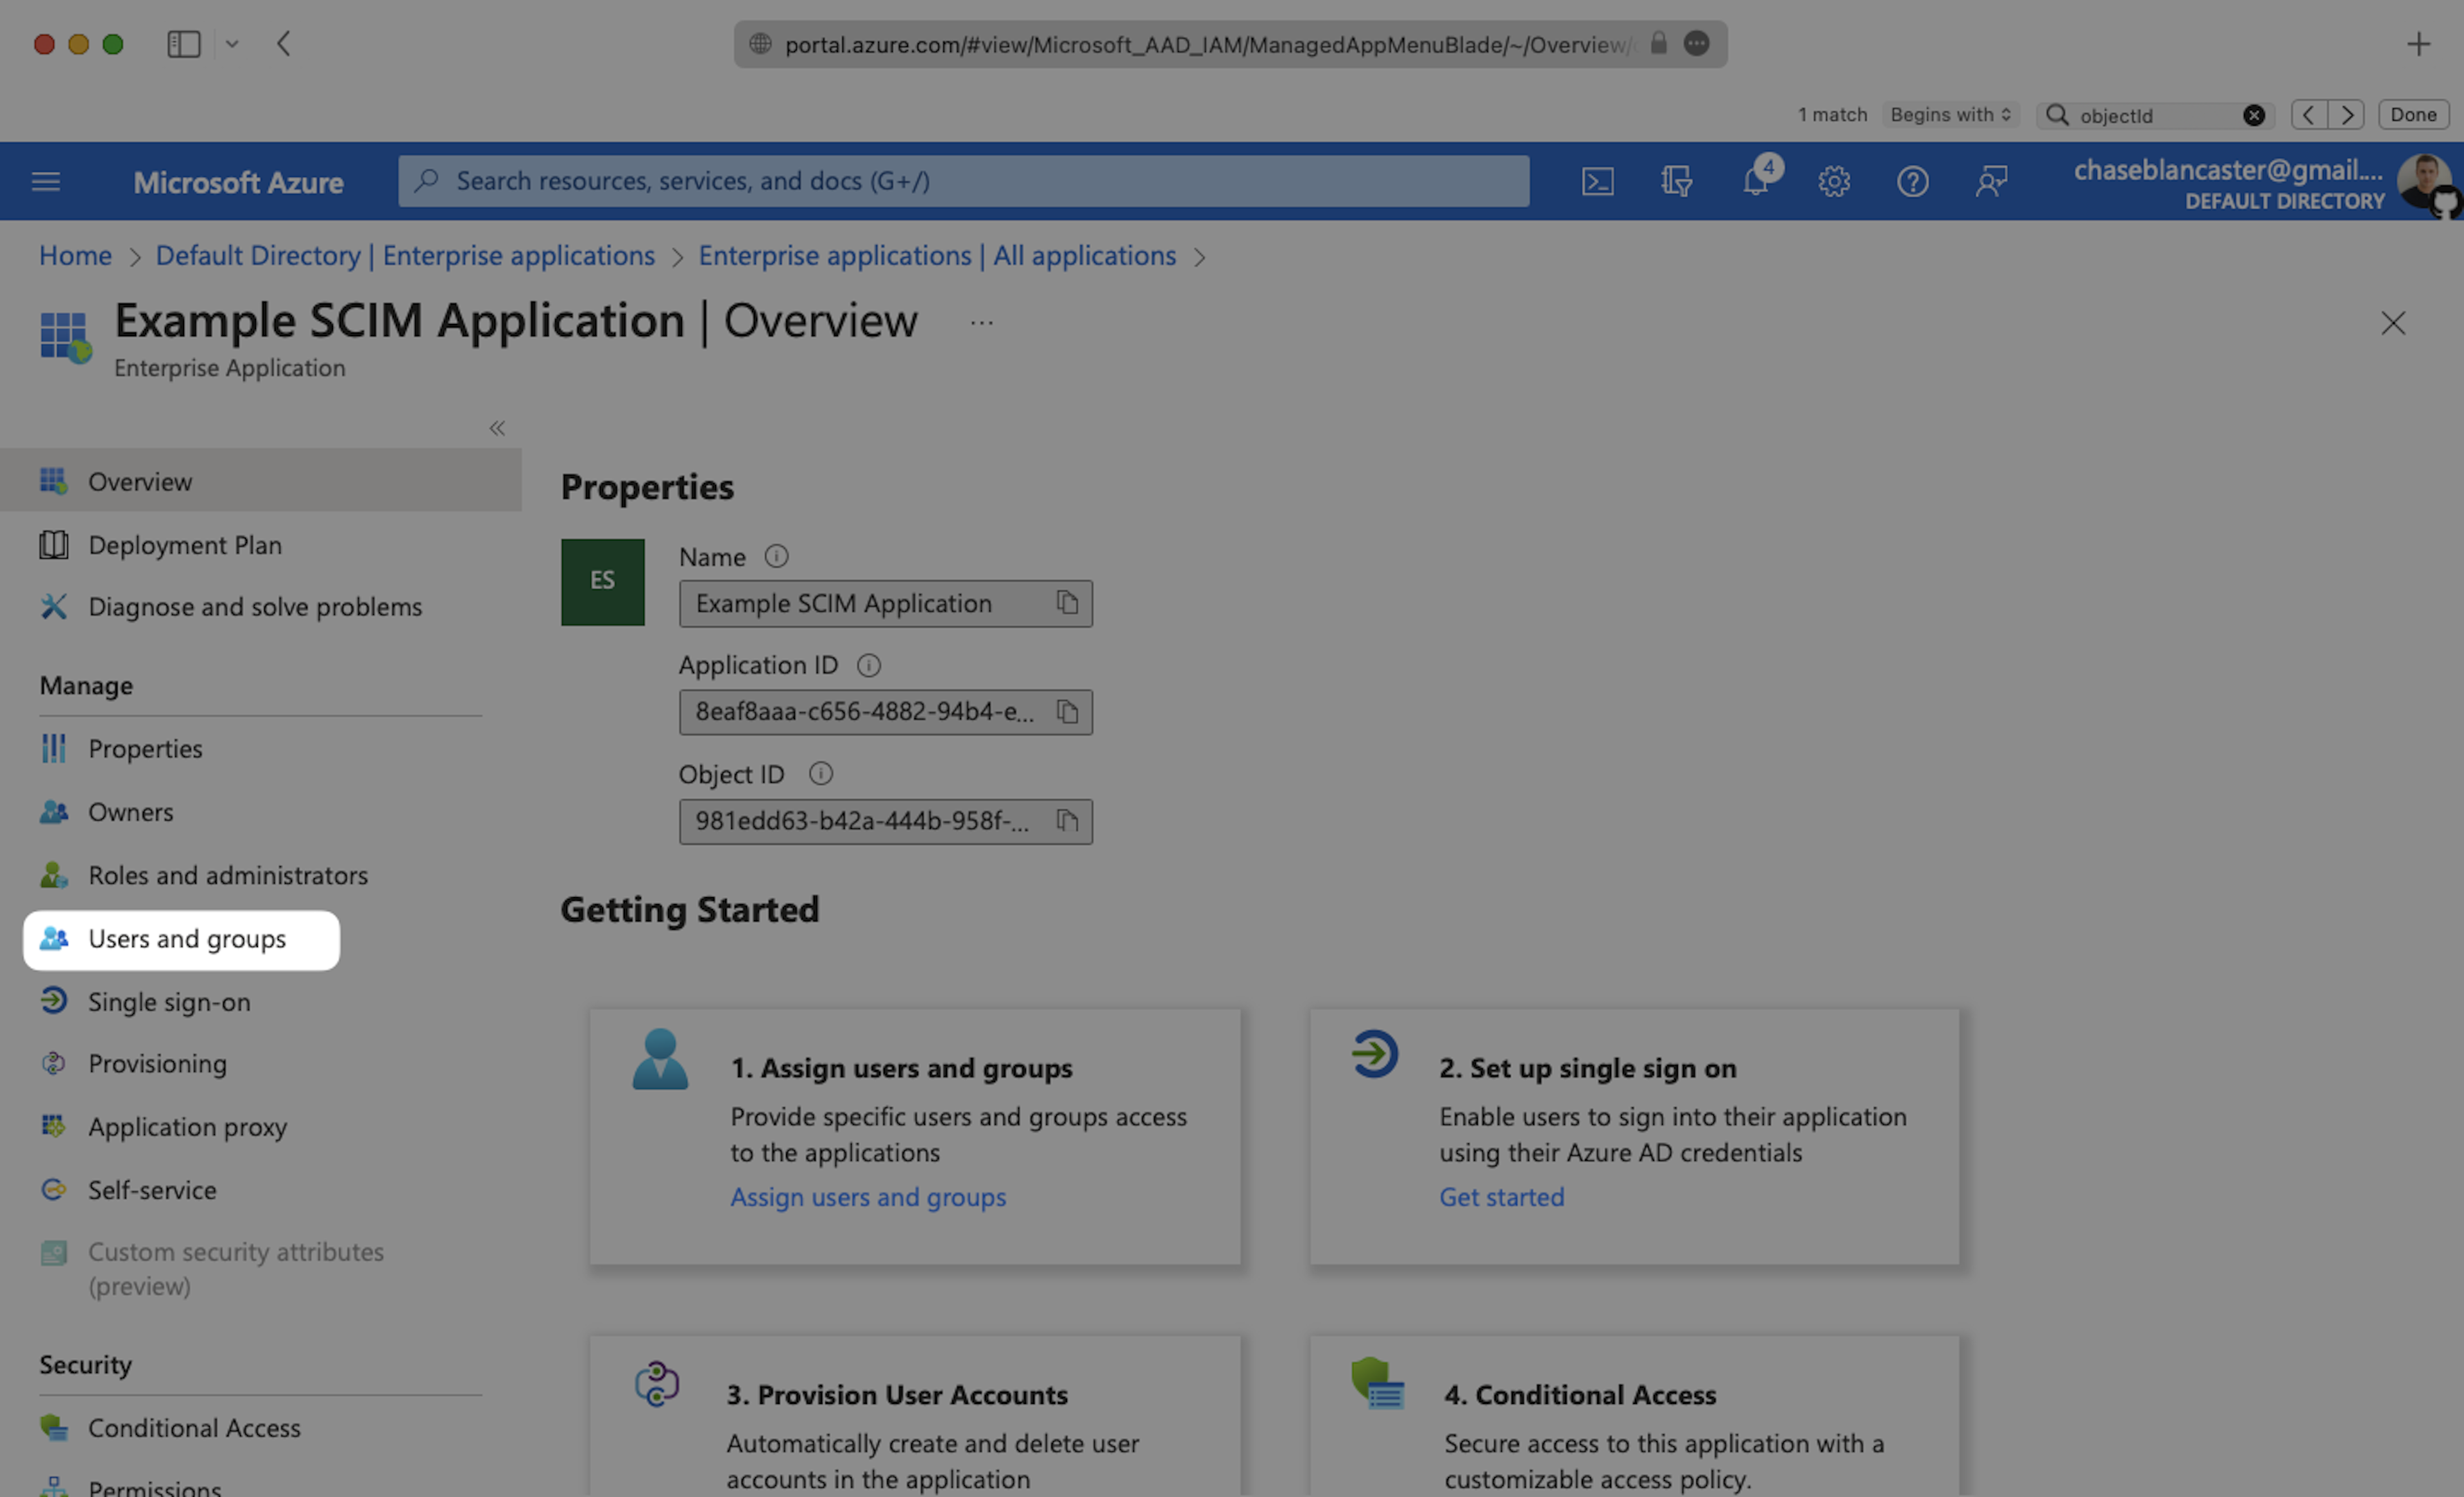
Users and groups must be assigned to the Spekit SCIM application before they can be synced into Spekit.
- In the left sidebar under the Manage section, click Users and groups.
- Click Add user/group from the top menu.

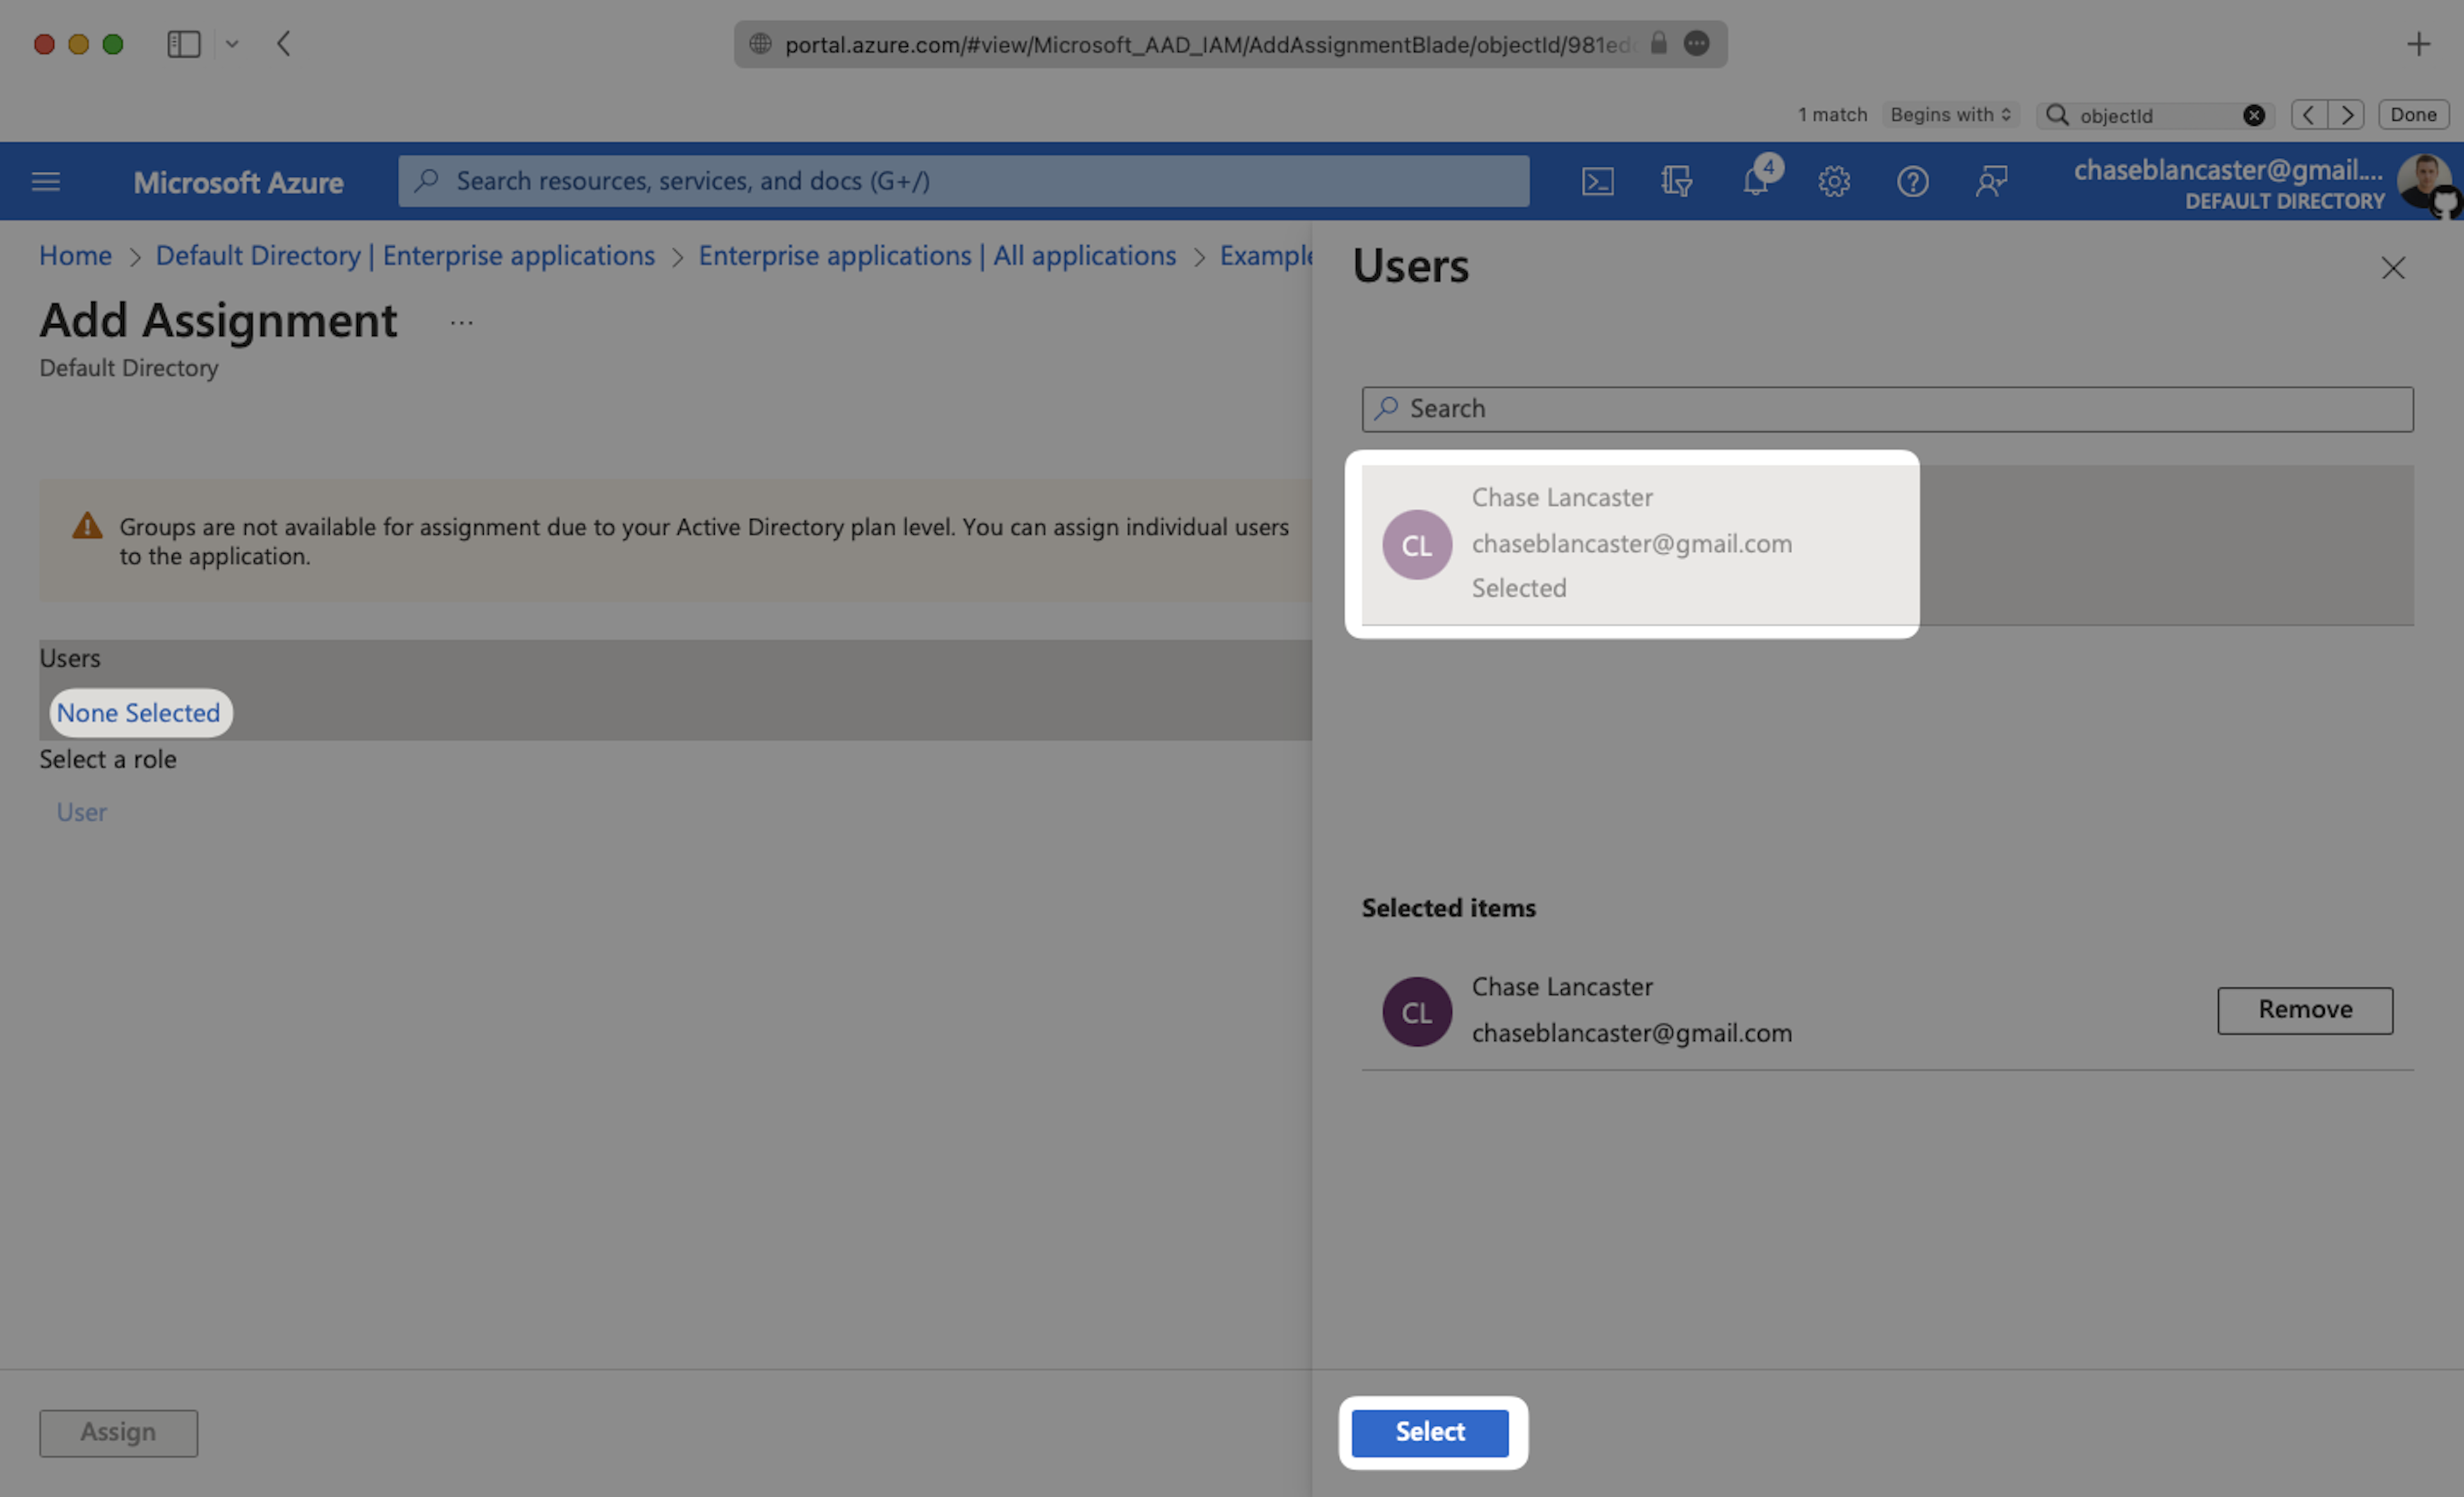
- Click None selected under Users and Groups.
- Search for and select the users and groups you want to sync into Spekit.
- Click Select to confirm your selections, then click Assign.
- Navigate back to the Provisioning page and confirm the following settings are correctly configured:
- Provisioning Status is set to On
- Scope is set to Sync only assigned users and groups
