Setting up Okta SCIM provisioning with Spekit? This guide provides a general overview of how to add SCIM provisioning to an existing Okta SAML application and configure the provisioning actions needed to sync users into Spekit.
⚠️ Important: This guide provides a general overview of the SSO connection process and should not be used as a step-by-step configuration guide. To set up SSO with Spekit, go to the Connect page within your Spekit Web App and proceed through the in-app setup walkthrough.
📌 Quick-Jump Topics
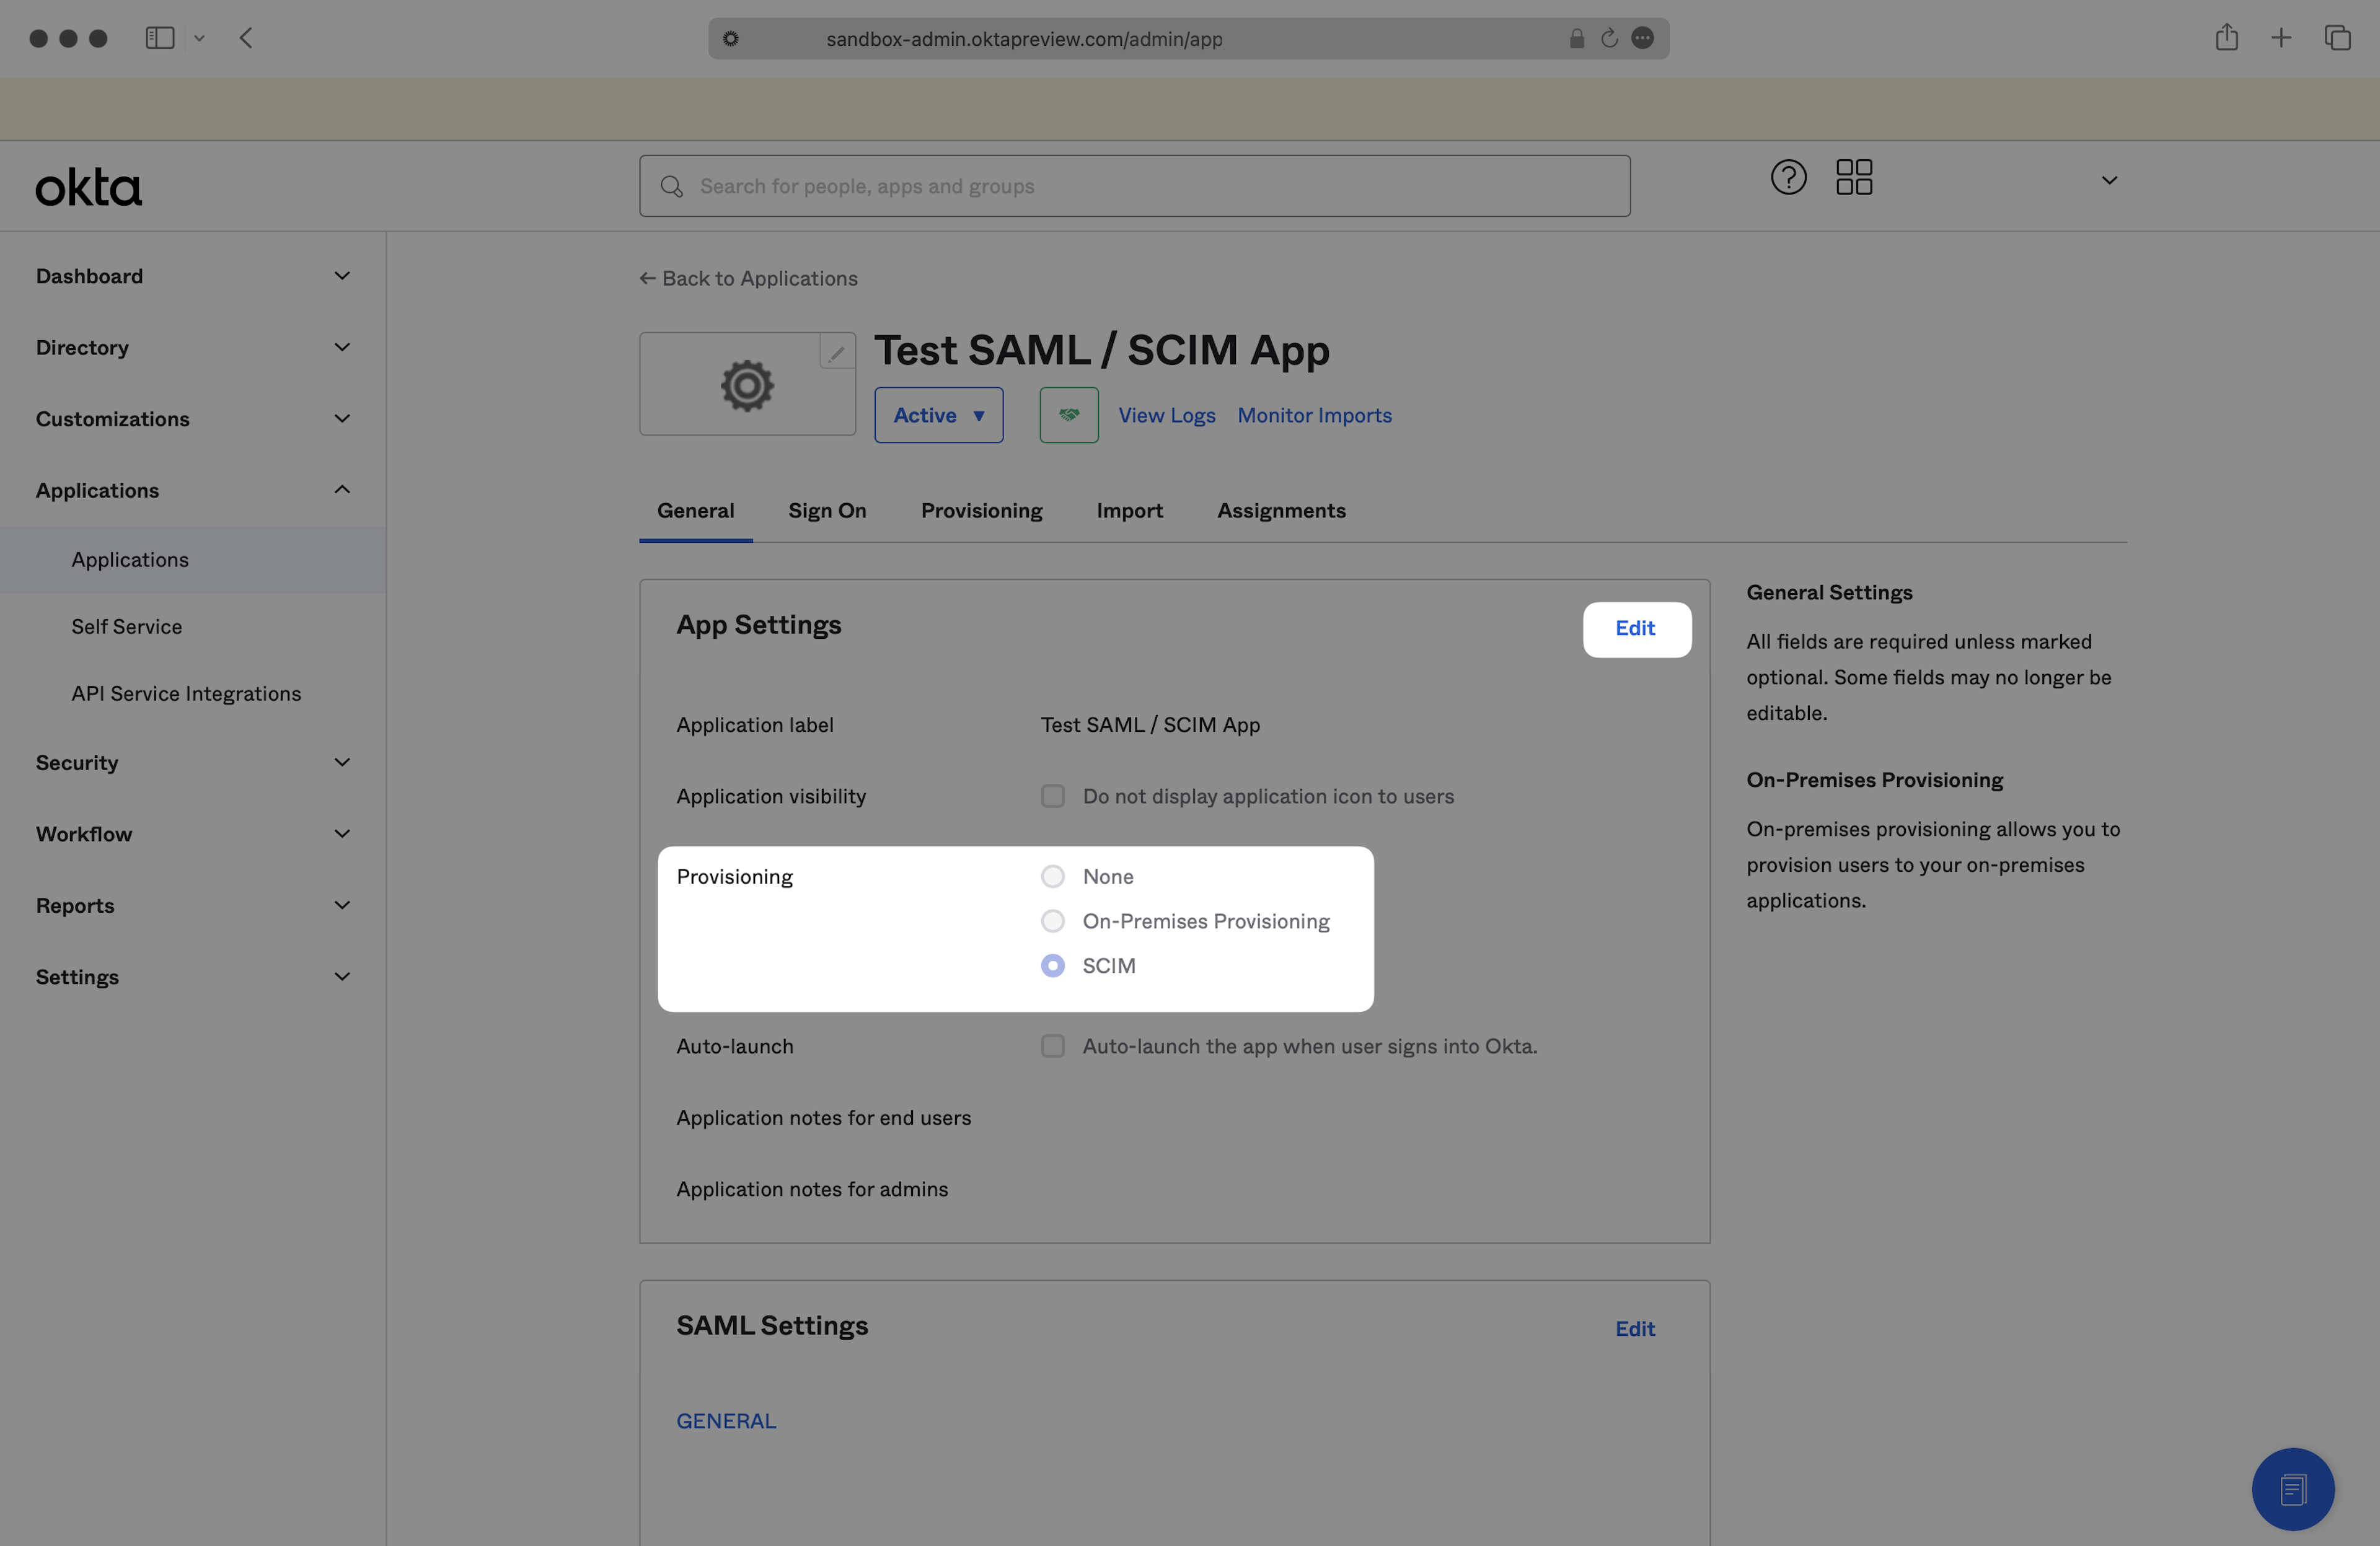
Step 1: Add Provisioning to Your SAML Application
How do I enable SCIM provisioning on my existing Okta SAML application?
- In the Okta Admin Dashboard, navigate to your existing Spekit SAML application.
- Click the General tab.
- Under App Settings, click Edit.
- Select SCIM as the provisioning option.
- Click Save.
Configure the SCIM connection:
- A new Provisioning tab will now appear. Click it.
- Click Edit.

- Copy the Endpoint URL from your Spekit in-app walkthrough and paste it into the corresponding field.
- Copy the Unique Identifier from your Spekit in-app walkthrough and paste it into the corresponding field.
- Under Supported provisioning actions, check the following options:
- Push New Users
- Push Profile Updates
- Push Groups
- Set the Authentication Mode to HTTP Header.
- Copy the Bearer Token from your Spekit in-app walkthrough and paste it into the Authorization field.

- Click Test Connector Configuration to verify the connection is working correctly.
- Click Save.
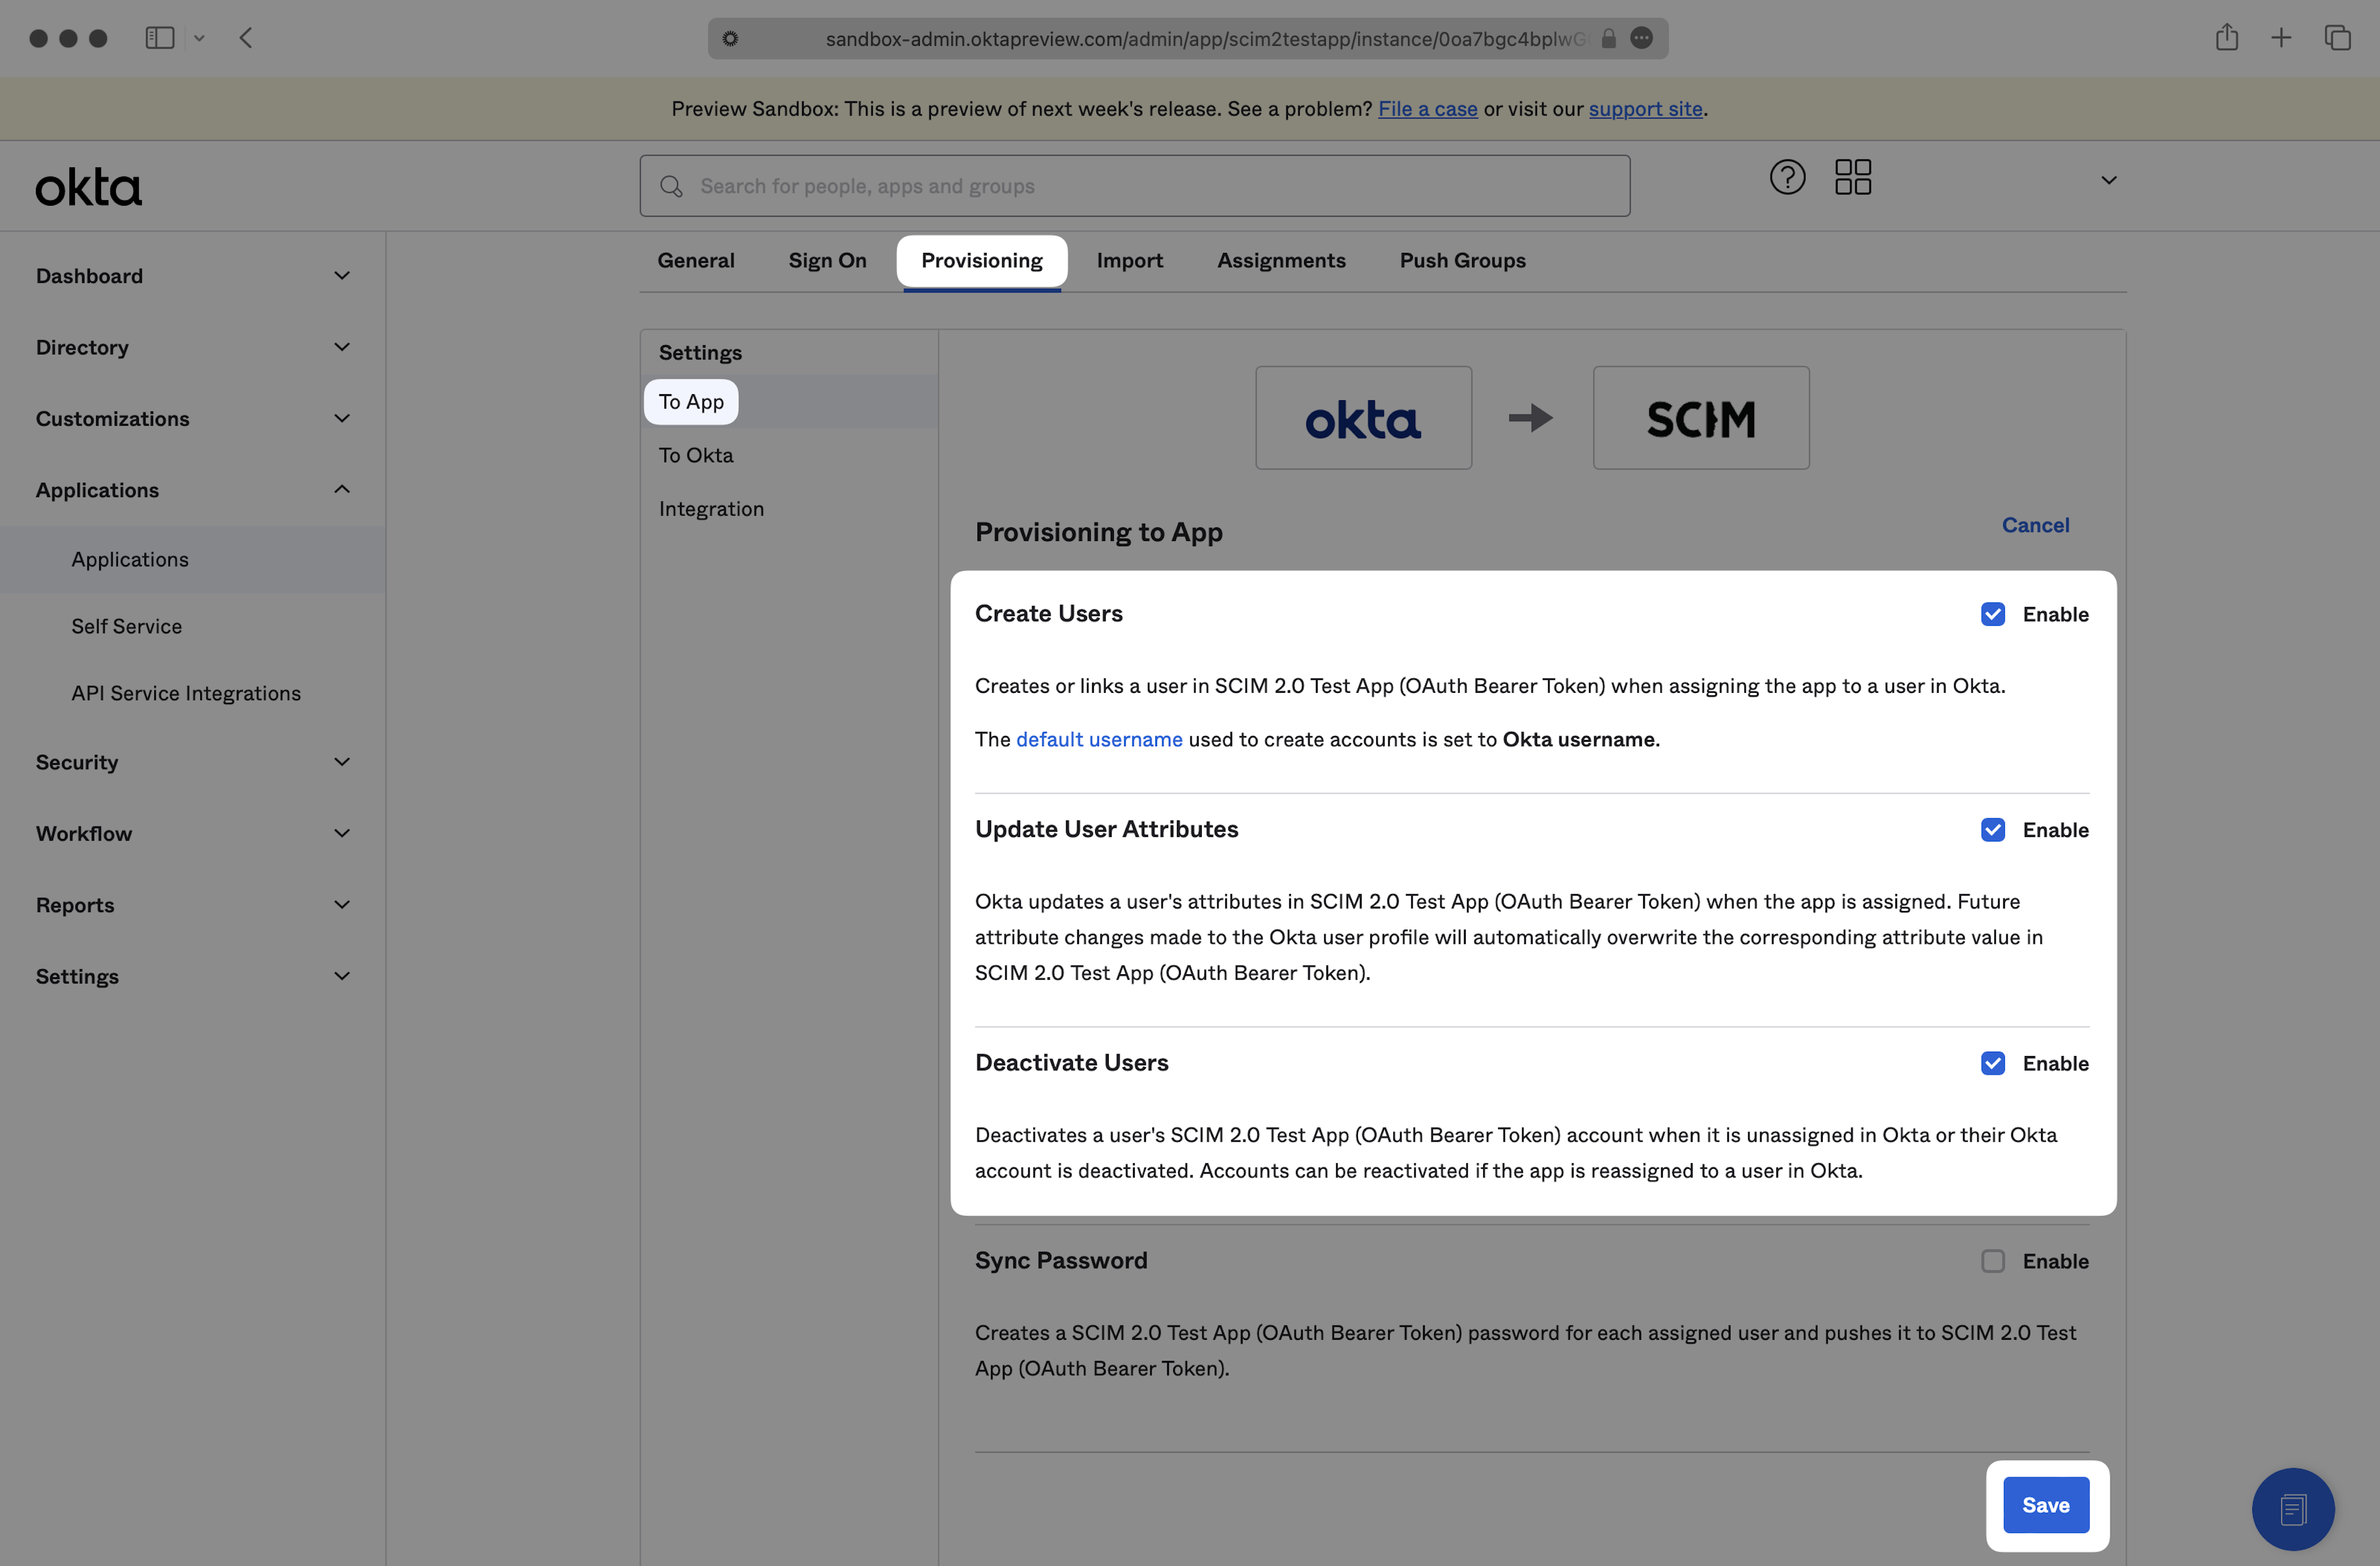
Step 2: Configure Provisioning Actions
How do I configure which user actions Okta will sync to Spekit?
- Within the Provisioning tab, navigate to the To App section in the left navigation.
- Click Edit.
- Enable the following provisioning actions by checking each checkbox:
- Create Users
- Update User Attributes
- Deactivate Users
- Click Save.